Session Features
So far, you've learned about the minimum requirements for Frame in our Getting Started Guide and the basic functions of your Frame account/session in our Navigating your Frame Account Guide. Now it's time to move on to the final guide all about session features. This guide will provide you with detailed information about different session features that may or may not be enabled for your account by your administrator. While most end users access their Frame account from a browser, we have also included additional information for those accessing Frame from Frame App.
This guide is intended to explain optional features which may or may not be enabled for your Frame account.
Supported Peripheral Devices
Frame in a Browser
Frame supports using many common peripheral devices, including the verified devices listed below. The Google Chrome browser is the preferred client browser for all integrations. Most of the same functionality is available on other modern browsers like Mozilla FireFox and Microsoft Edge. If a desired device is not listed, please reach out to Frame Support. Frame remoting technology provides unique integrations for distinct devices based on use case. Check out our End User System Requirements documentation to read more about supported browsers on Frame.
| Device Type | Windows PC (HTML5) | Mac (HTML5) | iOS/Android (HTML5) | Linux (HTML5) |
|---|---|---|---|---|
| Storage Device (PenDrive, USB Hard Disk) * | ✓ | ✓ | - | ✓ |
| Audio Out (Speakers, headsets) | ✓ | ✓ | ✓ | ✓ |
| Audio In (Microphone) | ✓ | ✓ | - | ✓ |
| Standard Generic Keyboard | ✓ | ✓ | N/A | ✓ |
| Symbol HID Barcode Scanner | ✓ | ✓ | N/A | ✓ |
| Mouse | ✓ | ✓ | N/A | ✓ |
| Multi-touch Screen | ✓ | N/A | ✓ | - |
| Microsoft Surface Pen | ✓ | N/A | N/A | N/A |
| Printer | ✓ | ✓ | N/A | ✓ |
| Yubikey | ✓ | ✓ | N/A | ✓ |
| CAC/PIV Smart Card Readers (requires Frame App) Early Access | ✓ | - | - | - |
| Microsoft Windows Image Acquisition (WIA) Scanners (requires Frame App for Windows) Early Access | ✓ | - | - | - |
| Wacom Intuos Pen Touch Device (Chrome only) Early Access | ✓ | ✓ | N/A | - |
* = Files in USB storage devices on the local endpoint must be manually uploaded into the Frame session following the workflow described in the Accessing Files section of this document.
USB Support
When enabled for your account, using your generic USB device is as simple as plugging the device into your local computer while in a Frame session.
USB HID Support
Frame supports up to 10 USB HID devices (3D mice, gamepads, and joysticks) connected to your local computer, in addition to your mouse and keyboard. If USB HID support has been enabled for your account, you may need to follow the instructions below to finish your configuration. If you are accessing Frame via a web browser, you must use Chrome on MacOS or Linux-based operating systems. End users should follow the steps below to complete configuration of USB HID support when accessing Frame from Chrome on MacOS or a Linux-based operating system. Chrome users must enable the “Experimental Web Platform features” within the Chrome browser, as Google still considers USB HID and WebUSB support to be an experimental feature.
End users accessing Frame from Frame App are not required to make any additional configuration changes and should be able to use the feature immediately (if enabled for their account).
- In a new Chrome browser tab, enter the following in the address bar:
chrome://flags/#enable-experimental-web-platform-features
- At the top of the page you will see the "Experimental Web Platform features" option. Use the drop-down menu to enable this feature.
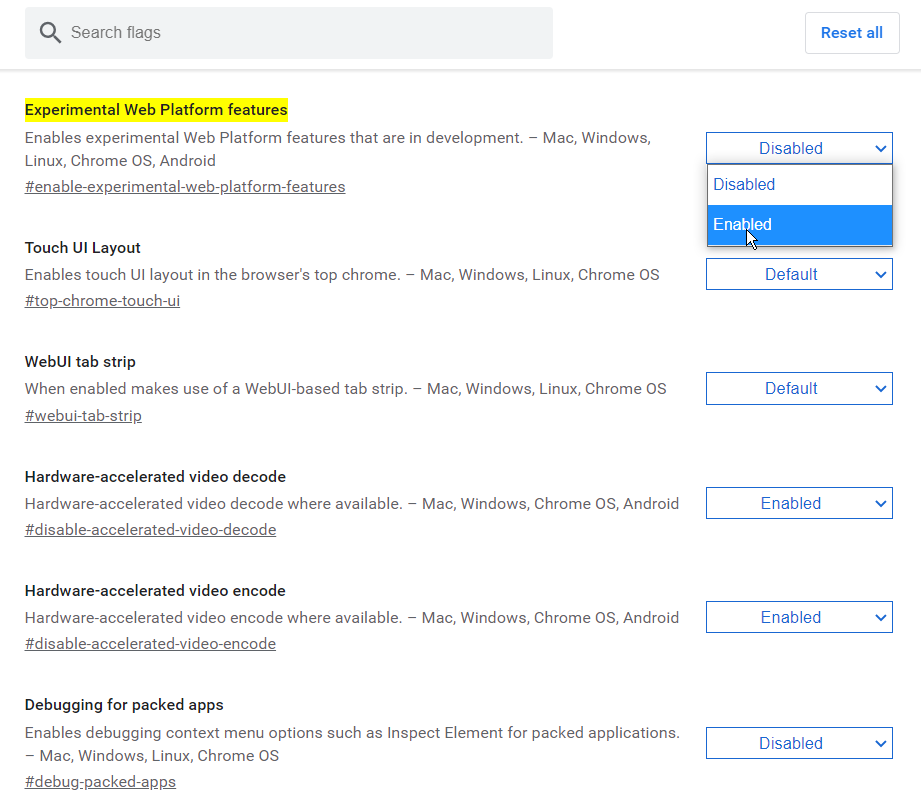
- Click the "Relaunch" button once it appears at the bottom of the page to apply your changes.
-
To plug in a USB device from the list to the Frame session, click on the desired USB device name. When the device is plugged in, a confirmation sound will play and the device will be visible in the OS (just like if you had physically connected it to the computer).
-
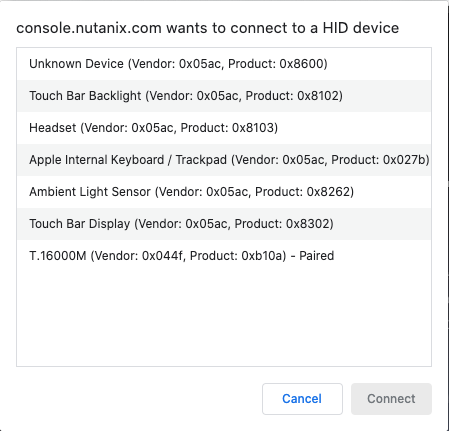
If the device you want to use has not previously been registered, select the "Add HID device" option from the menu. A new window will appear and display a list of the recognized HID options attached to your local machine.
Input Options
If your administrator has enabled multiple keyboard input languages for your environment, switching between languages is very simple. If your Frame environment includes the Windows taskbar, you can use the native Windows language bar.
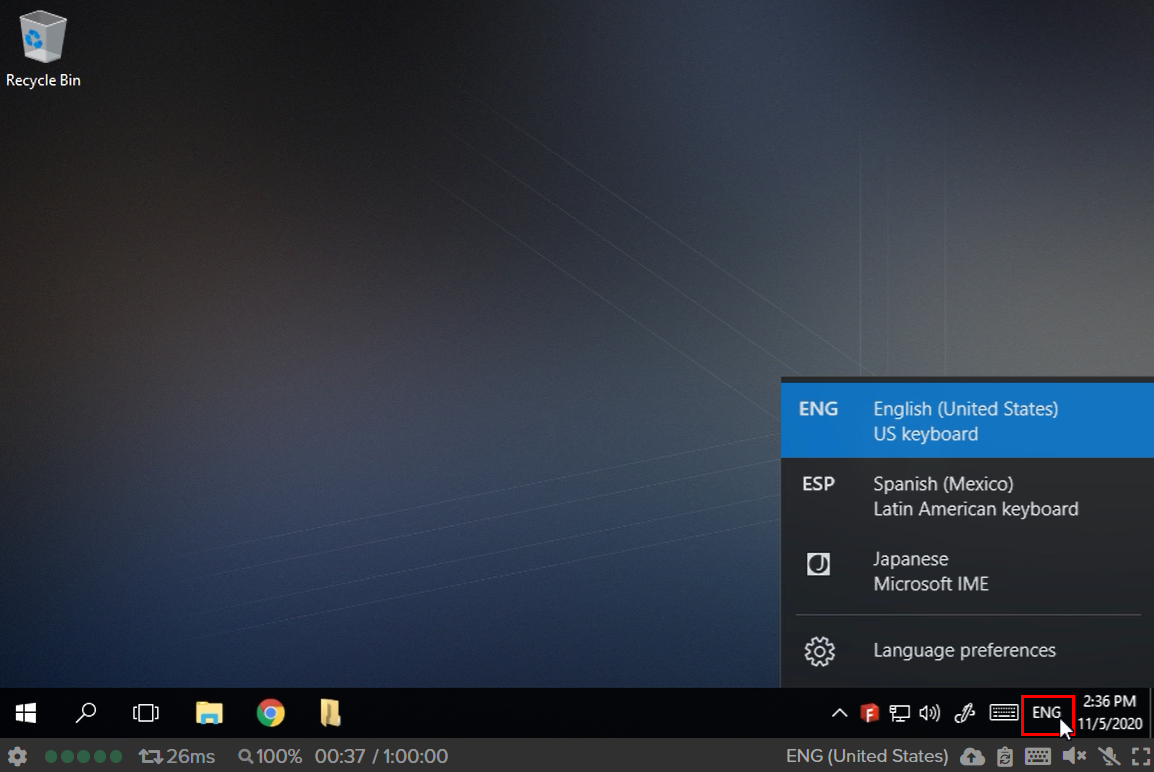
Click on the language icon in the bottom right corner of your window.
Your Frame environment may not include the Windows taskbar, in which case you will want to use the language icon located on the far right side of your Frame status bar.
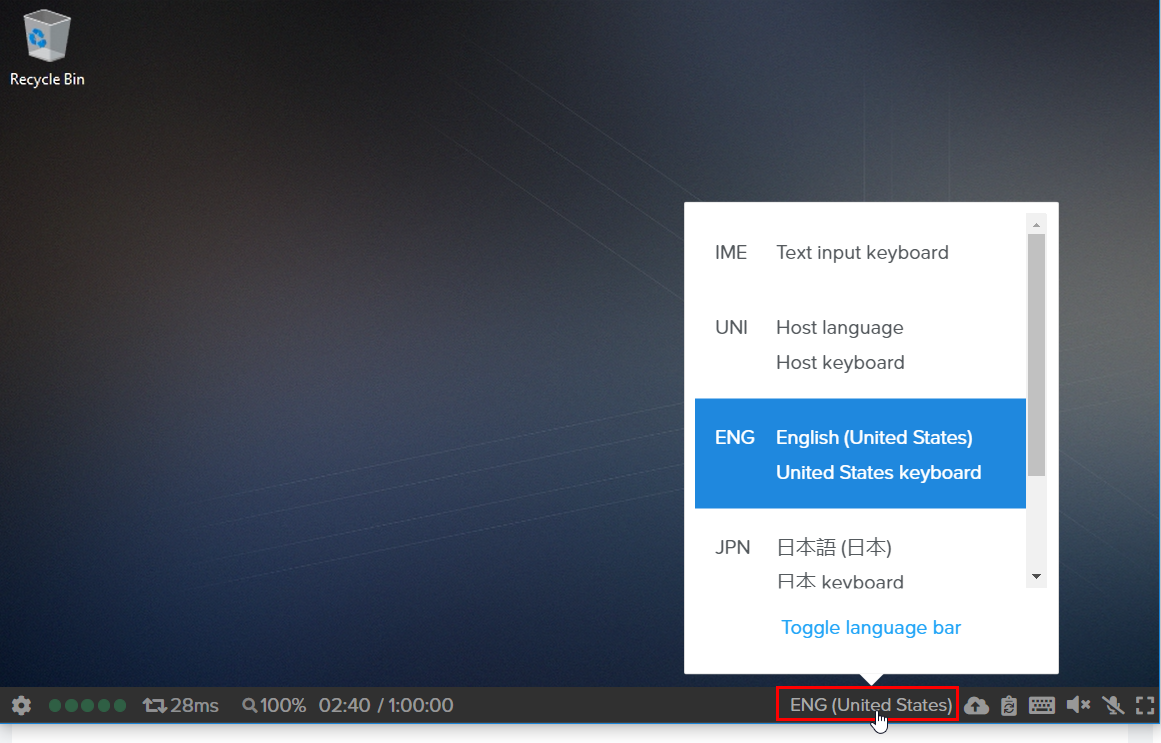
Select your desired language from the list that appears.
Mouse Modes
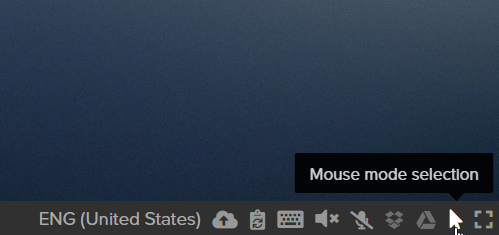
A new dialog box will appear, select the mouse mode you wish you use.
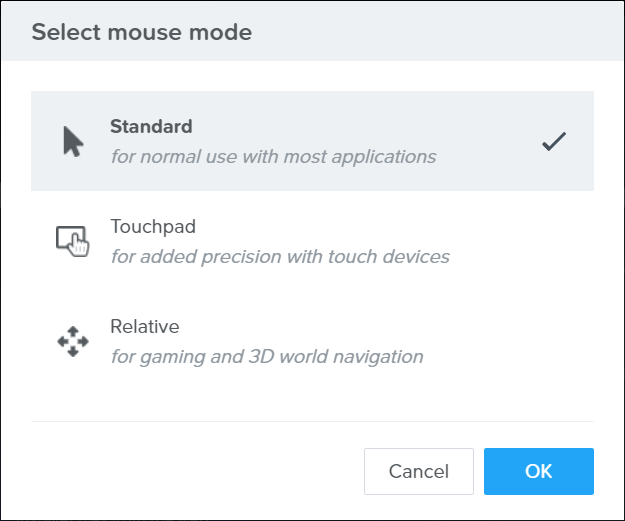
Standard
Touchpad mode was created to provide extra precision when accessing a Frame session on touch-enabled devices. With Touchpad mode, you'll see a special gray cursor that you can move by pressing anywhere on the screen and dragging.
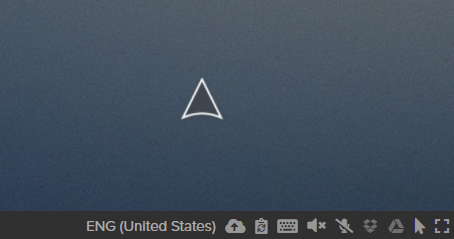
To left-click, tap once anywhere on the screen with the cursor placed in the area you'd like to click. To right-click, tap with two fingers anywhere on the screen. The cursor will show which button-click you're performing. For instance, a left-click in Touchpad mode looks like this:
Relative mouse mode is intended for gaming and 3D world navigation. You'll want to first launch the application you're going to use, and then switch to relative mouse mode when you need to navigate a 3D environment. Once enabled, your cursor will disappear and you will be able to navigate your app like you would with any first-person point-of-view game.
To exit relative mouse mode, simply hit ESC on your keyboard.
Audio Options
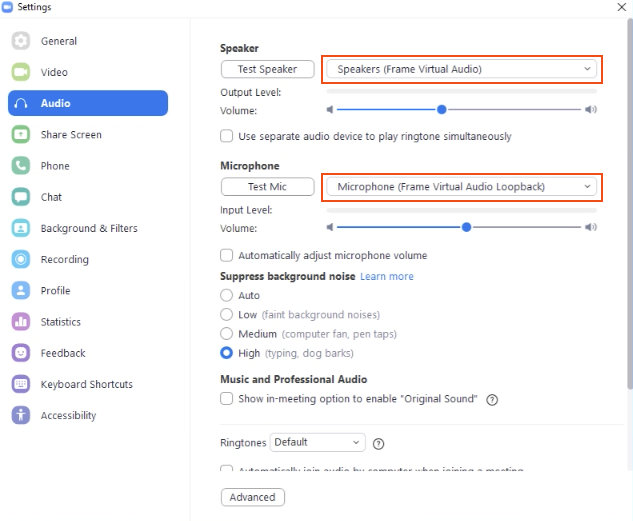
Frame Virtual Audio: Frame recognizes this device as the speaker. This audio device outputs all application and system sounds to the client computer's audio out.
Frame Virtual Audio Loopback: Frame recognizes this device as the microphone.
It is sometimes necessary to specify which audio devices you wish to use in an application. In those cases always ensure that Frame Virtual Audio is the output/speaker and Frame Virtual Audio Loopback is set as the input/microphone. See the below image for an example using Zoom.
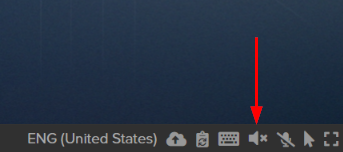
If you are using an application which requires audio output from your speakers, you can enable sound output in your session by clicking on the speaker icon on the bottom right corner of your Frame status bar.
If you are using an application which requires audio input from your microphone, you can enable microphone input in your session by clicking on the microphone icon on the bottom right corner of your Frame status bar.
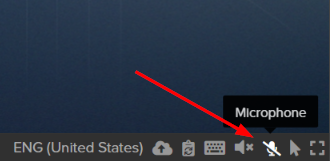
Microphone
This list displays all microphones connected to your endpoint device.
Webcam Support
To enable webcam within your Frame session, simply click on the webcam icon. The first time you enable this feature, your browser will request you enable camera permissions for console.nutanix.com:
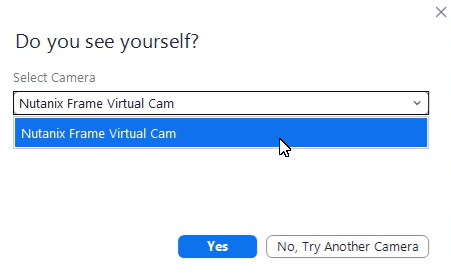
If you are accessing your webcam from an application (e.g., Zoom, Google Duo, Skype), you may see your webcam device show up as "Nutanix Frame Virtual Cam."
Display Options
Multi-display configurations are useful for a variety of end user workflows. Frame's multi-monitor feature allows users to connect up to 4 displays at a time. End users may configure the display order as desired while in the session. This feature is supported by Frame App and the browser-based Frame Terminal.
Using Multi-monitor
To use the multi-monitor feature, click on the Frame Gear Menu and then select Manage Displays.
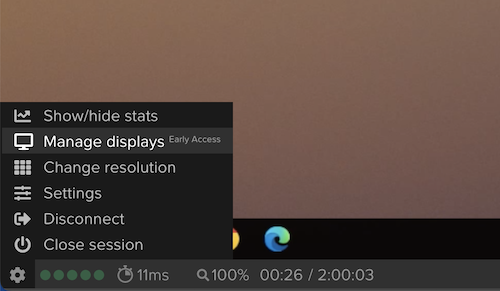
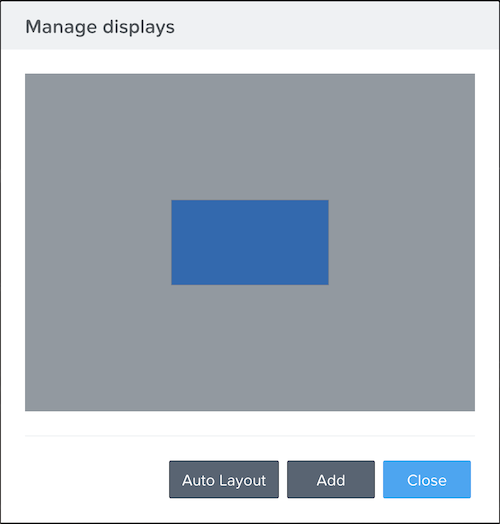
A new window will appear showing the display you are currently using. To add a new display, click the Add button to add a display. Alternatively, you can click Auto Layout button and let Frame Terminal create displays on up to 4 physically-connected monitors.
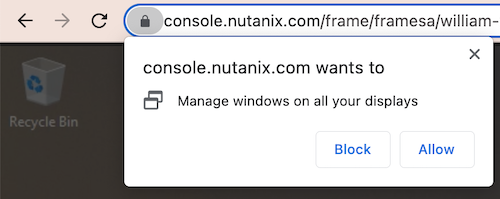
With Enhanced Multi-monitor support, the user's browser will prompt the user to allow Frame Terminal to manage the windows on all displays before the second monitor can be created. The user only has to grant this approval the first time the second monitor is added in a Frame session.
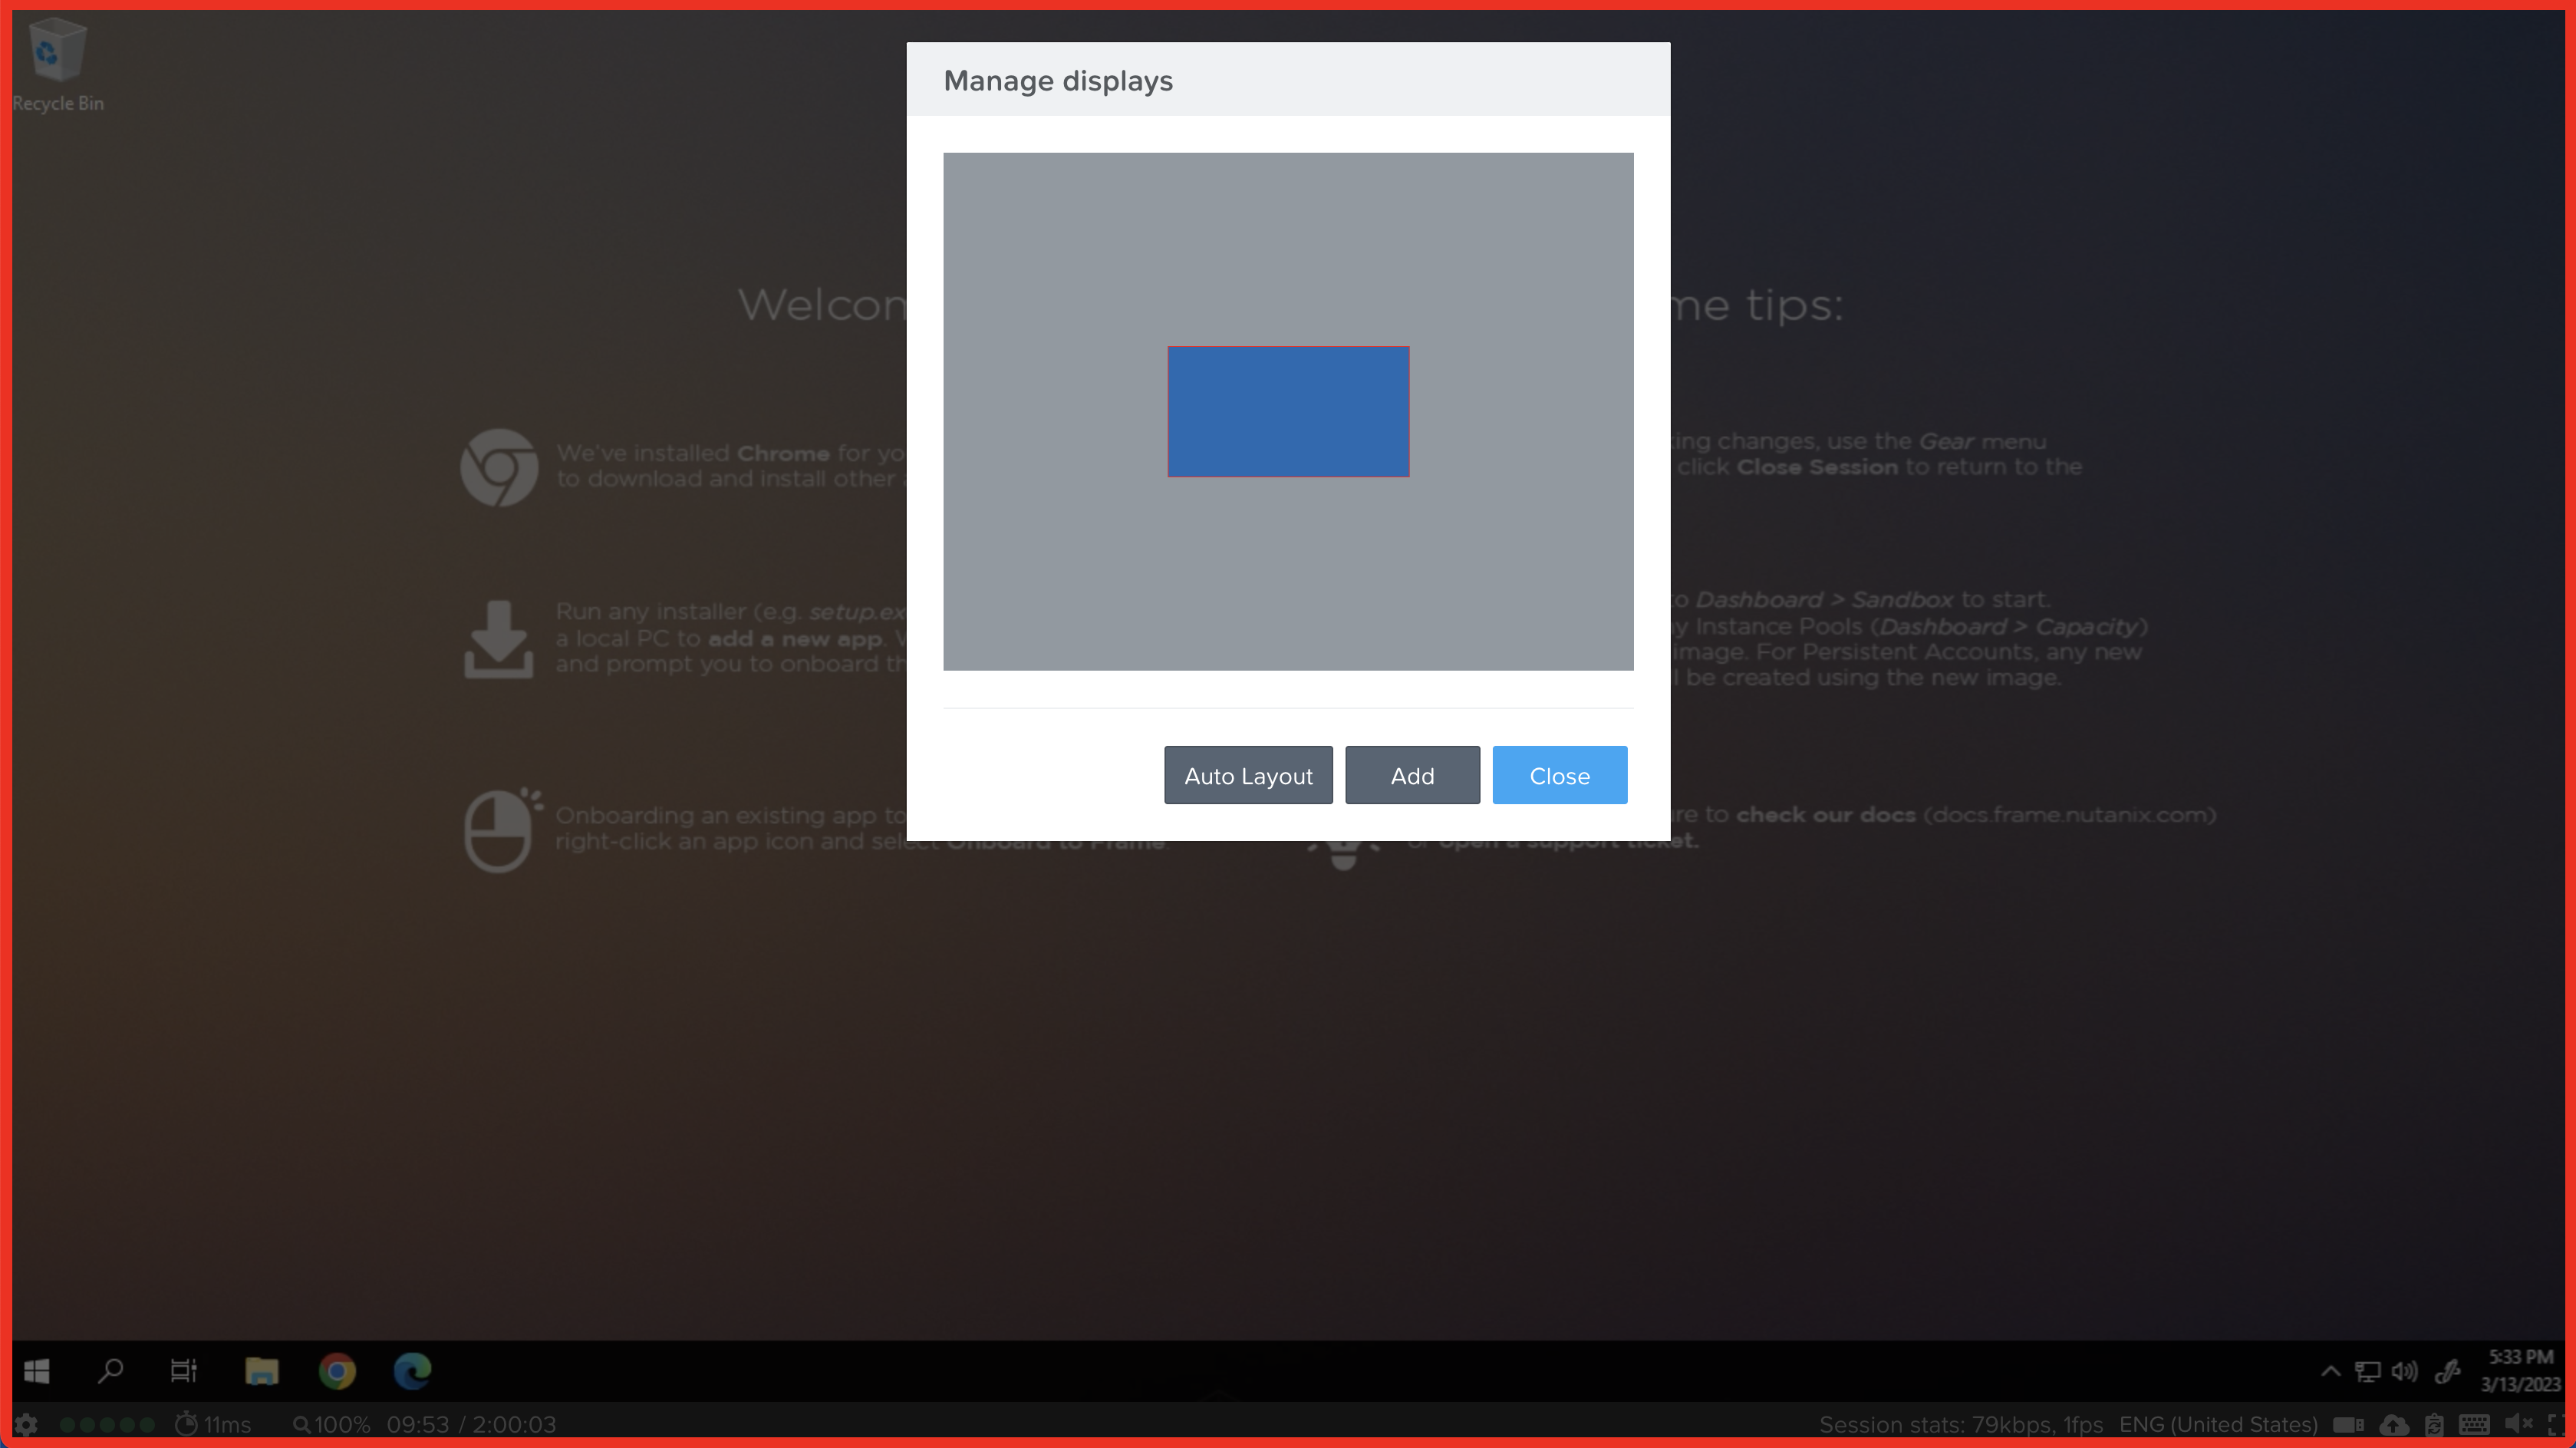
Simply click on a display from the "Manage displays" window to verify your display order. The display you click on will be highlighted with a red outline in the browser window.
To remove a display, go to Manage Displays from the Frame Gear Menu and click the X (Close Window) in the top right corner of the display you wish to remove. Any applications will automatically be moved back to the main display.
If you are accessing your Frame account from Frame App, you will automatically be prompted to connect and configure your displays if multiple displays are detected.
Multi-monitor Limitations
- Multi-monitor is not supported with Mozilla Firefox.
Display Resolution
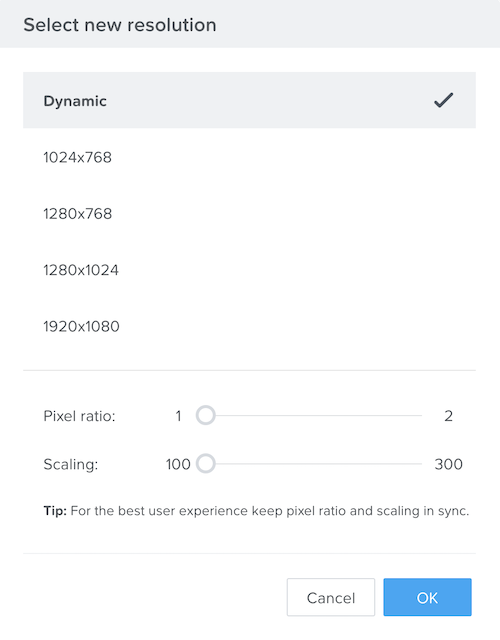
- Dynamic: Adjusts the resolution based on the size of your browser window (default setting).
- Fixed: Forces the display to a specific horizontal x vertical pixel resolution, regardless of the size of your browser window.
- Pixel ratio: Sets the remote Windows display resolution to the pixel ratio X your local display resolution.
- Scaling: Adjust this parameter value (100% to 300%) in order to change the Windows System > Display > "Change the size of text, apps, and other items" value to scale up for better readability for each monitor you are using.
Terminal Settings
If your administrator enables the ability for users to change their own stream settings, you will see the following tab in Terminal Settings.
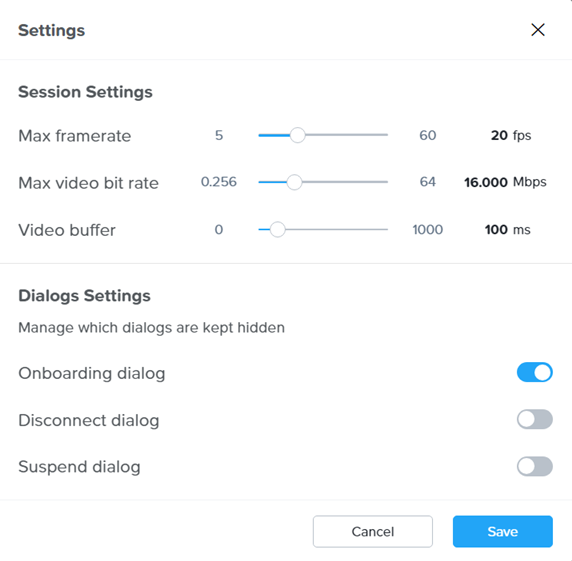
- Max frame rate (fps): Sets the maximum frame rate for your session. The frame rate is defined as the number of frames displayed per second. Increasing the frame rate will increase the required bandwidth between your device and your instance (remote virtual machine).
- Max video bit rate (Mbps): Sets the maximum video bit rate (bandwidth) for your session. Increasing the frame rate will increase the required bandwidth between your device and your instance.
- Video buffer (ms): Buffers the video stream from your instance in your browser or Frame App to improve the smoothness of video stream over a low quality network. However, depending on the amount of video buffering you add, you may notice delays in the display changing when you move your mouse, click on your mouse buttons, or type on your keyboard.
Storage Options
Personal Drives
Your Personal Drive is tied to your Frame account and can be used from the session just like a regular storage drive on your local computer. Simply navigate to your file explorer in your Frame session and look for the "PersonalDisk (P:)" drive.
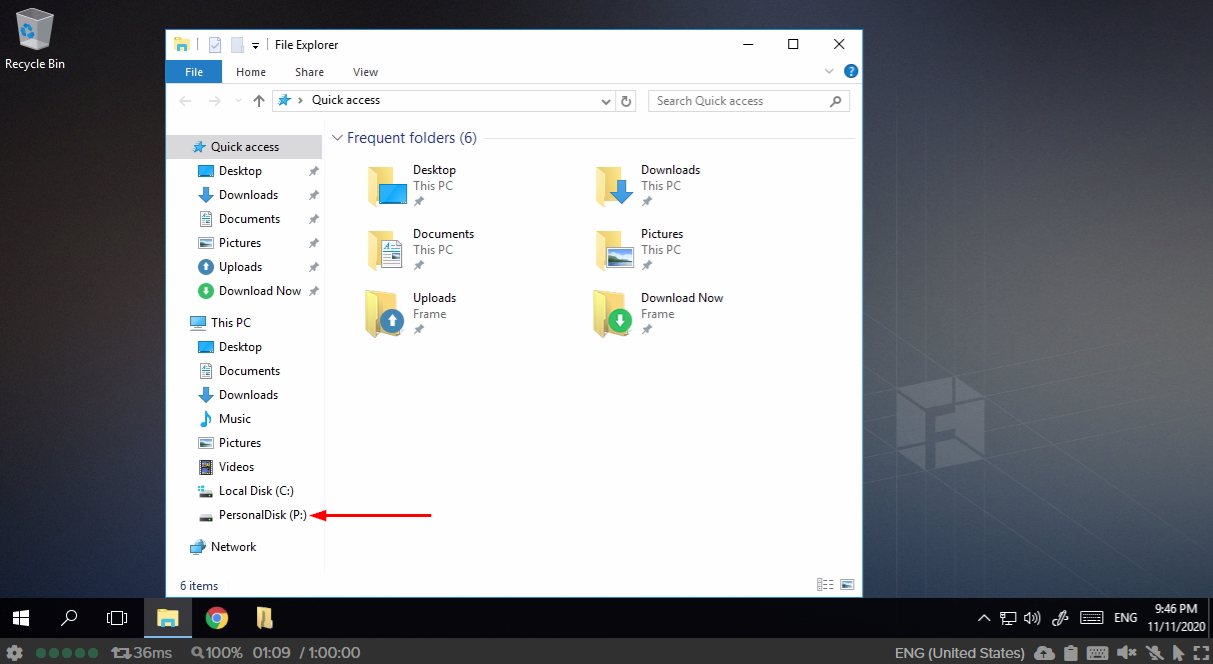
As an end user, you are automatically granted the permissions to manage your own Personal Drive backups. You can do this from your profile page.
Network Share Drives
As the title of this section suggests, a network share drive is a shared volume which can be accessed by multiple Frame account end users. This drive is configured and managed by the administrator of the account. It appears simply as an additional volume in your file explorer and can be accessed just like any other drive (from your file explorer or while browsing files in an application).
Accessing Files
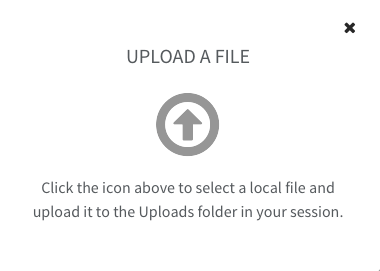
With most browsers you can simply drag and drop a file from your local desktop onto your Frame session's browser window to initiate an upload. Alternatively, you can click on the file upload icon and the following pop-up will explain what to do next:
-
Once the file has been uploaded, you can access it directly in your application by using the app's file manager or navigating to the "Uploads" folder in the Favorites section.
-
If needed, you can cancel the file upload by clicking on the progress indicator. A small dialog will appear with the option to "cancel" or "cancel all."
- You can drag any files from your local Frame session to the "Download Now" folder to download it to your local machine. Your browser window will show the file being downloaded to your local computer automatically.
Limitations
As mentioned in the section above, cloud storage drives, network share drives, and Personal Drives all appears as mounted drives in your Frame session. Accessing your files from a mounted drive is simple. Start by opening your file explorer, then navigate to the desired drive. You may also access this drive from within an application.
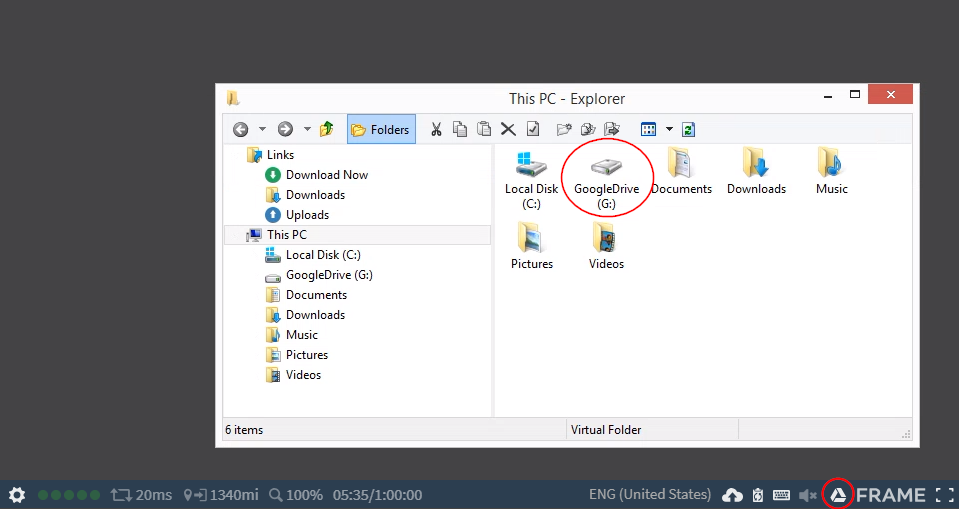
Since there are a few variations of the Google Drive integration, you may or may not have to enter your account credentials every time you log on to your session (depending on your account configuration).
Clipboard Integrations
First, click on the clipboard icon located on the right side of your Frame status bar.
As you may already know, you can also copy text from your local computer to your Frame session using the opposite method. Once you have copied your desired text from your local machine, go back to your session and click on the clipboard icon. Paste the text into the box on the left. The dialog will display a "Pasted!" message if the text was pasted successfully.
Clipboard Sync
You can enable/disable clipboard sync in your session by clicking on the icon in the lower right corner.
-
Depending on your account configuration, some administrators may only allow you to copy/paste in one direction. For example, an administrator may only allow their end users to paste from local to remote, but not from remote to their local environment.
-
In order to use Ctrl + C and Ctrl + V to copy files within your Frame session you must have clipboard sync disabled. You can still copy/paste files by right-clicking and selecting the desired action from the context menu.
-
Due to browser limitations, clipboard sync only transfers plain text between your local environment and your Frame session. Any text formatting will be stripped between environments.
Printing from your Session
When you click "Print," the virtual printer will automatically create a .PDF file and prepare to push it to your local browser. A printer icon and notification will appear at the bottom of your screen:
