IBM Cloud
This document will provide you with instructions on how to prepare and register your own template image in IBM Cloud for use with Frame. Before moving forward with the preparation procedure, please ensure you have read through the general requirements and considerations on the Windows BYO image page. We will outline additional details specific to IBM Cloud public cloud below.
Considerations
Customers planning to use their own OS image (Windows 10, Windows 11, Windows Server 2019, or Windows Server 2022) can bring their own (BYO) template image by starting the process in one of two ways:
-
An IBM Cloud-provided OS image (e.g., Windows Server 2019 or Windows Server 2022). This approach is the simplest as the IBM Cloud-provided OS image already has the required IBM Cloud drivers.
-
A Microsoft-provided Windows 10, Windows 11, Windows Server 2019, or Windows Server 2022 image. This approach requires installation of IBM Cloud-required drivers in the image before uploading the image to IBM Cloud. Additionally, customers will need to verify that the image will operate correctly in IBM Cloud.
Administrators must also be aware of the following considerations:
- Windows 10 Enterprise multi-session images are not supported.
- IBM Cloud Generation 2 and 3 VMs are supported. However, Windows 10/11 requires Generation 3 VMs due to the requirement for UEFI.
IBM Cloud-provided OS Images
This procedure describes how to prepare your template OS image based on an IBM Cloud-provided OS image. When configuring your image, you must use a Windows OS user account with local Windows administrator privileges.
-
Log in to https://cloud.ibm.com/ and under VPC Infrastructure, open Virtual server instances.
-
Click on Create + option to create a new virtual machine.
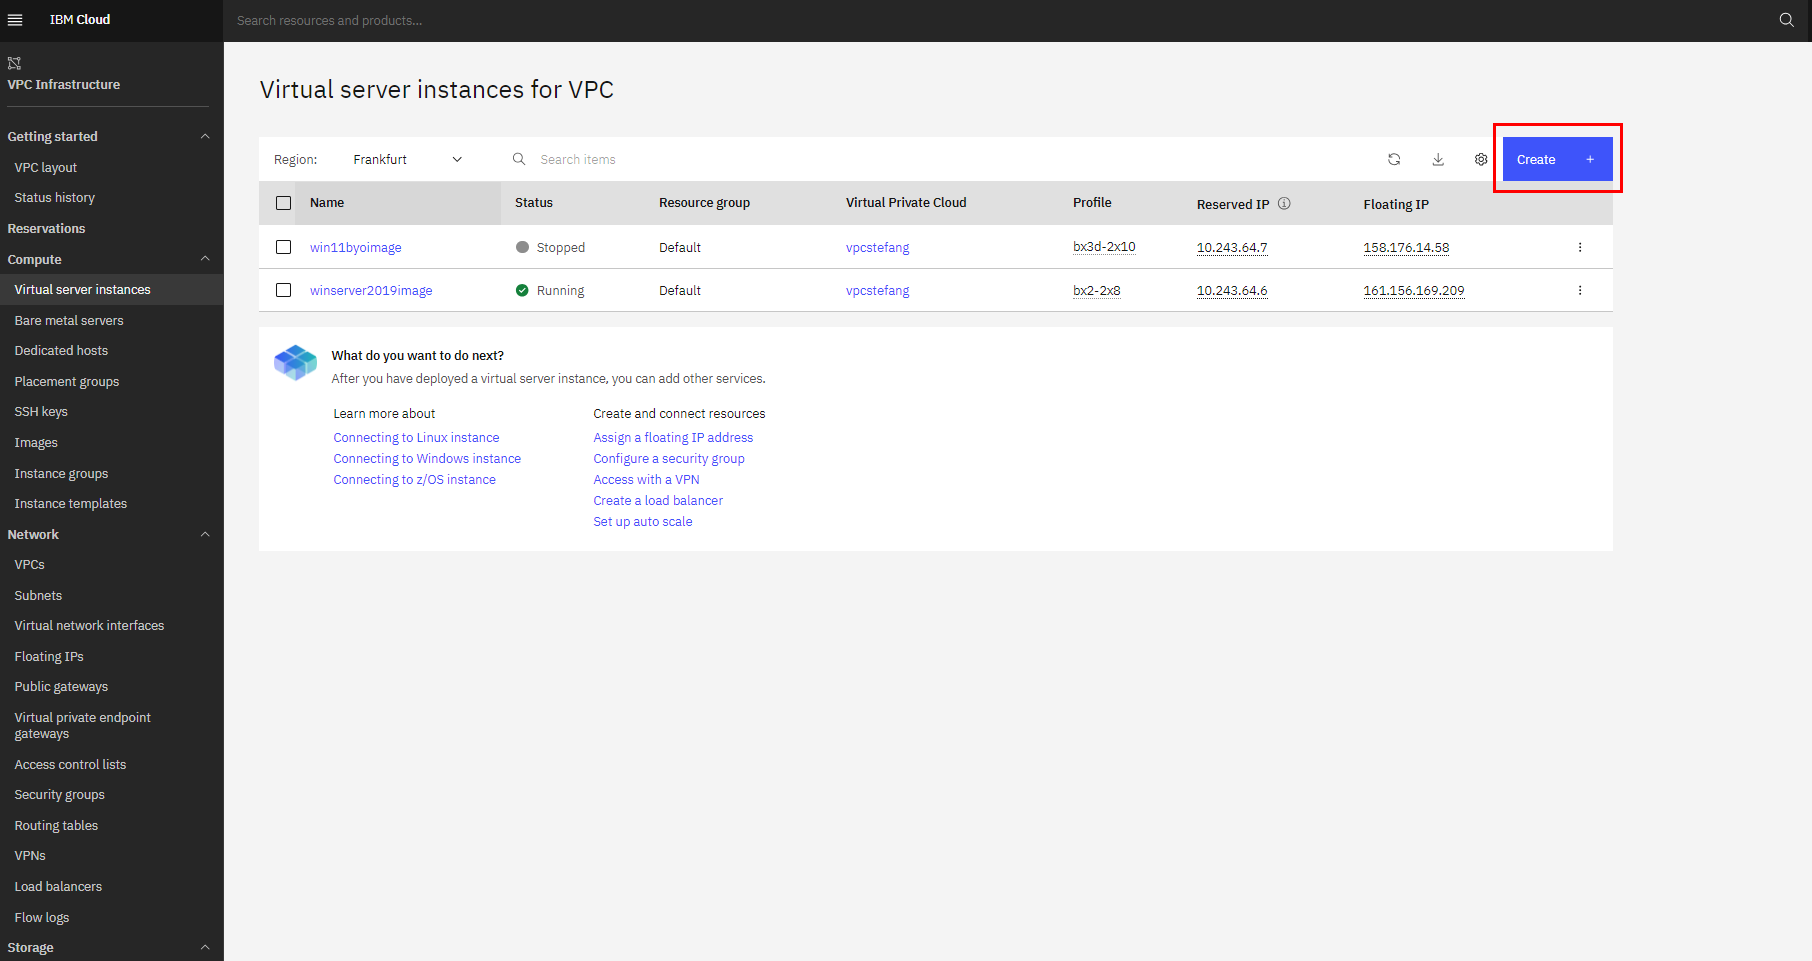
IBM Cloud - Virtual Server Instance List -
Select desired location, specify a name for the virtual server, select desired resource group, and for the image family, select "ibm-windows-server-2019-full-standard-amd64-18" or "ibm-windows-server-2022-full-standard-amd64-12". Choose the profile. In the example below, the Balanced | bx3d-2x10 profile was selected.
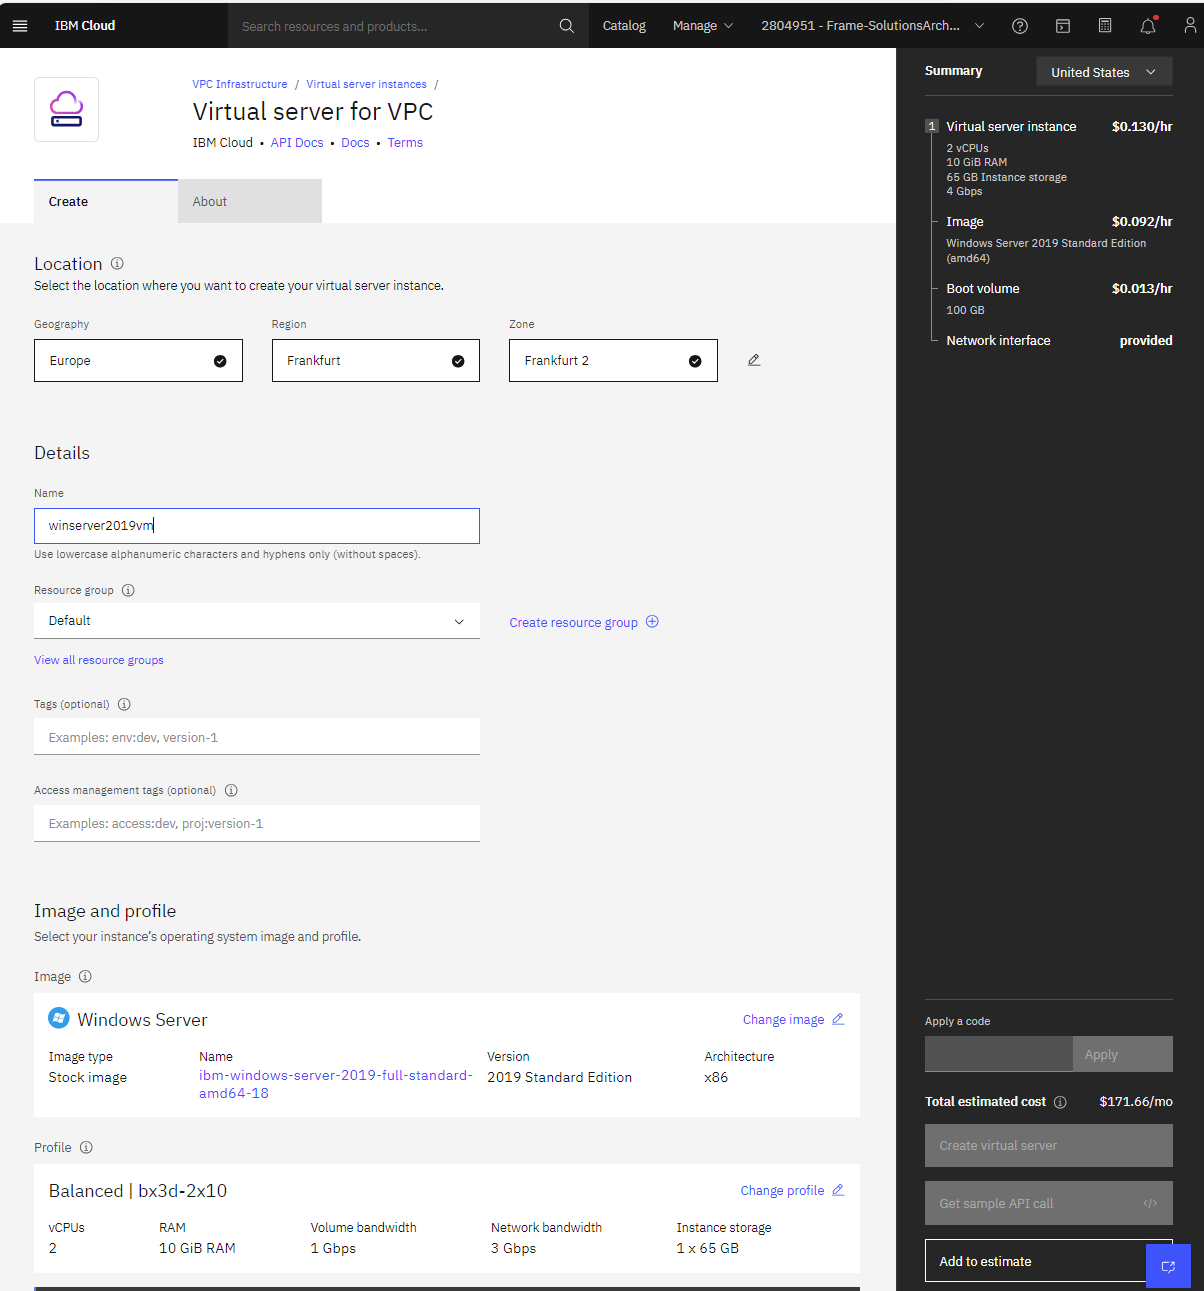
IBM Cloud - Create Virtual Server Instance -
Add one or more SSH keys to your instance. If you already have SSH key, you can use your existing key or you can create new key. In case you are creating a new SSH key, please note that the key is generated in .prv format and will be saved to your local machine. You will need that key to authenticate to the virtual server via RDP.
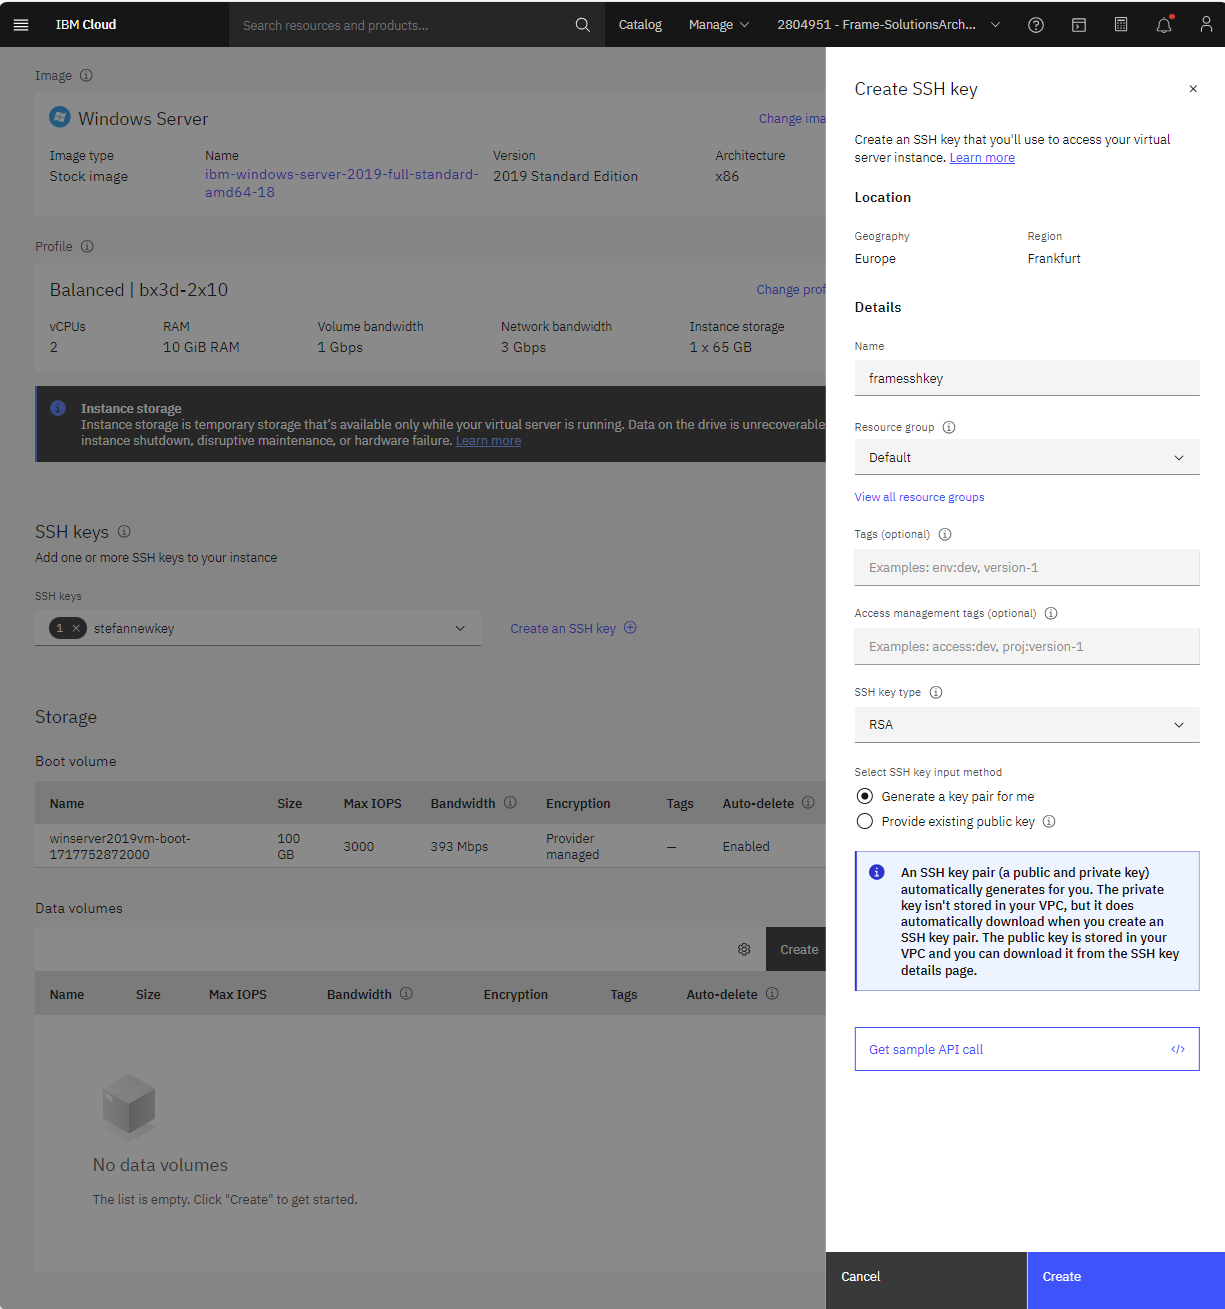
IBM Cloud - Create SSH Key -
Setup Networking and Enable Metadata. You can create a new VPC or choose an existing VPC to put this virtual server. Enable the Metadata slider for the Frame Agent Setup Tool (FAST) to execute properly.
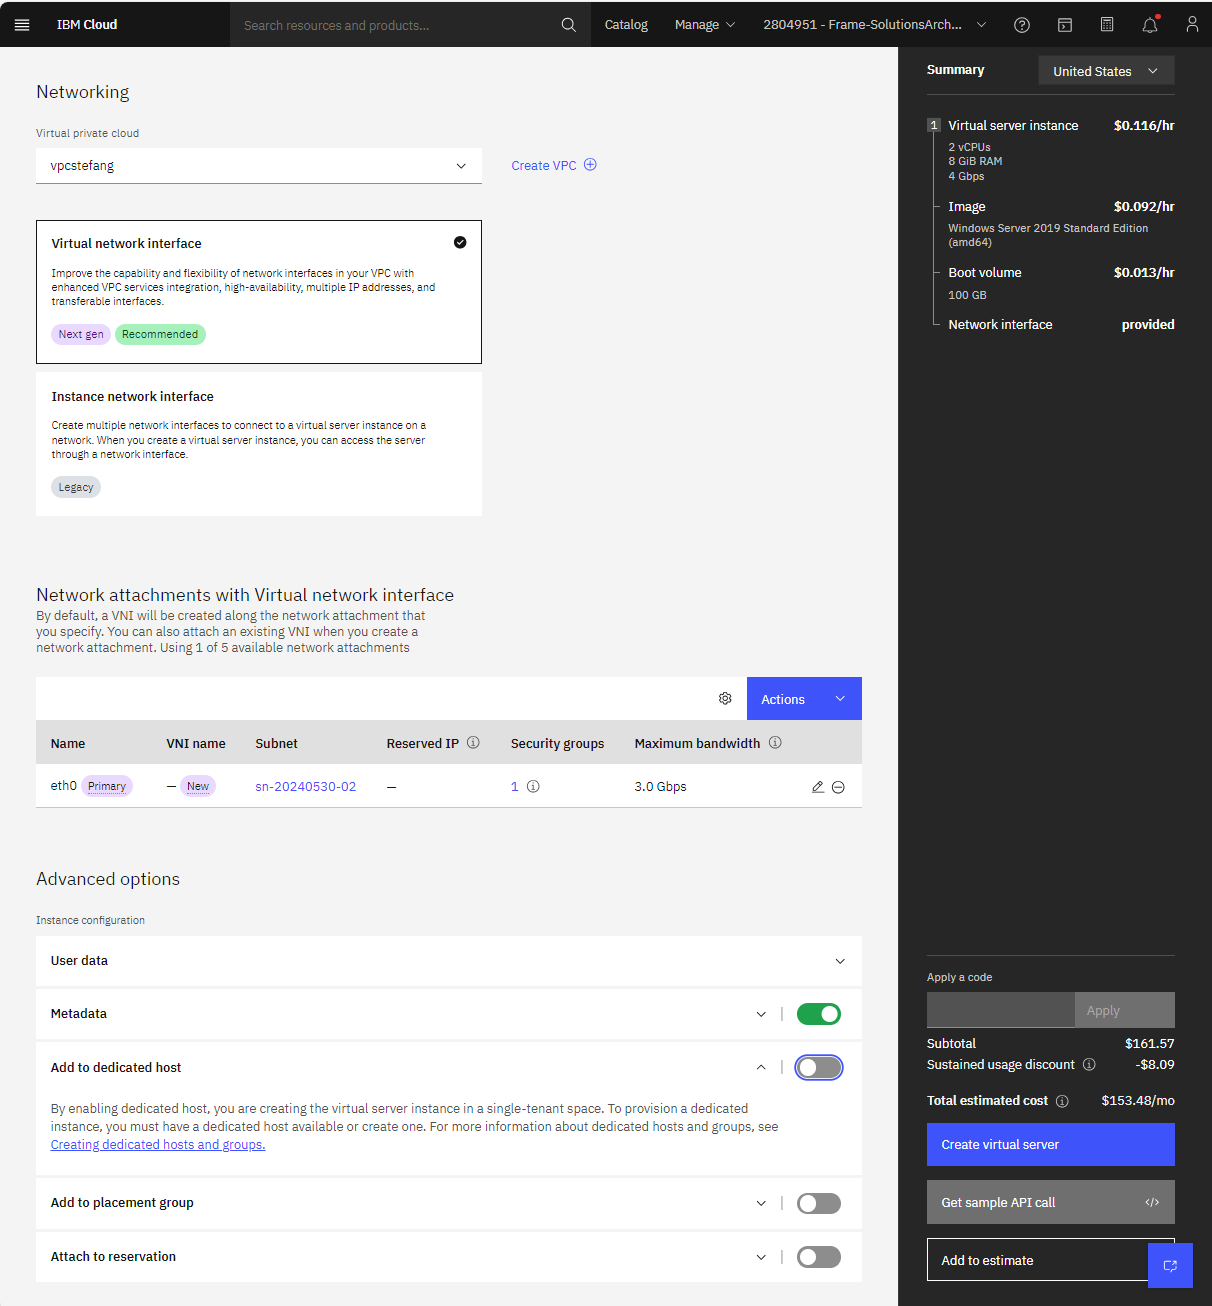
IBM Cloud - Create Networking -
Click on Create virtual machine to finalize VM creation.
-
You will now need to RDP into your VM in order to install the Frame Agent, optimize the image, and execute Microsoft sysprep.
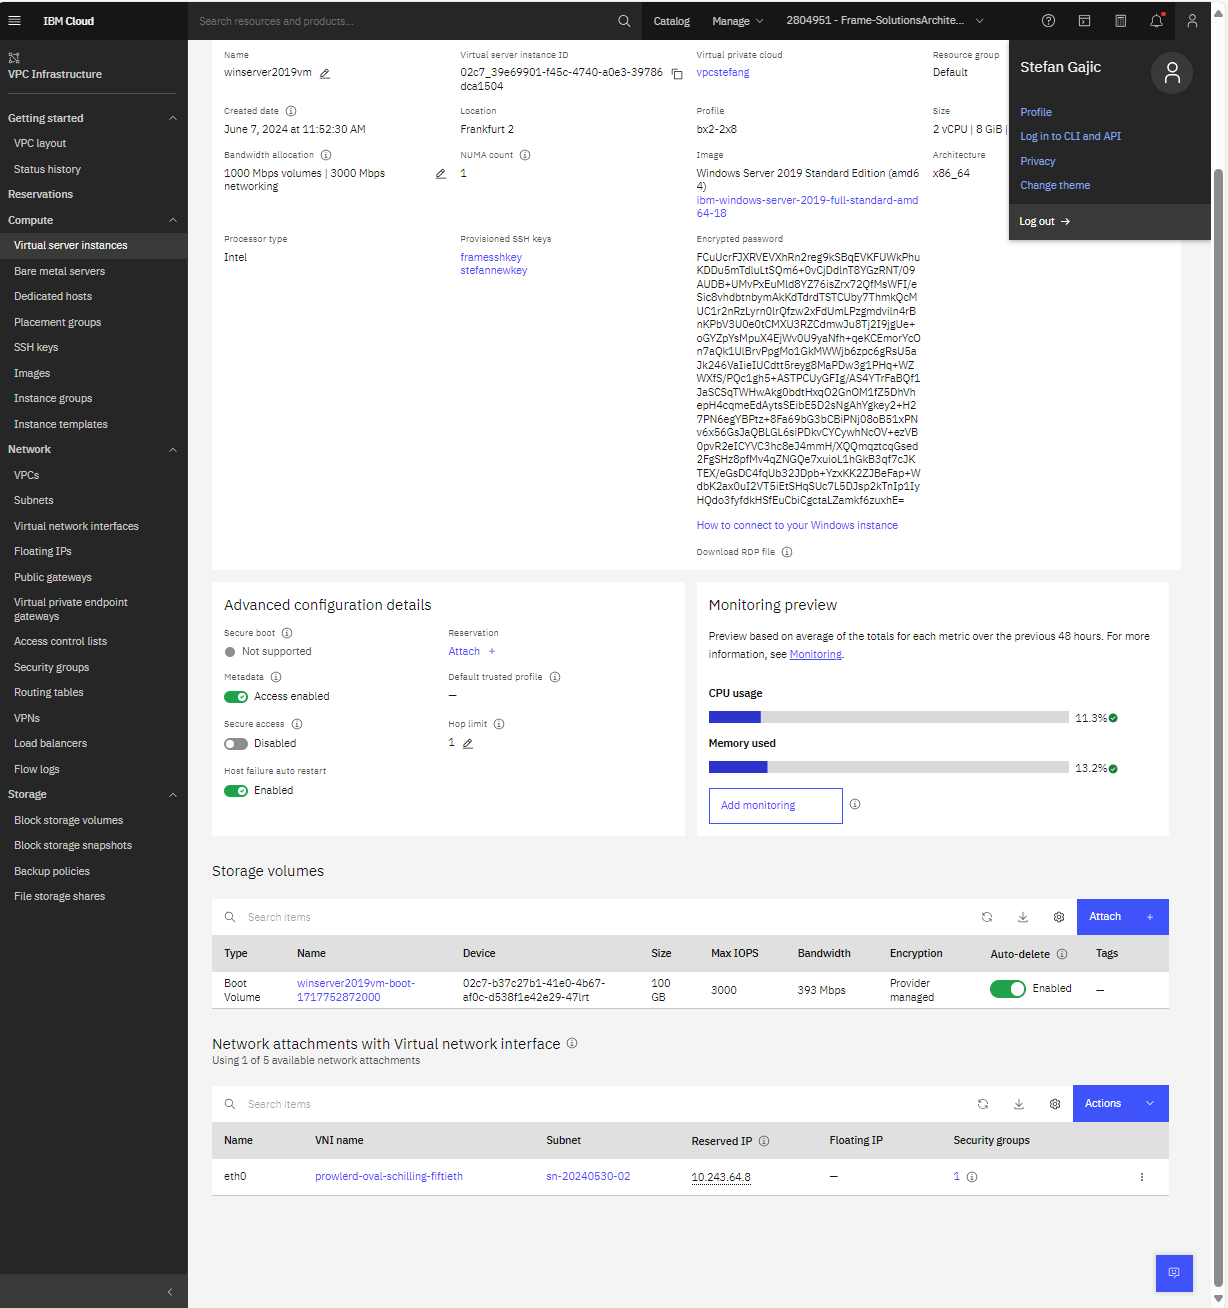
a. RDP into your virtual server. If an RDP connection is unsuccessful, verify that you have enabled
tcp/3389andudp/3389. Select your virtual server and under “Network attachments with Virtual network interface”, click on Security group. You should be able to view the security group configuration page for your virtual server. Click on Manage rules.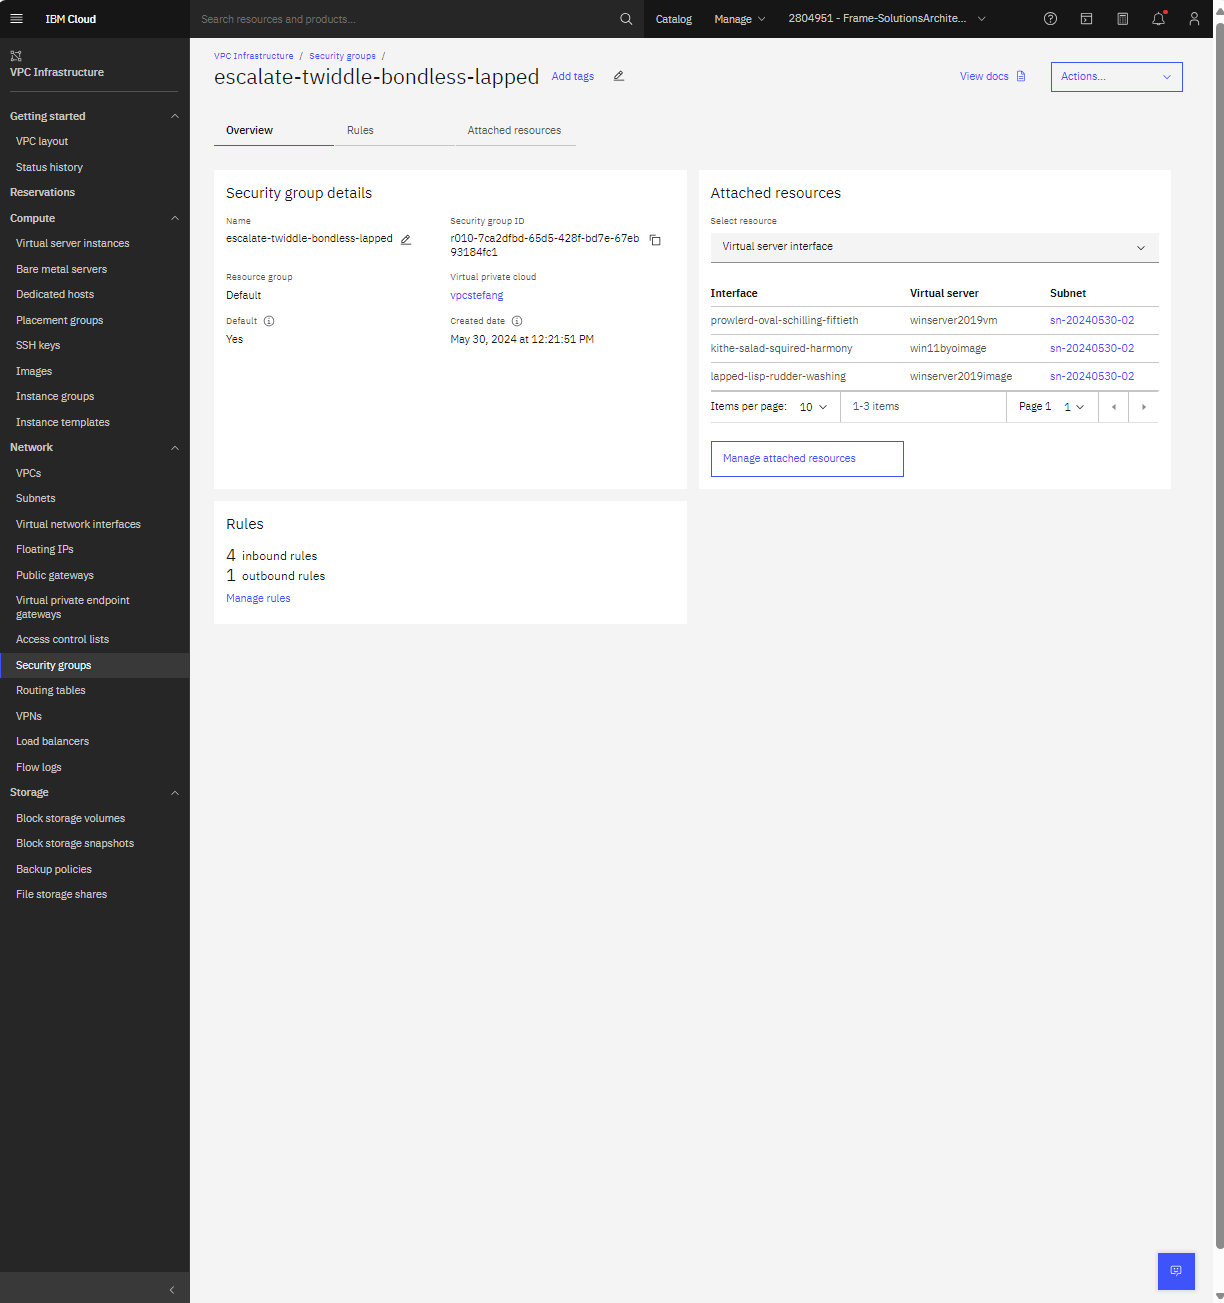
IBM Cloud - Configure Security Group b. Enable the RDP protocol (
port 3389) by creating an inbound rule.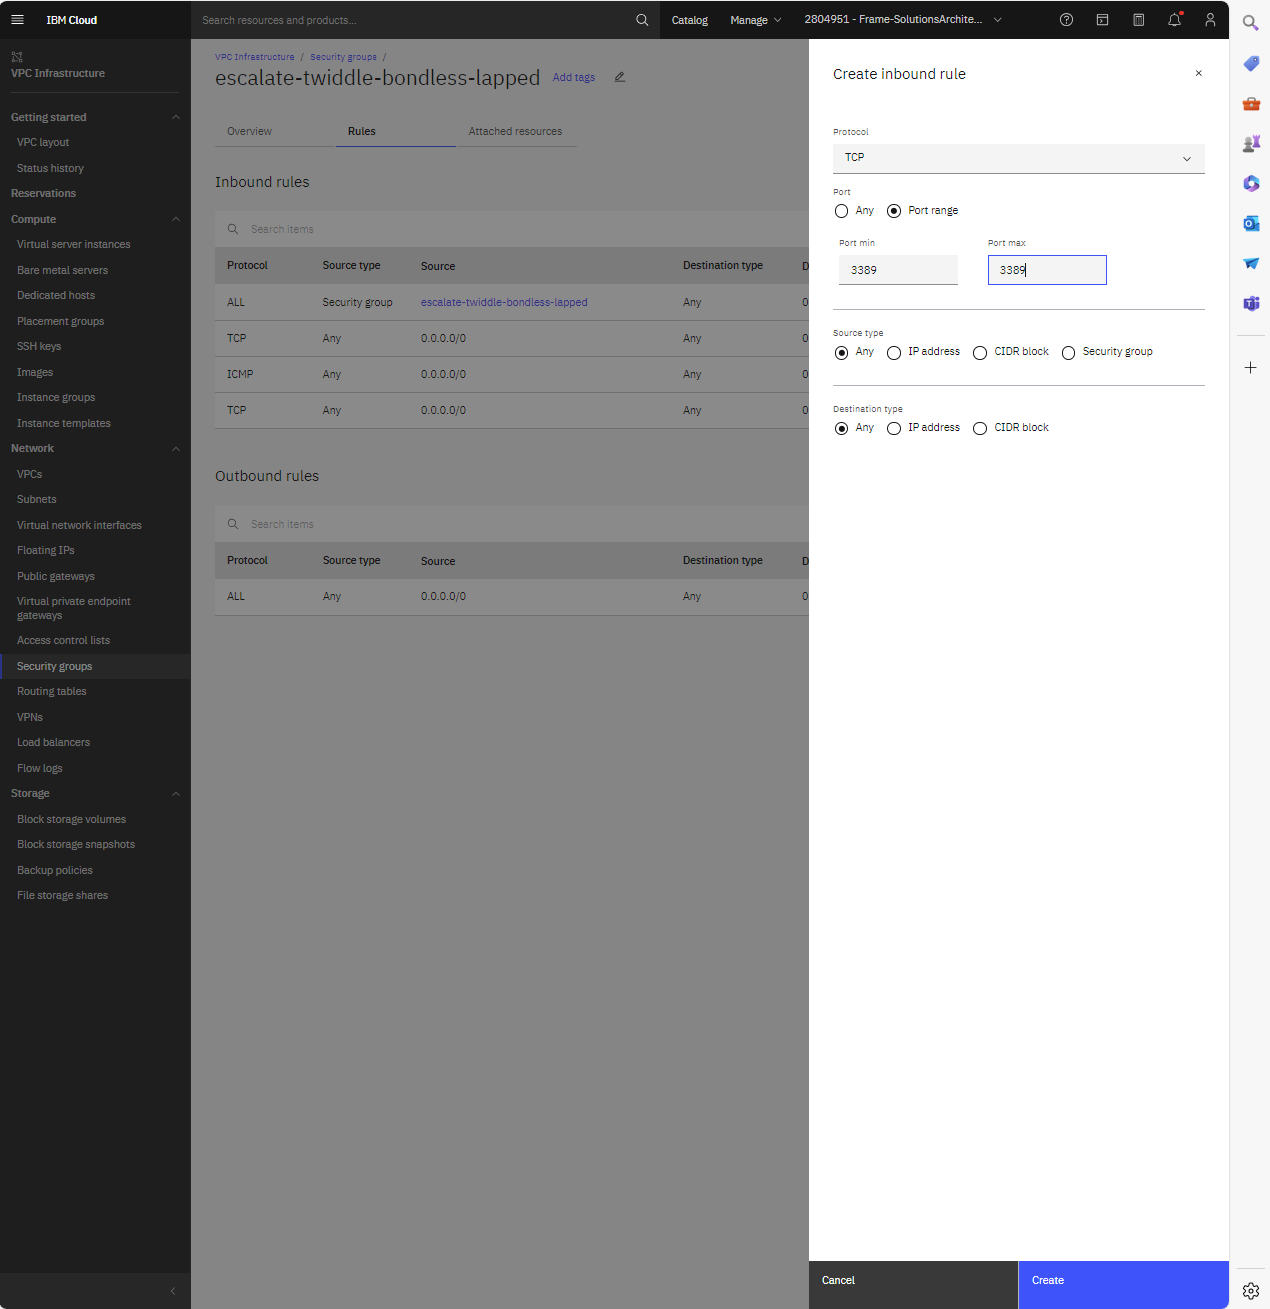
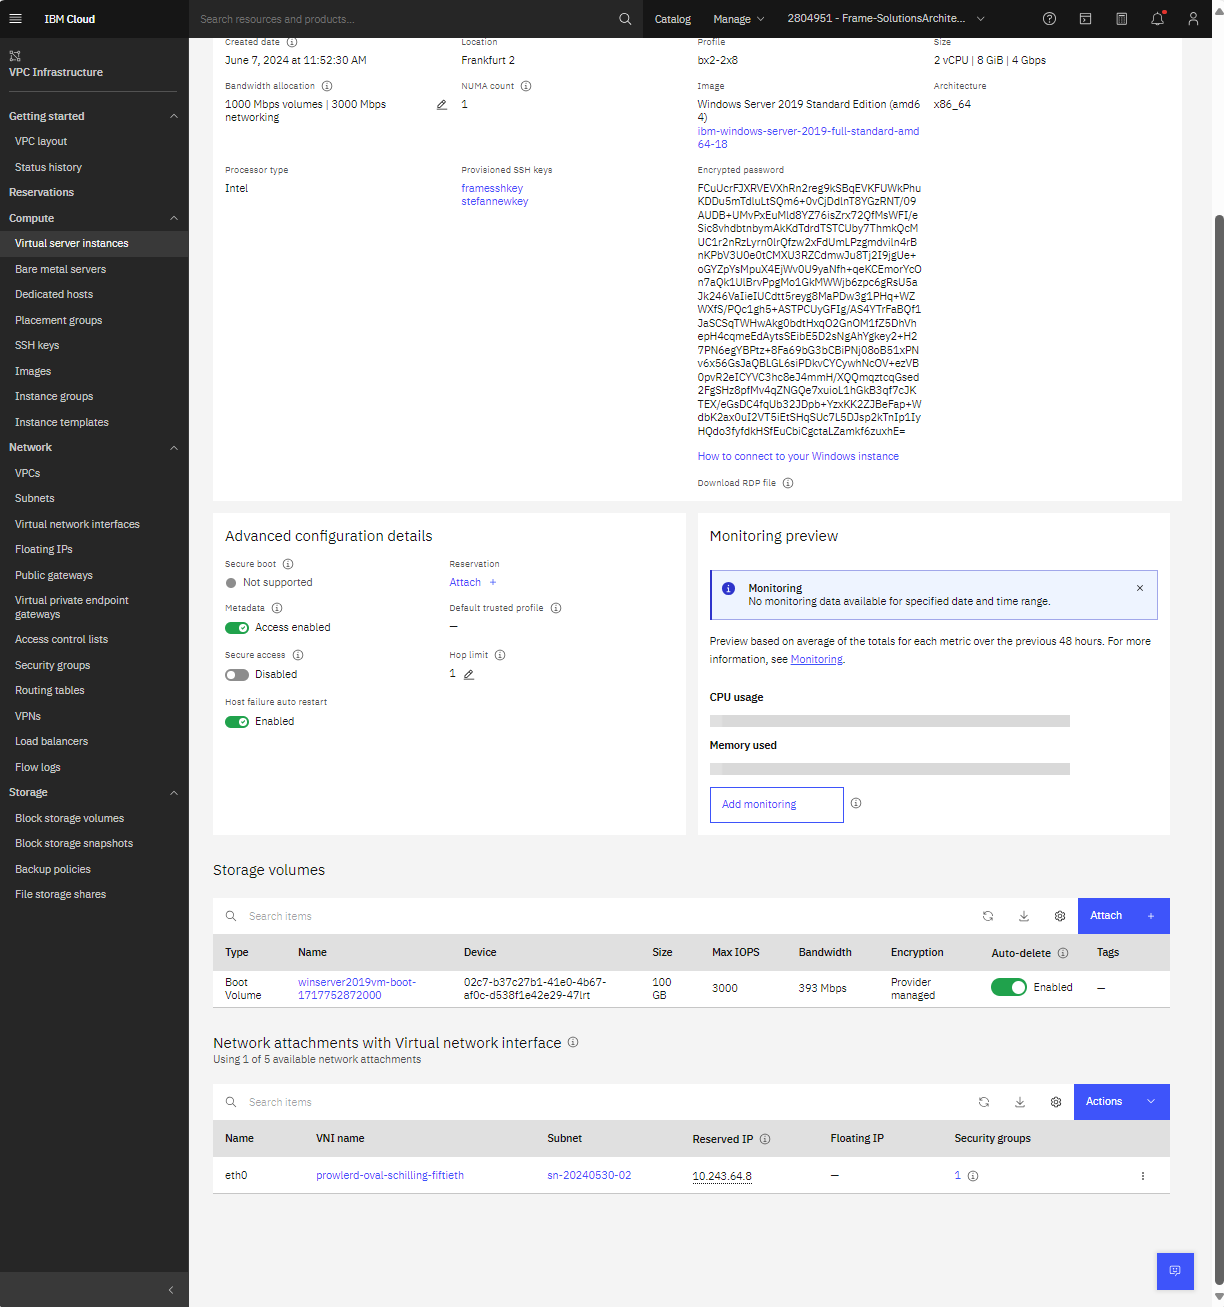
IBM Cloud - Enable RDP c. If you do not have a network route to your virtual server (i.e., S2S/P2S VPN), you will need to attach a Floating IP address to your virtual network interface. To assign a Floating IP, open the Virtual network interface under “Network attachments with Virtual network interface” and under Floating IPs, click on Attach + option to add existing or to create new Floating IP.
IBM Cloud - Configure Virtual Network Interface 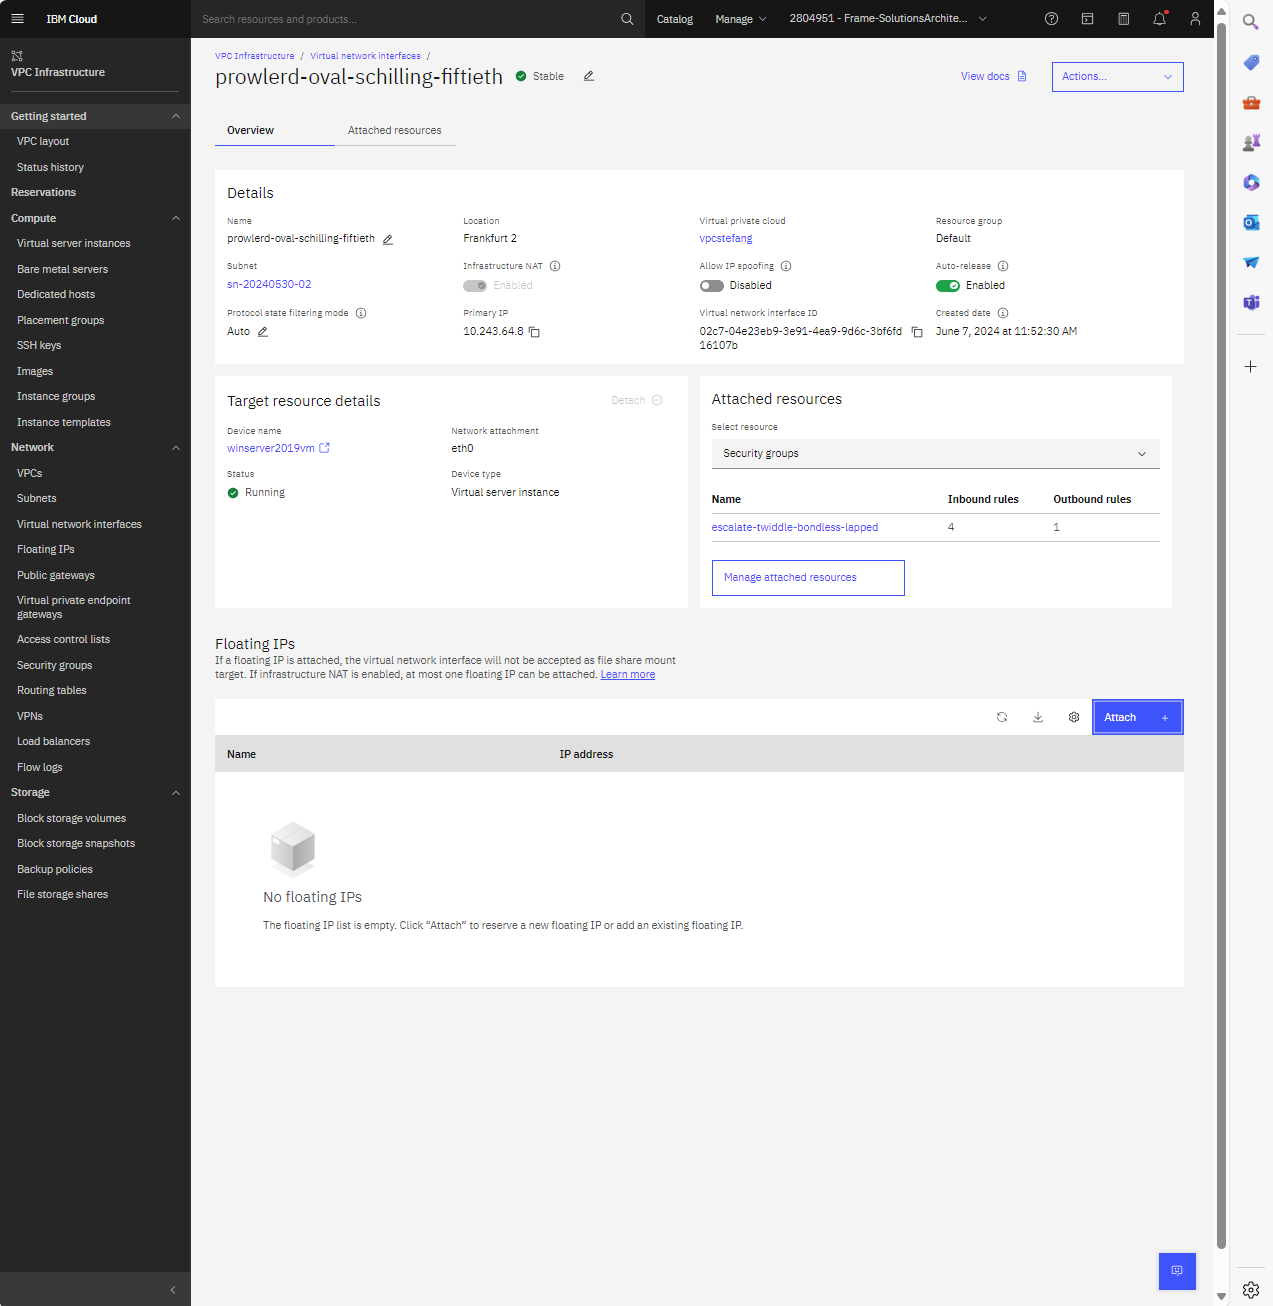
IBM Cloud - Add Floating IP Address d. Open Remote Desktop Connection from your PC and specify the IP address of your VM. Username for the RDP connection will be "Administrator" and the password needs to be extracted from .prv SSH key that you obtained during VM creation. To extract the Administrator password:
-
Download OpenSSL
-
Copy the file containing the private key (.prv format) to a folder with openssl.exe and run command:
.\openssl.exe rsa -in .\key.prv -out keypem.pem -
Open
keypem.pemin Notepad. -
Under your user persona in the upper right-hand corner of the IBM Cloud Portal, click on Log in to IBM CLI and API.
noteTo use IBM Cloud CLI and API, you will need to install the latest version of the stand-alone IBM Cloud Command Line Interface and the plugin by following the IBM documentation:
IBM Cloud - Log in to IBM CLI and API -
Run the following command:
ibmcloud is instance-initialization-values <virtual server instance id> --private-key "<private key>"
where
<virtual server instance id>is the value listed in the Virtual server instance page and<private key>is copied from the keypem.pem file you opened in notepad.exe.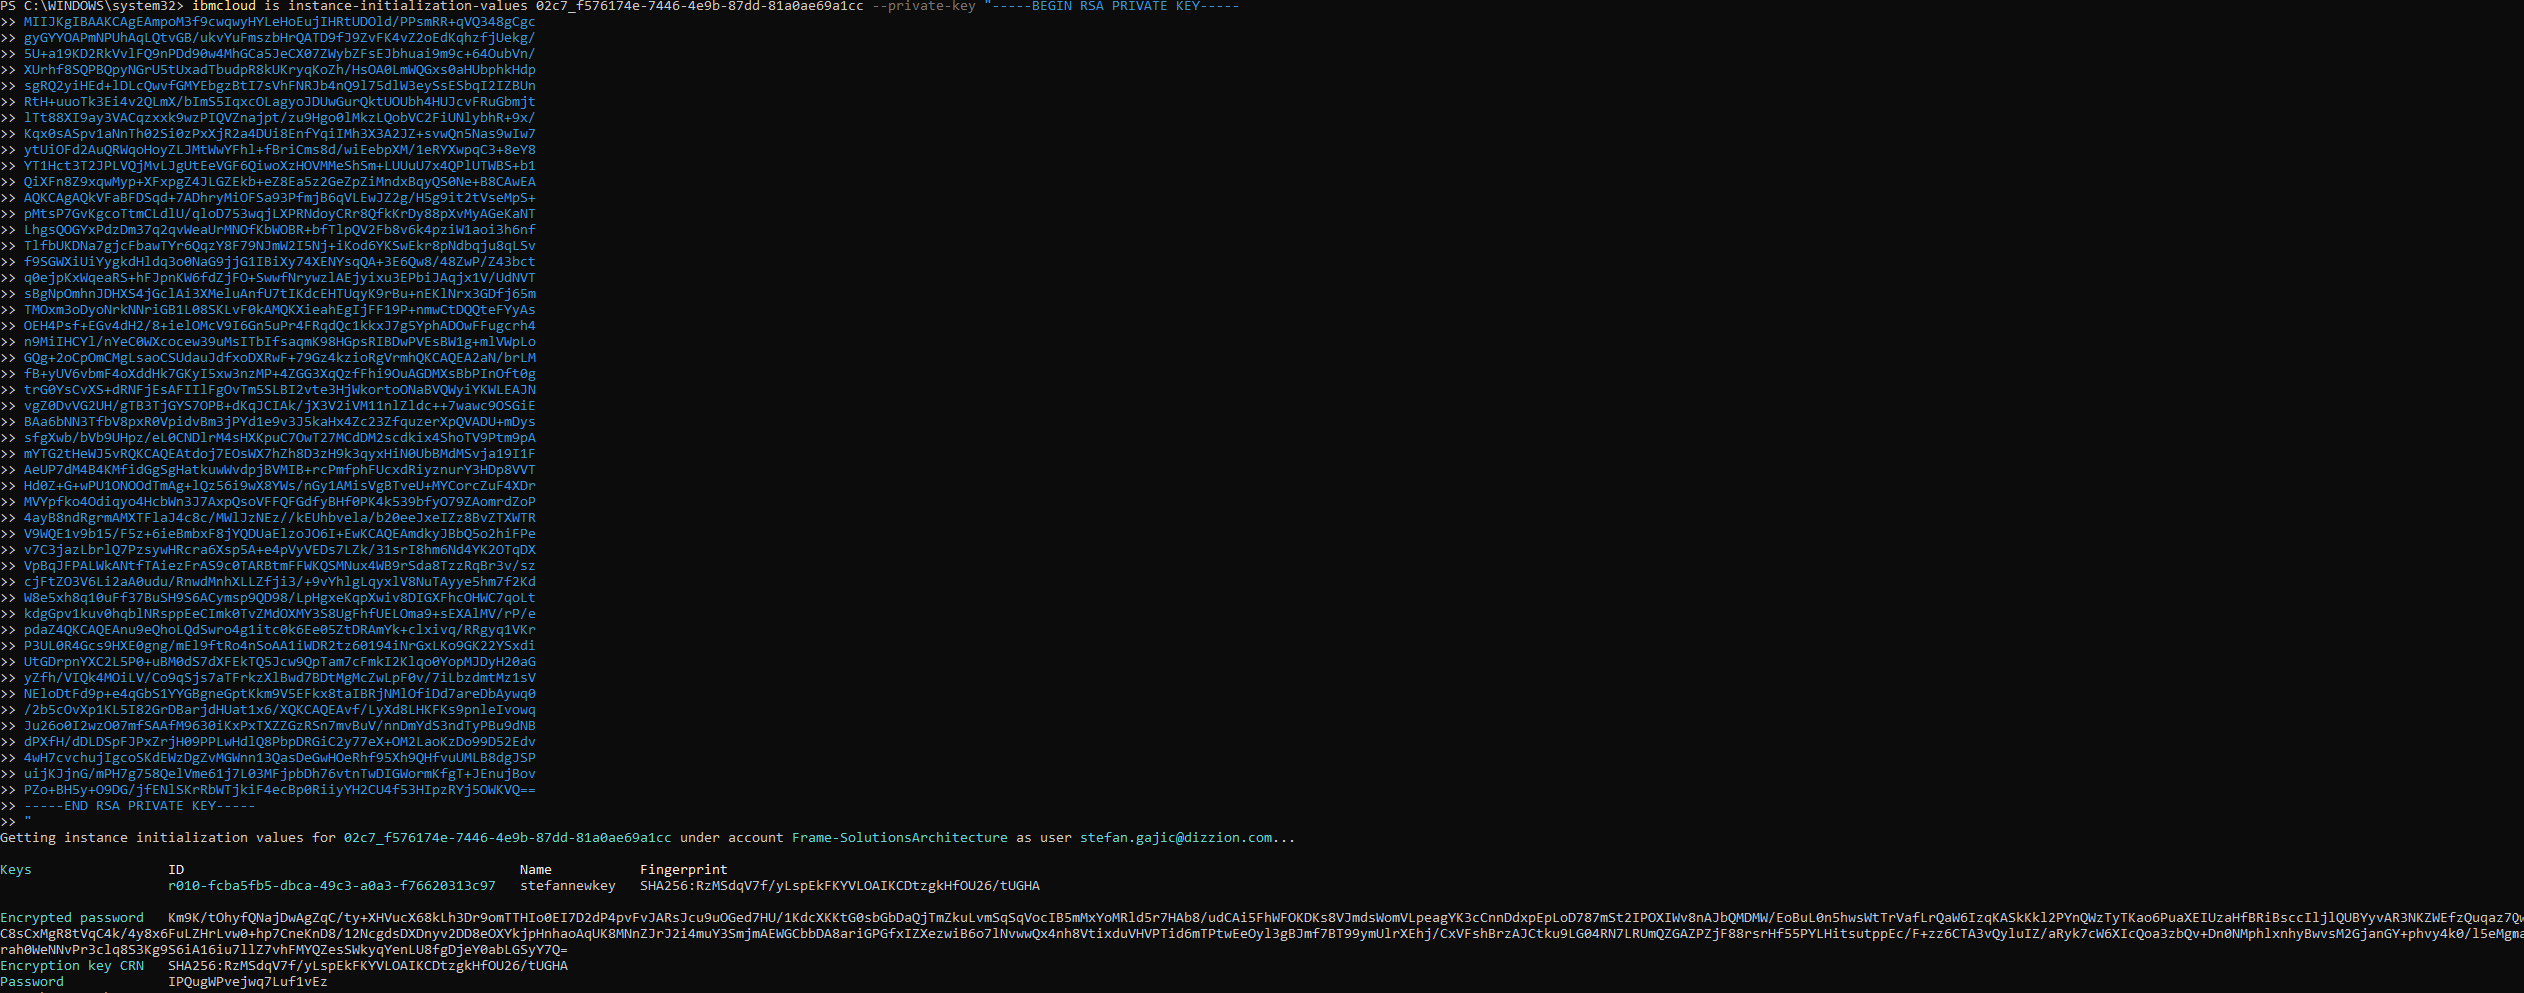
IBM Cloud - Example Configuration of SSH Key e. From your Remote Desktop Connection UI, enter your username (
Administrator) and password (private key) and RDP into the virtual server. -
Now that you have a template image VM accessible via RDP, you can proceed with the installation of the Frame agent and drivers.
Microsoft-provided OS Images
This procedure describes how to prepare your template OS image based on a Microsoft-provided OS image. In this scenario, you are bringing your own OS image and licensing.
With IBM Cloud, this scenario is particularly relevant if you wish to use Windows 10 or Windows 11 for the template OS image, as these Microsoft Client operating system images are not available from IBM Cloud. When configuring your image, you must use a Windows OS user account with local Windows administrator privileges.
Create Windows OS Image
This procedure requires use of a third-party tool Oracle VirtualBox to prepare a Microsoft-provided or third-party-provided OS image for use in IBM Cloud. This document is derived from the IBM Cloud Creating a custom Windows image page.
-
Download the Oracle VirtualBox installer from the VirtualBox website and install on a local machine.
-
Download the QEMU disk image utility from https://cloudbase.it/qemu-img-windows/ (download binaries using the link at the bottom of the web page). Extract the tool on the same local machine. Run the following command, as a Windows administrator, from the Windows command line to prepare a virtual hard drive (.vhd):
qemu-img.exe create -f vpc <filename>.vhd <file size>where
<filename>is the filename for the virtual hard disk and<file size>is the image size (e.g, 65G or 100G)noteFor Windows 11 operating system, the minimum virtual hard disk size is 64 GB.
-
Download the Microsoft-provided disk image (ISO) file for the desired operating system (e.g., https://www.microsoft.com/en-us/software-download/windows11).
-
Download the VirtIO drivers for Windows:
-
For IBM Cloud VPC, IBM Cloud discusses their recommended procedure to obtain the wirtio-win drivers at Step 3 of their Creating a Windows custom image documentation page.
-
Alternatively, you may obtain the virtio-win driver from other sources, such as from the Fedora Project (https://github.com/virtio-win/virtio-win-pkg-scripts/blob/master/README.md).
-
-
Open Oracle VirtualBox and create new virtual machine.
a. Click on the New button.
VirtualBox - New Virtual Machine b. Specify a name for your VM, choose the .iso file for the image, and select either the Pro or Enterprise. Check the option "Skip Unattended Installation" and click on Next.

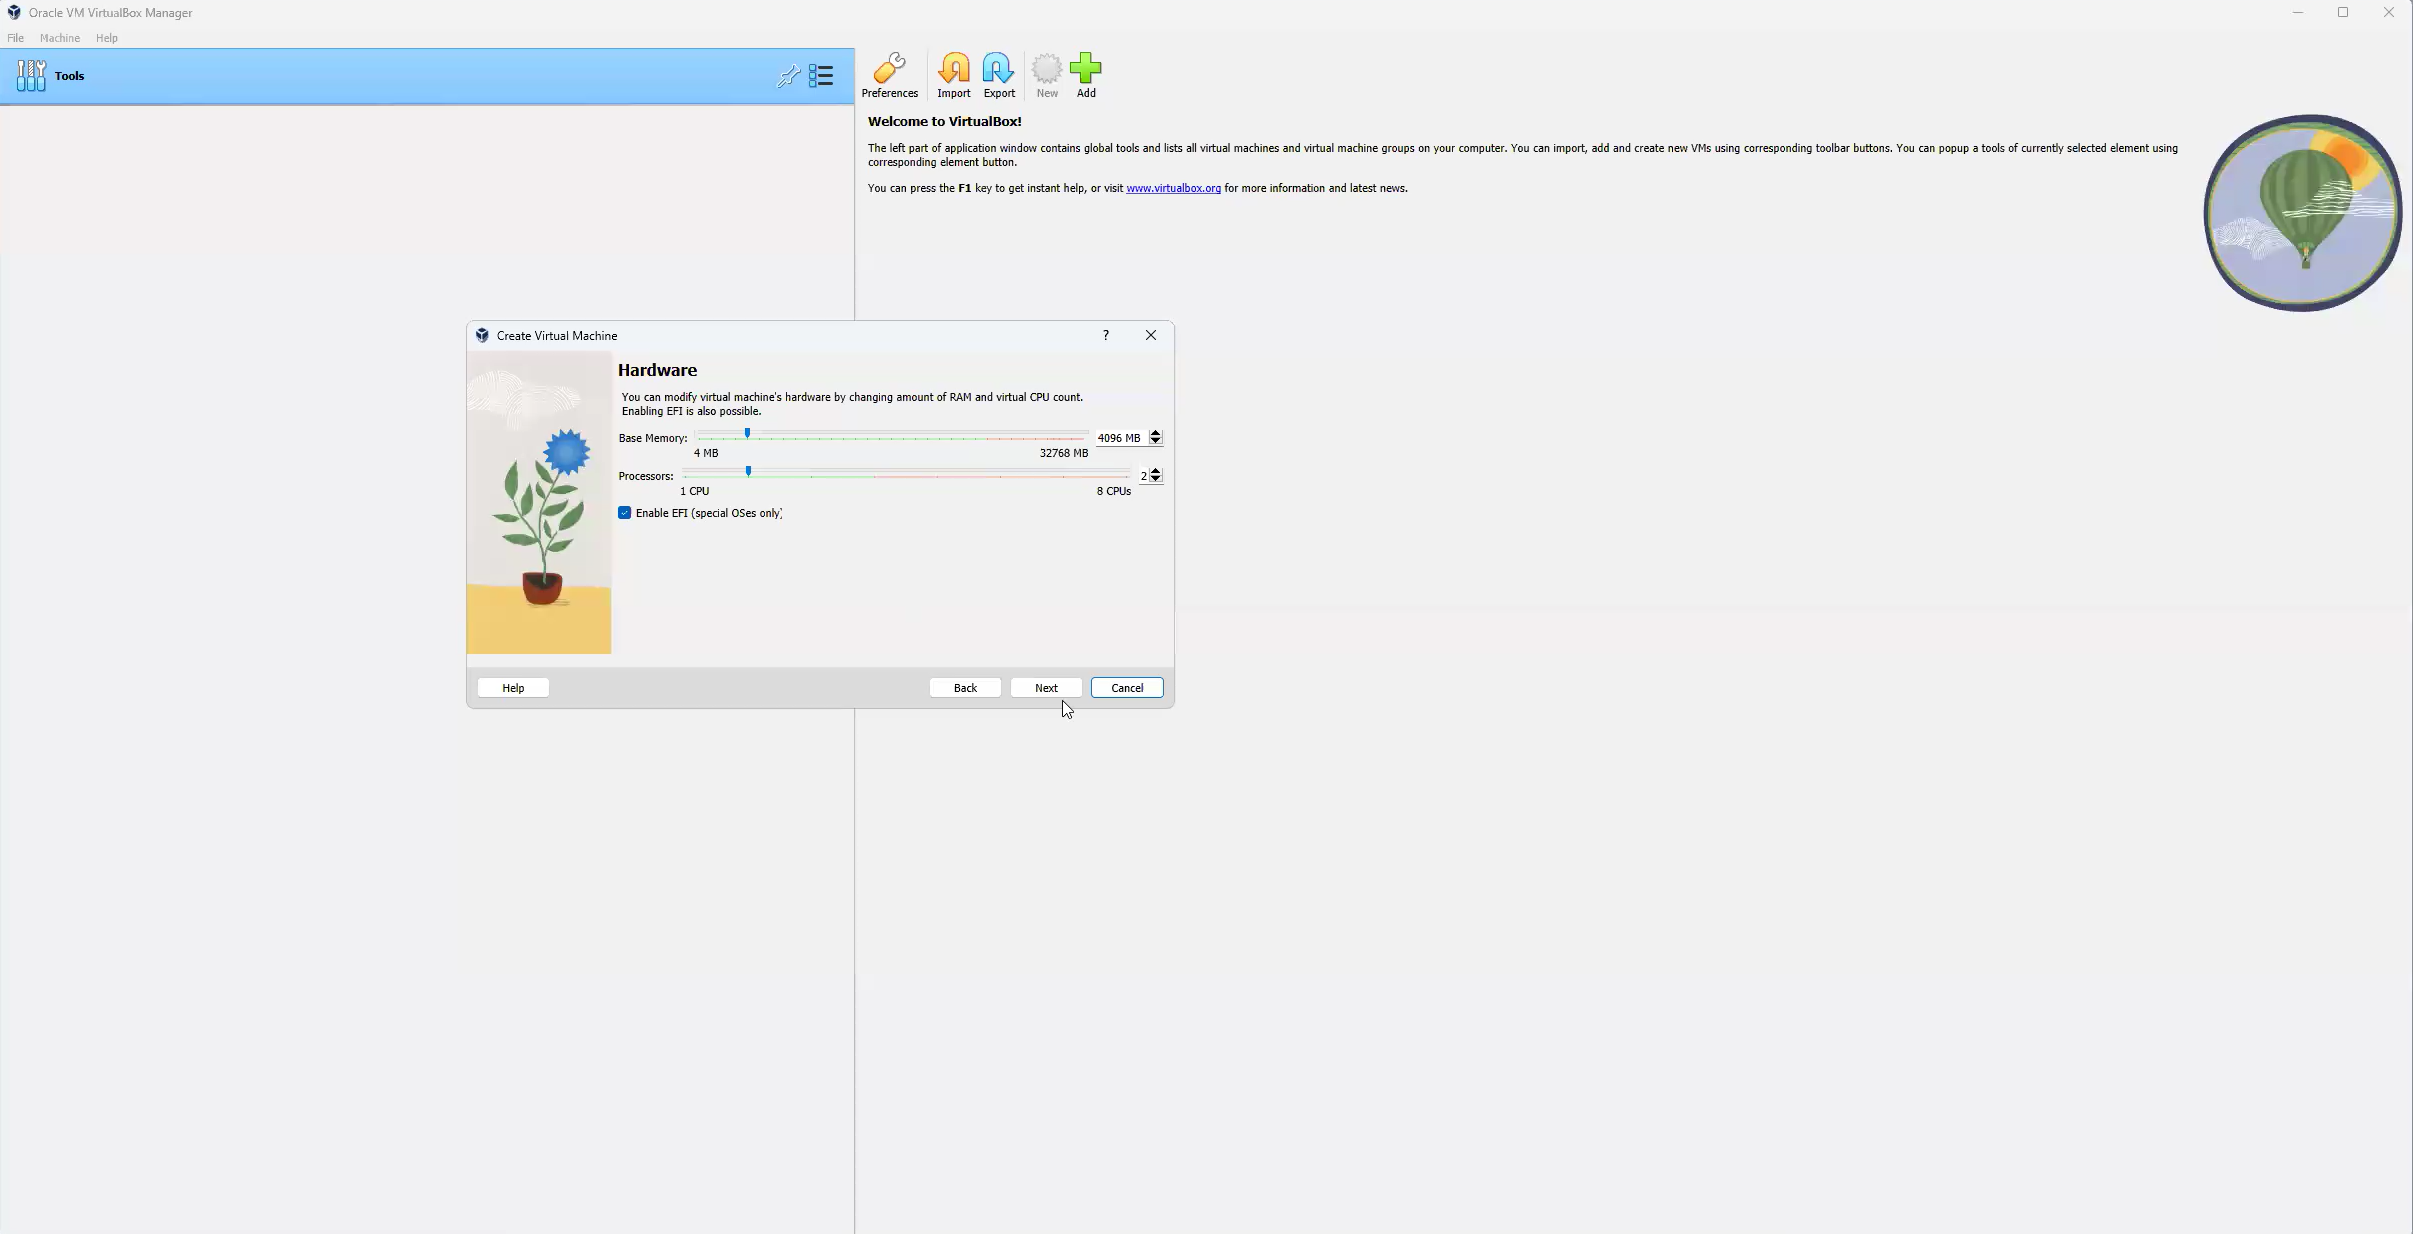
VirtualBox - Specify VM Name and Operating System c. Select the virtual hardware configuration of the virtual machine that will prepare the image for use in IBM Cloud. If you are creating a Windows 11 OS image, you must ensure that the Enable EFI checkbox is selected.
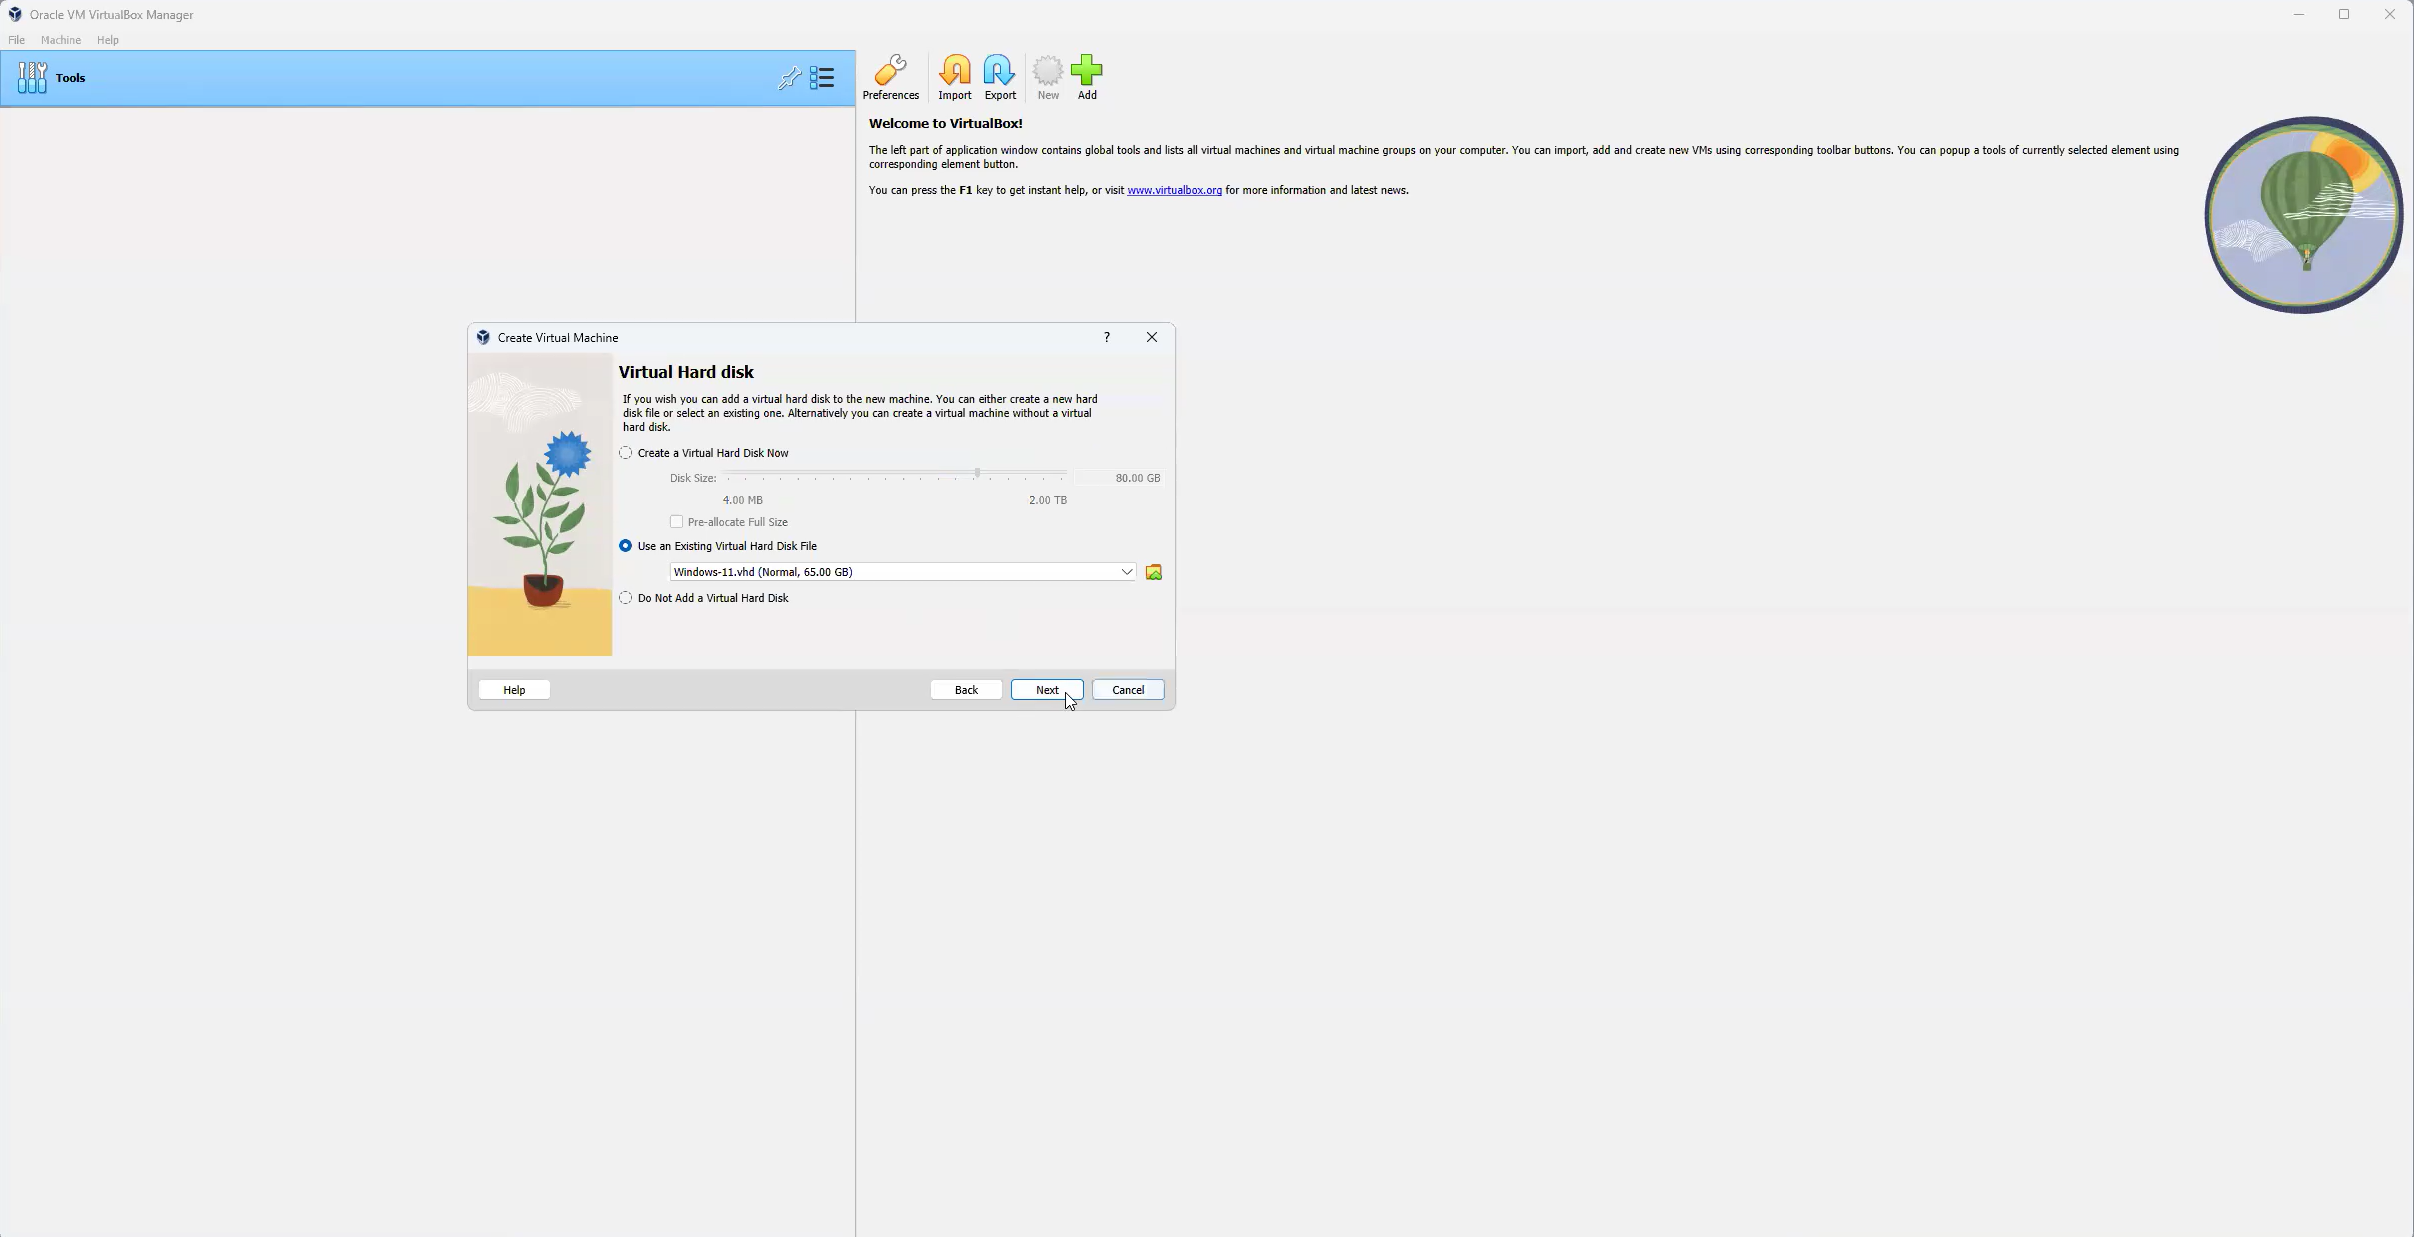
VirtualBox - Specify Hardware d. Next, add the Virtual Hard Drive (.vhd) that was created using the QEMU disk image utility by selecting the option "Use an Existing Virtual Hard Disk File", find the .vhd file, and select that file.
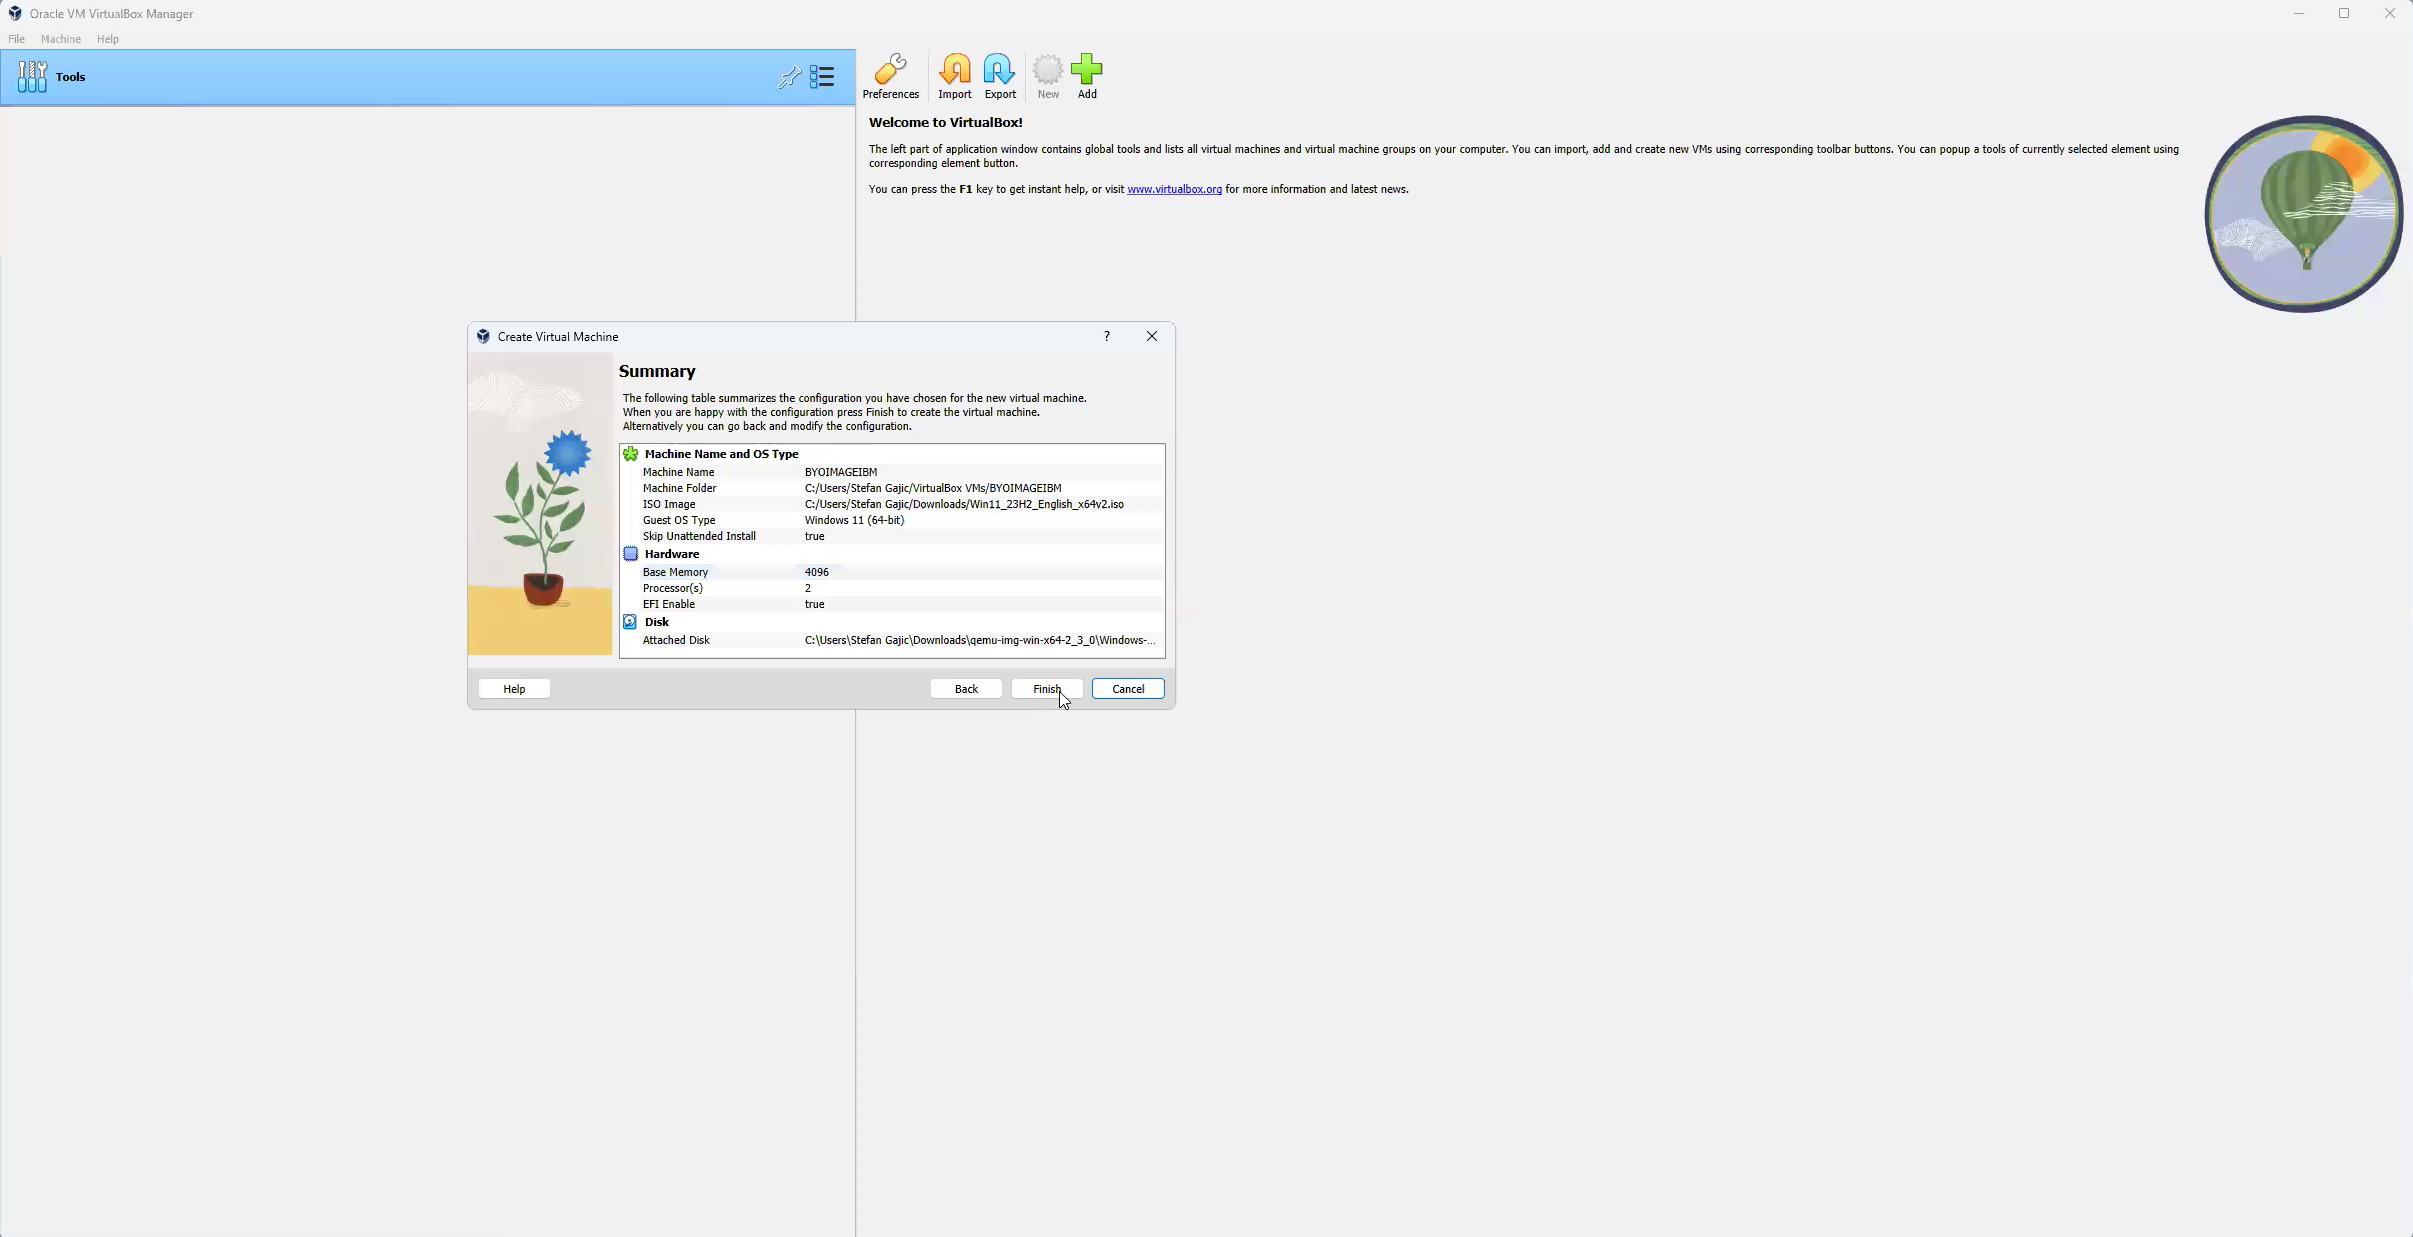
VirtualBox - Specify Virtual Hard Disk e. Click Finish to complete the VM creation process.
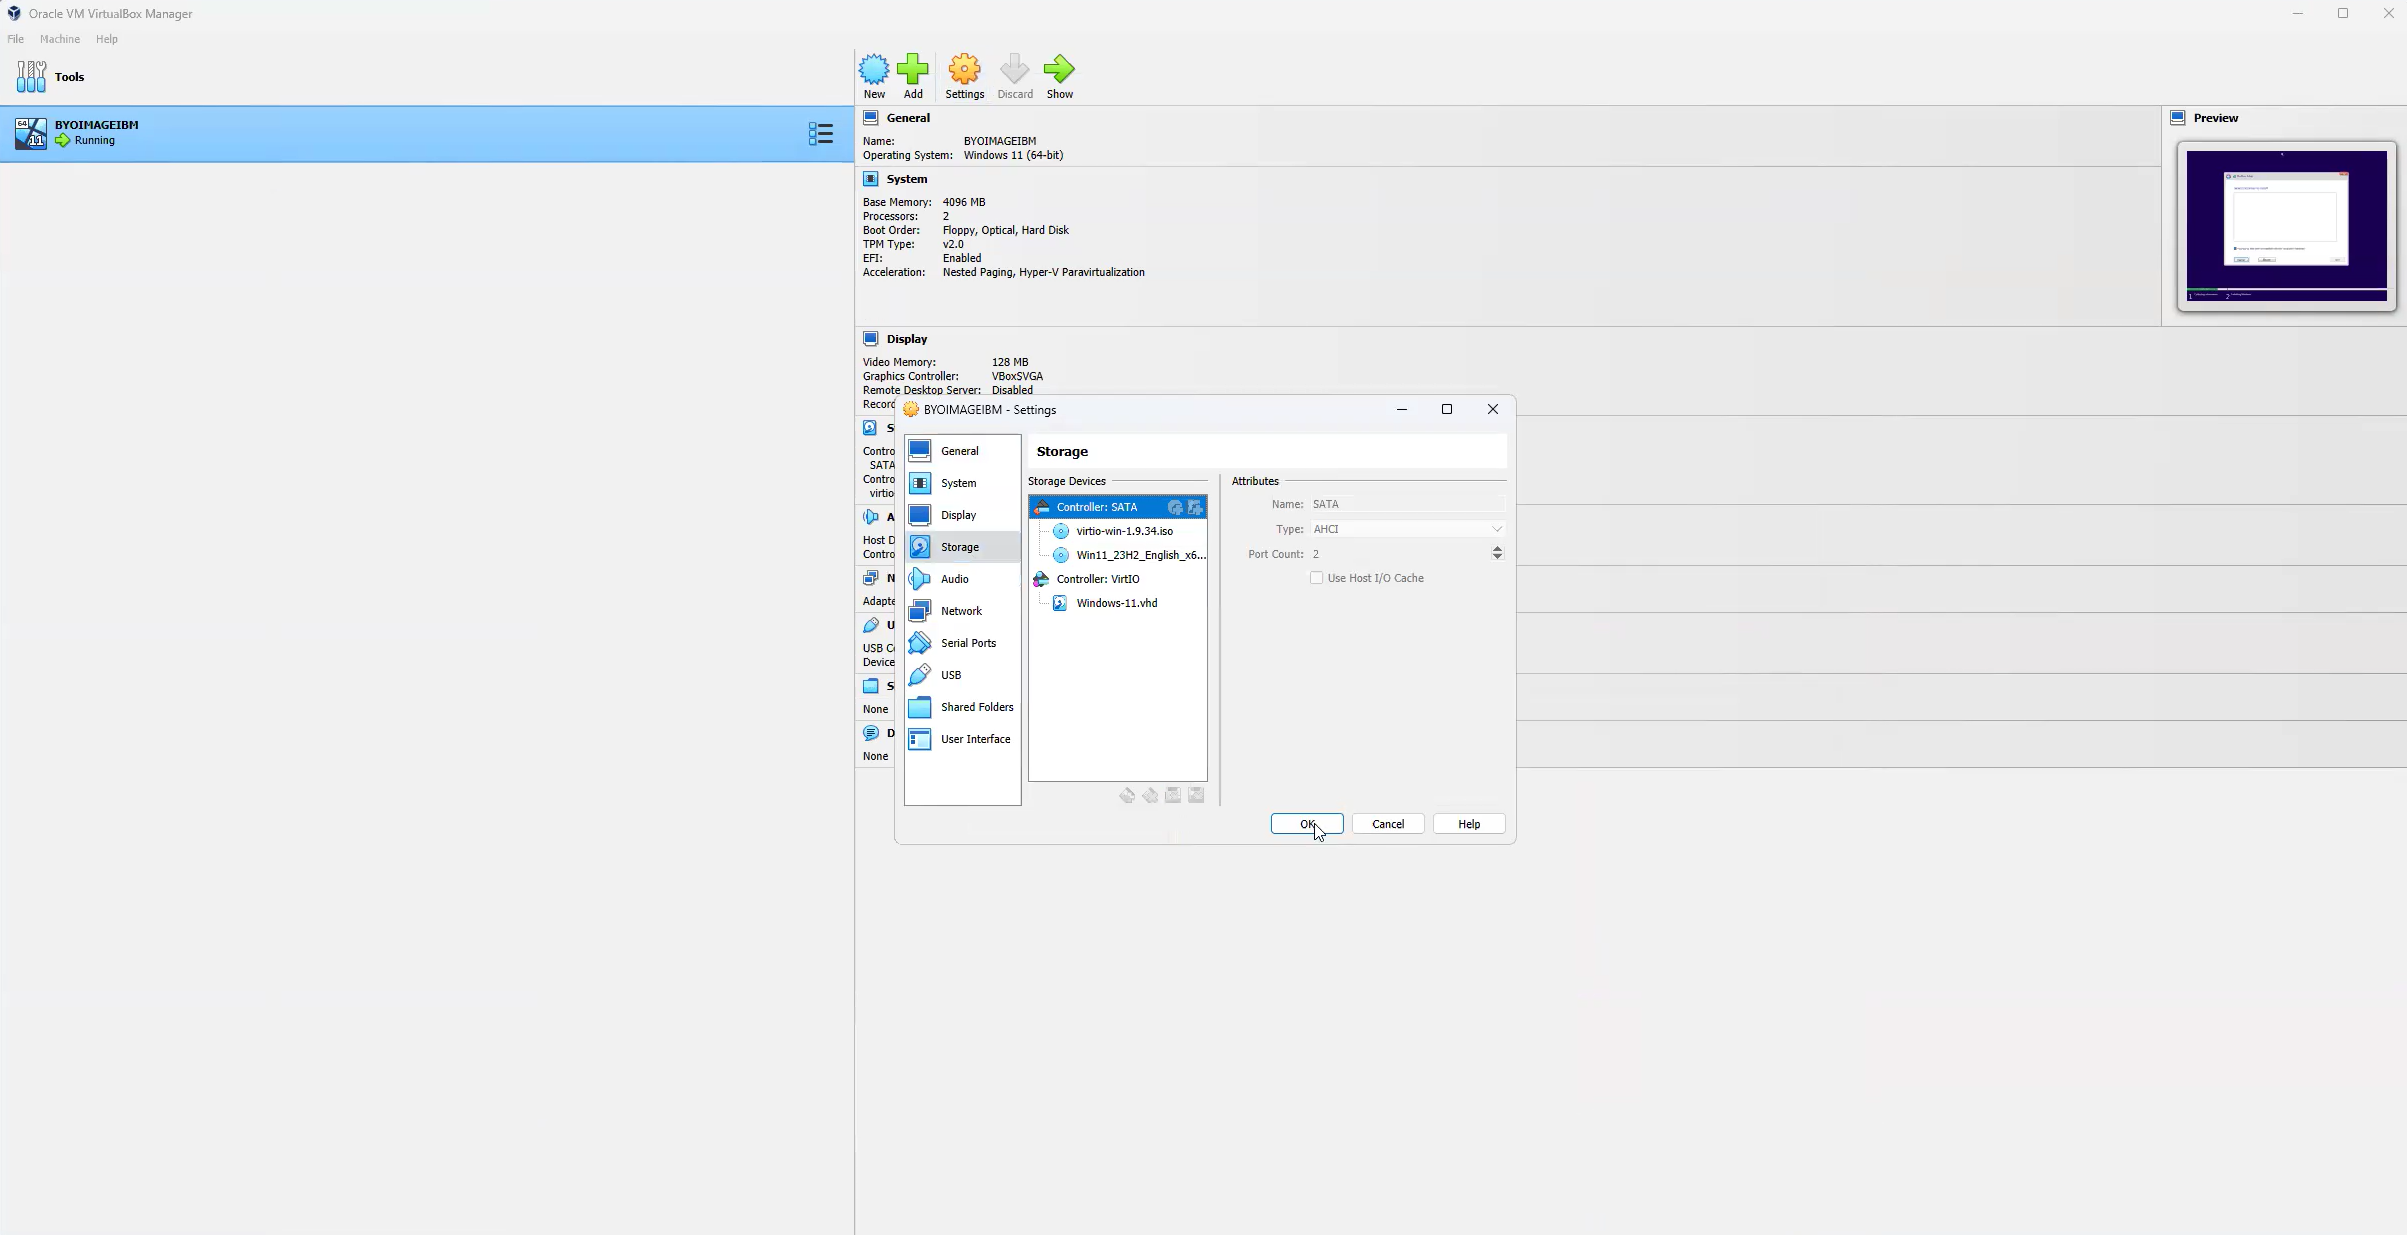
VirtualBox - Create the VM f. Select newly created VM and select Settings. Click on Storage and add virtio-scsi controller.

VirtualBox - Add the virtio-scsi Controller 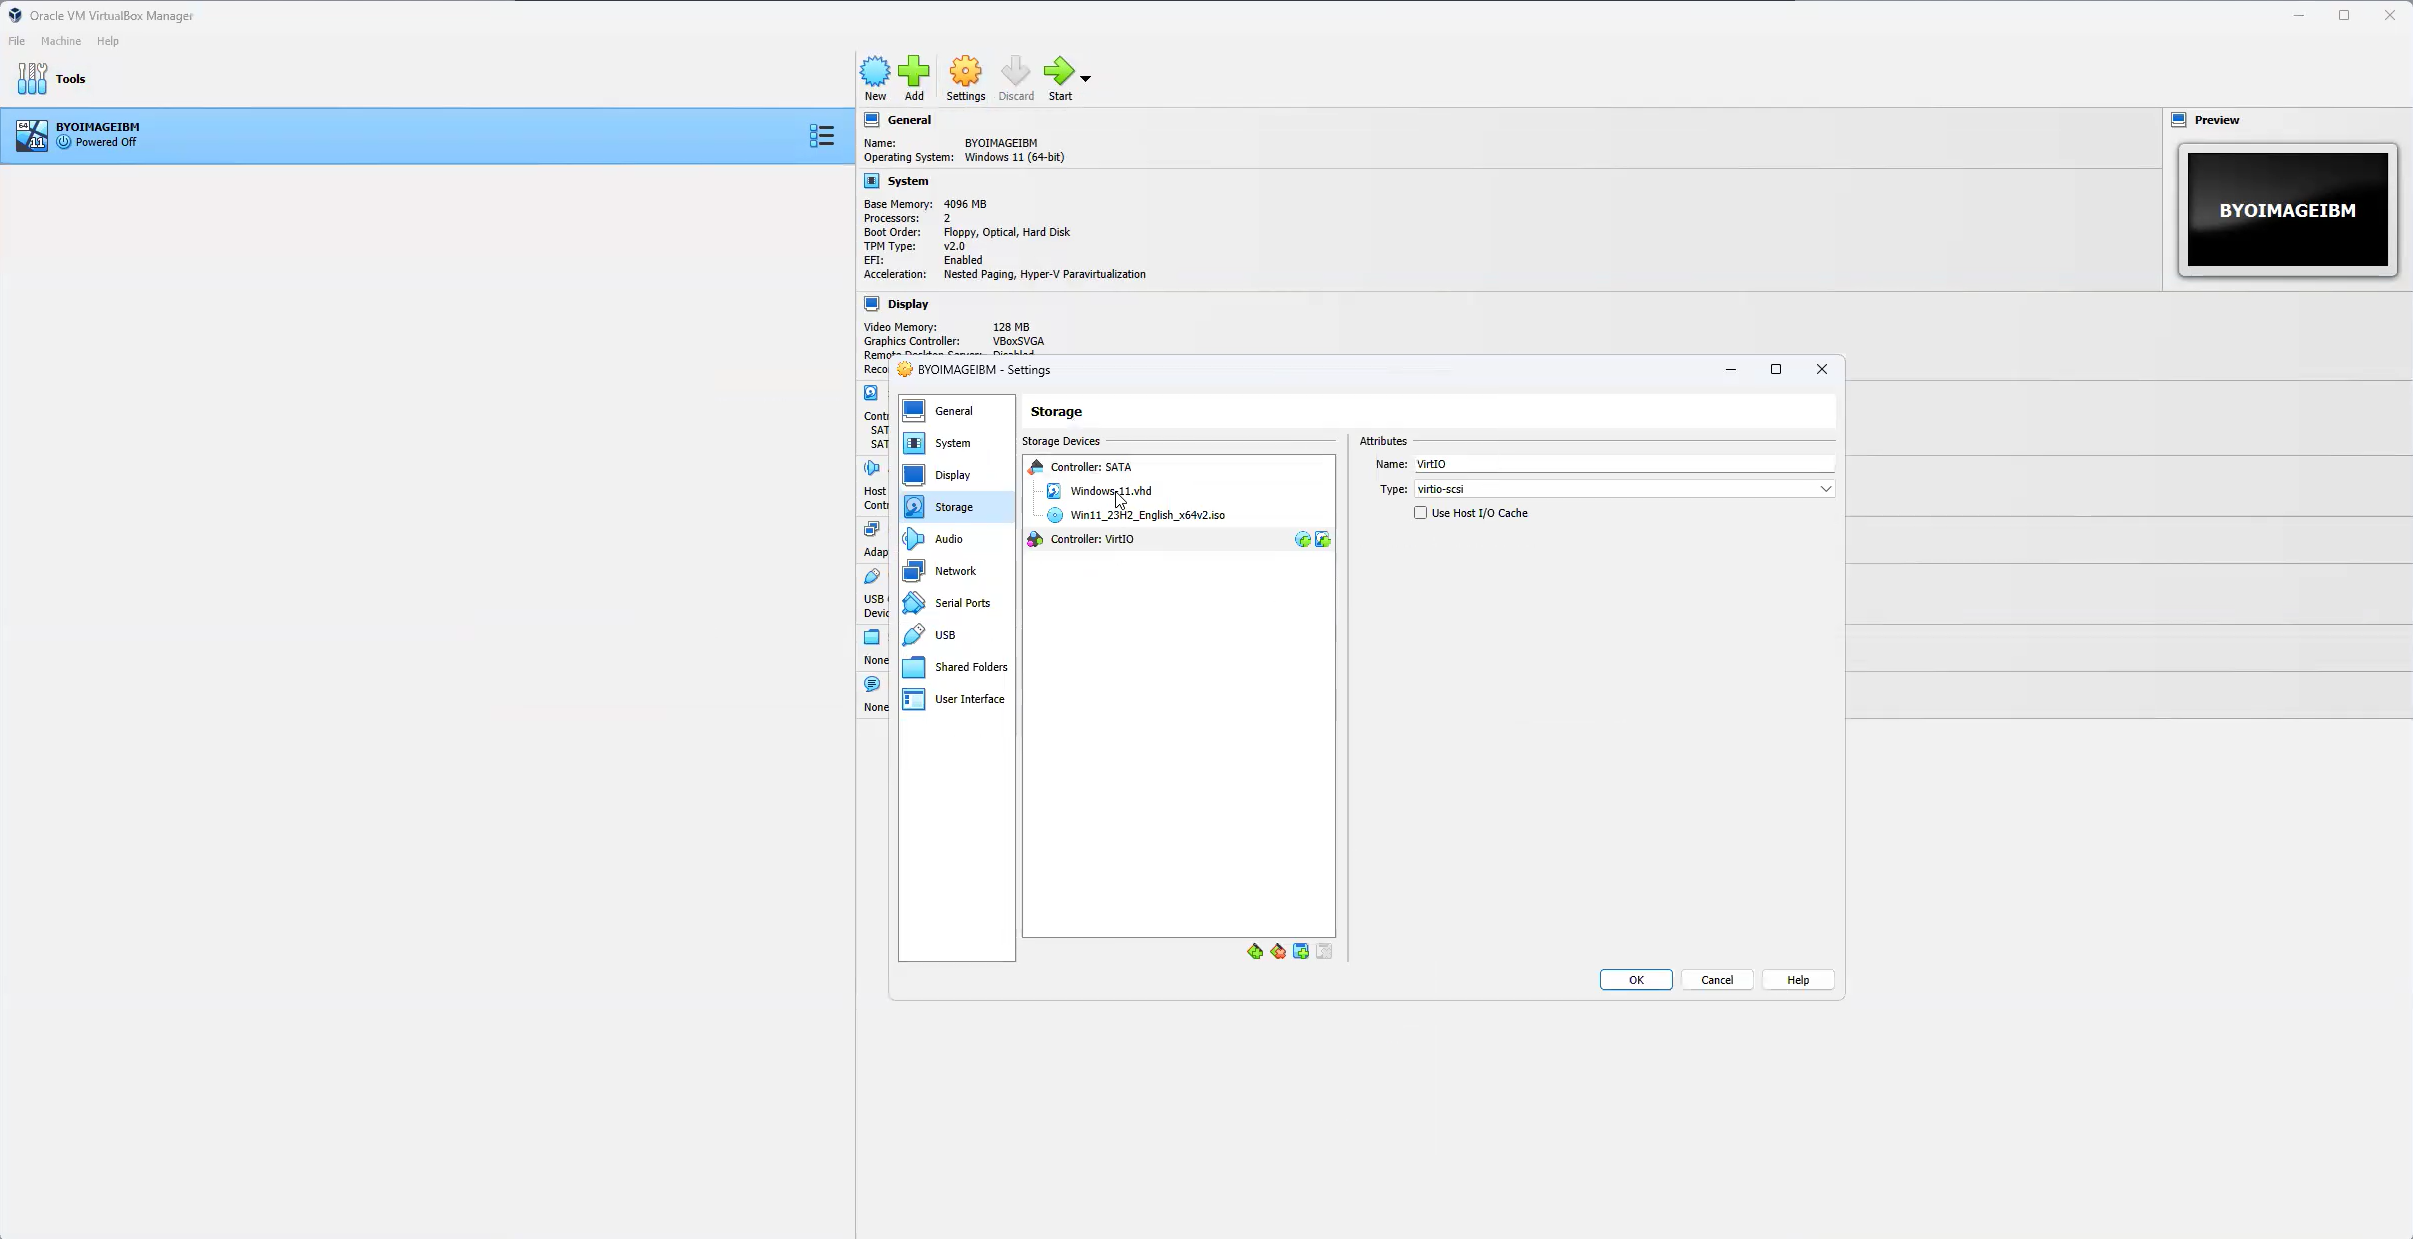
VirtualBox - Virtio-scsi Controller Added g. Left click the Windows OS .vhd disk and drag and drop the disk on the virtio-scsi controller. Click OK to continue.

VirtualBox - Associate VHD with SCSI Controller 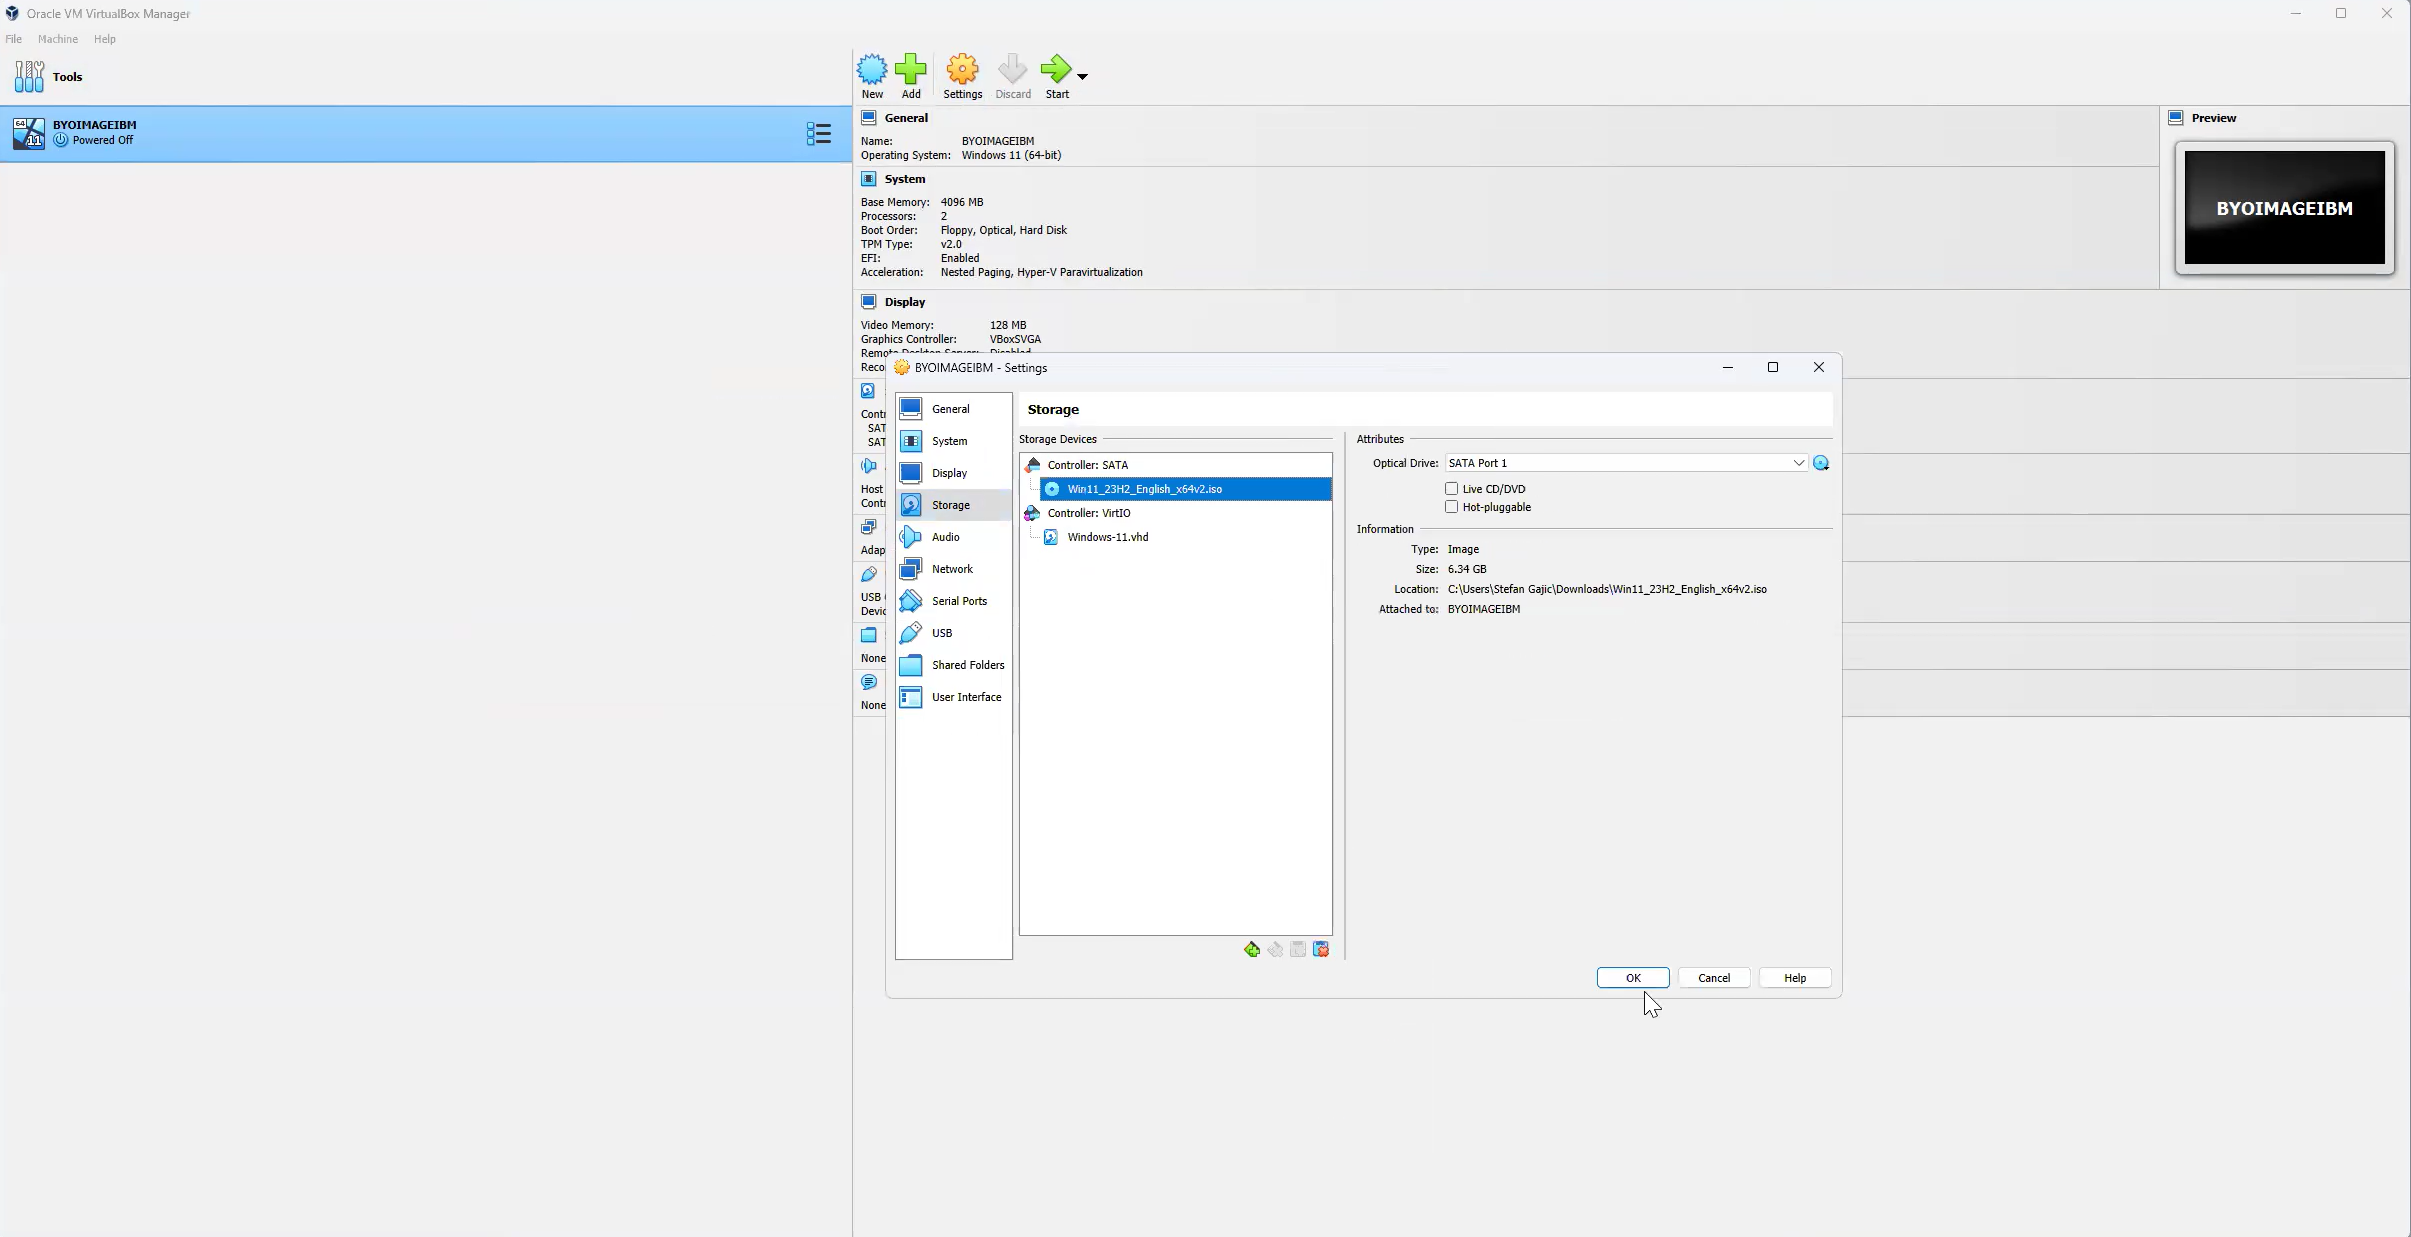
VirtualBox - VHD Attached to SCSI Controller
Windows Out of Box Experience (OOBE)
The following section only highlights the relevant steps of the Windows Out of Box Experience (OOBE).
-
Start the VM and go through the operating system installation process. Press any key to boot from .vhd and go through the OOBE workflow.
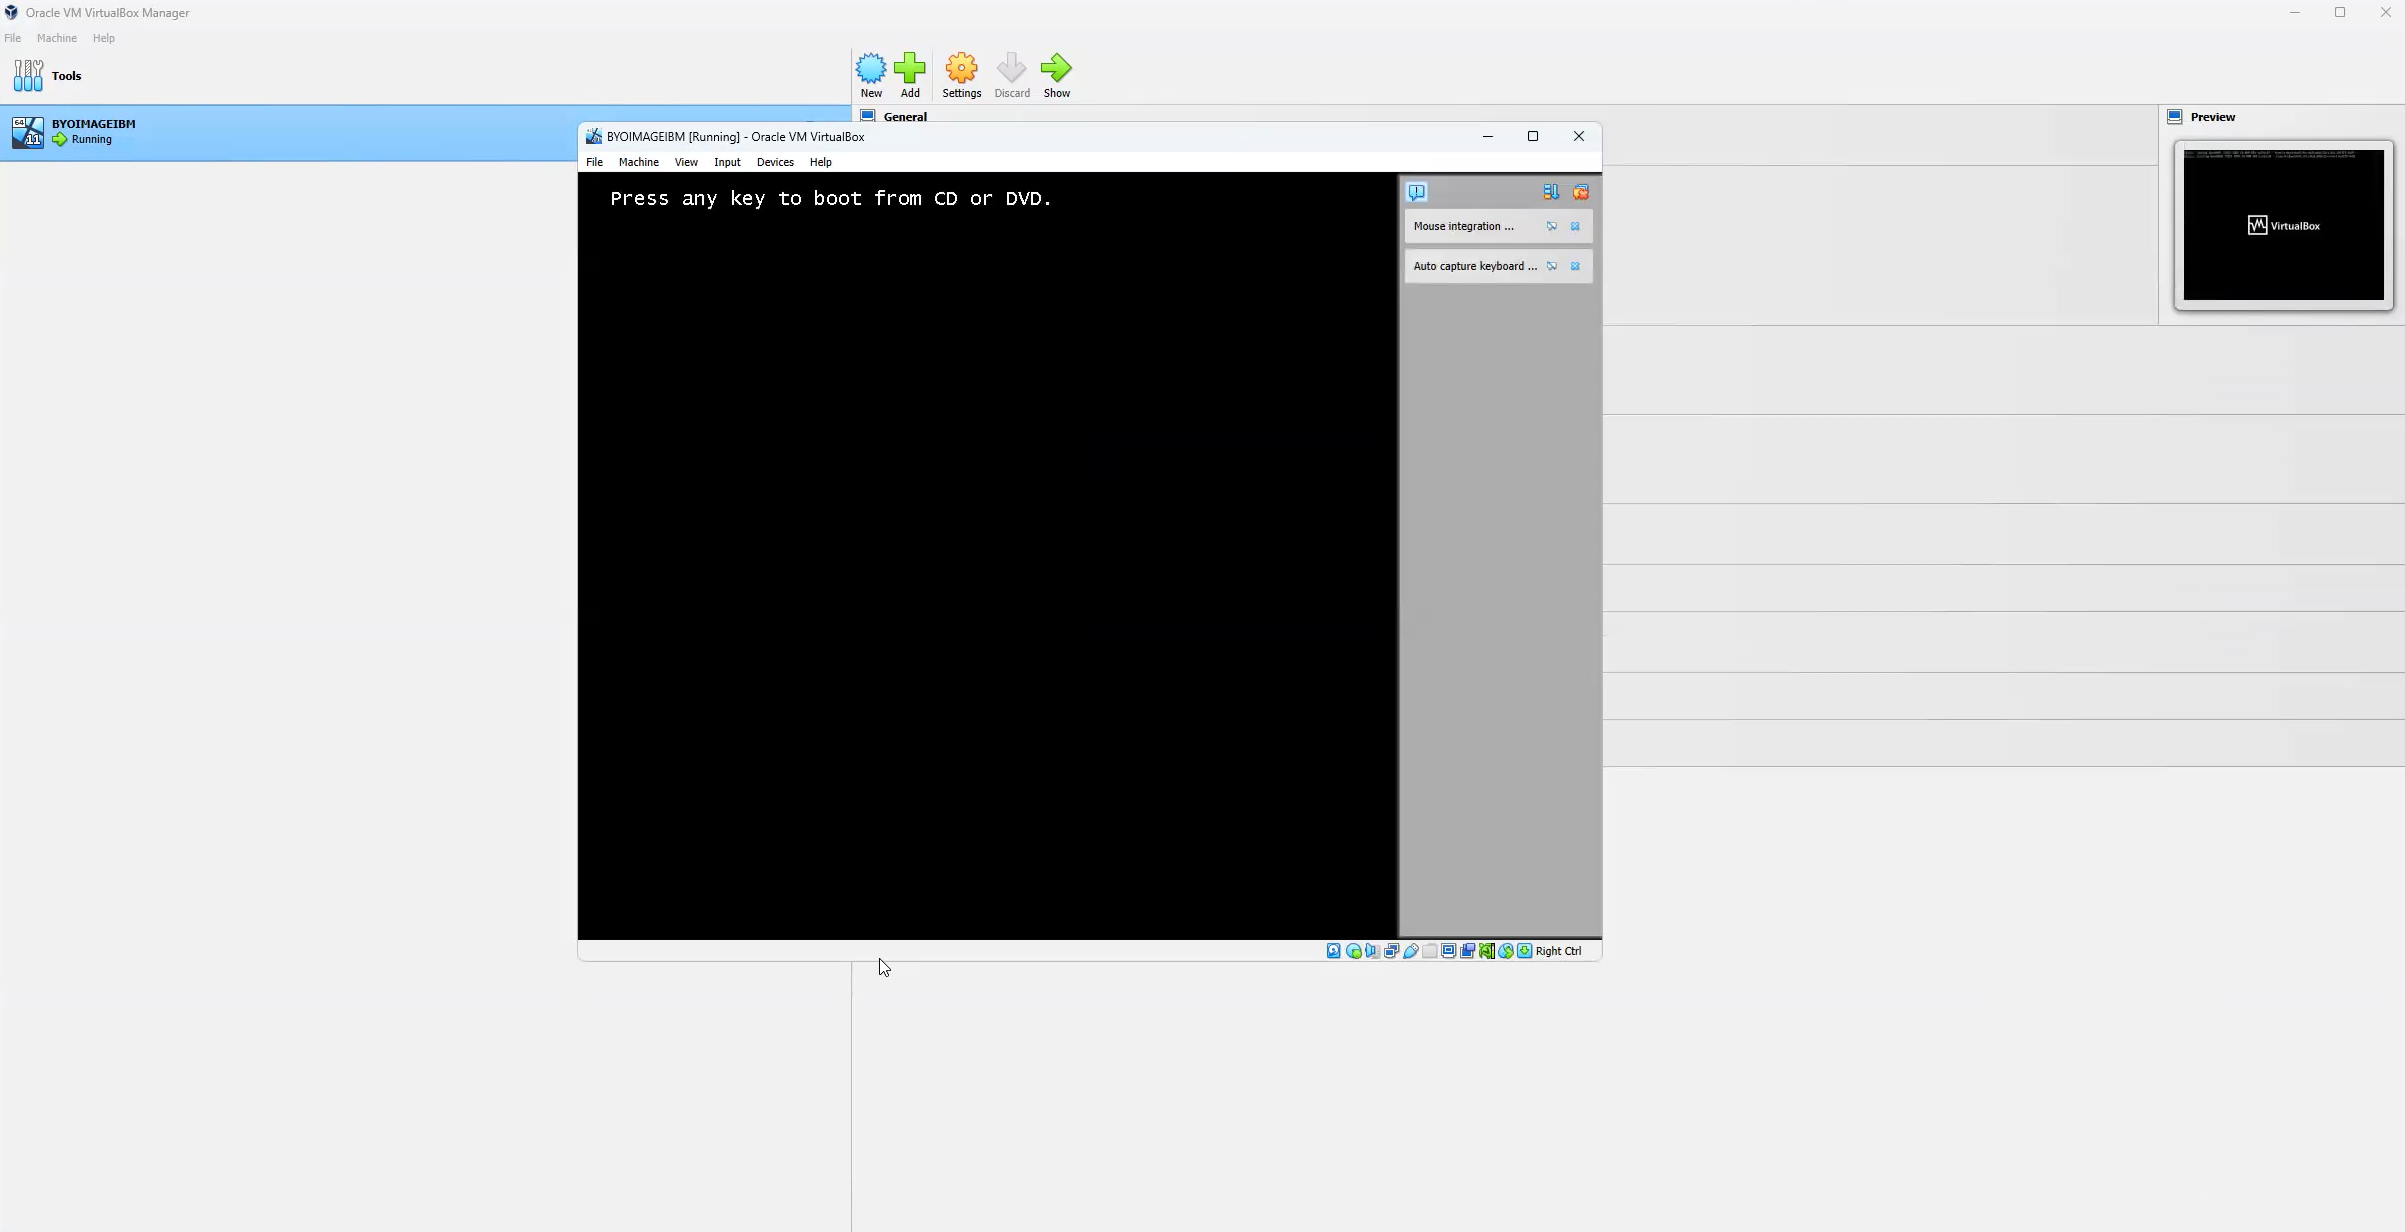
VirtualBox - Boot VM -
Choose the Windows OS Version.
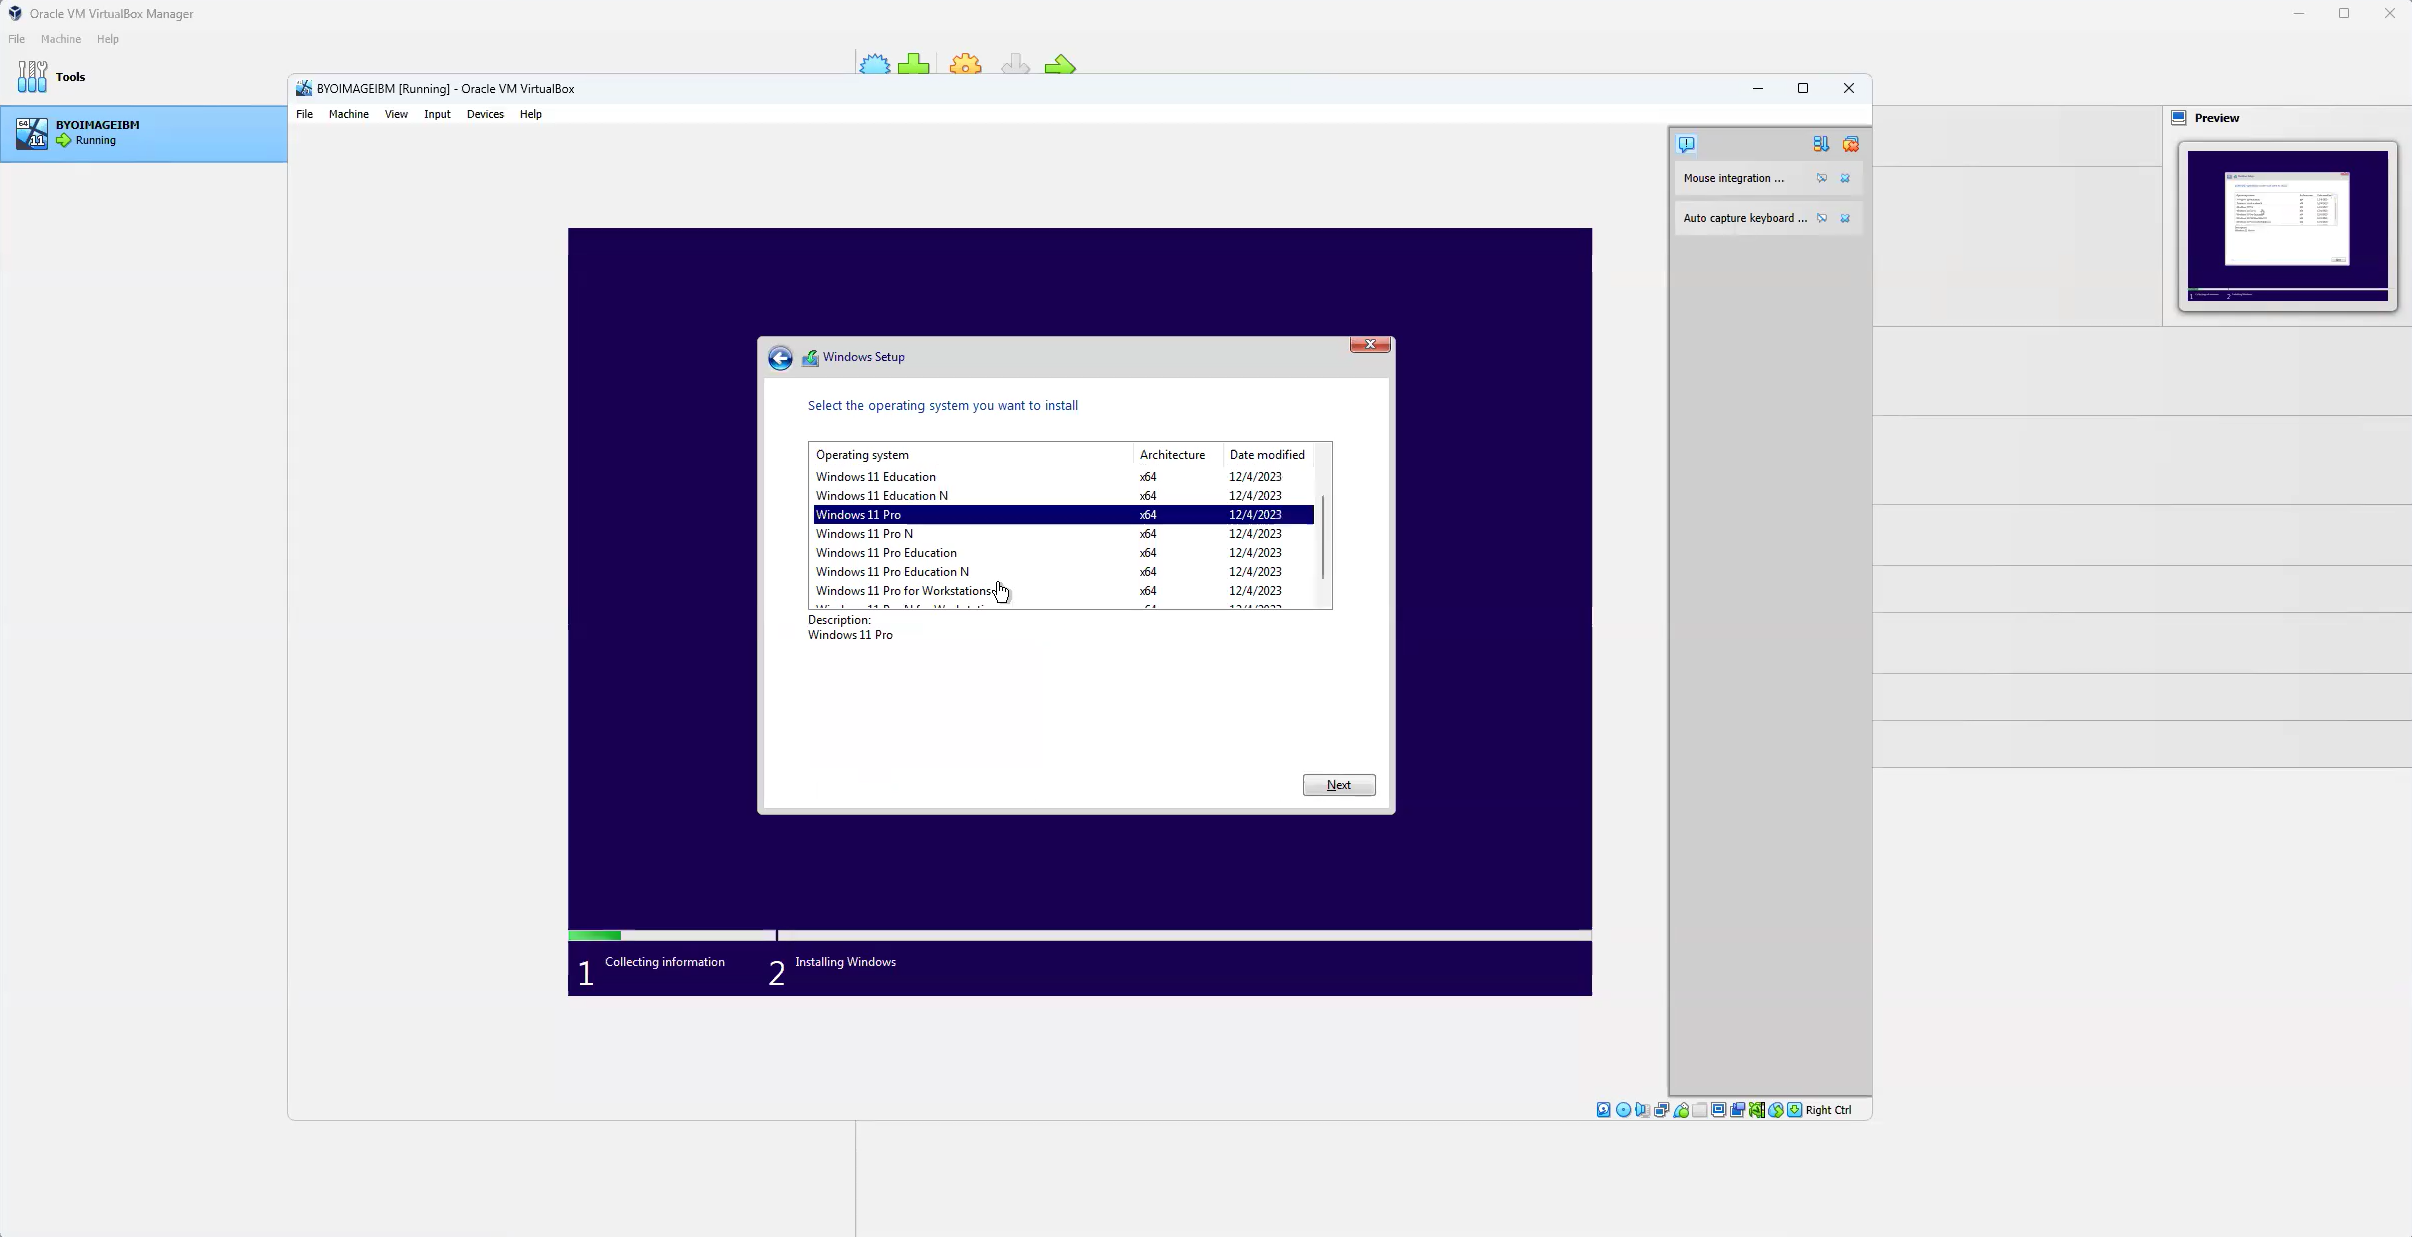
VirtualBox - Select Windows OS Edition -
Accept licensing and when you reach the "Which type of installation do you want?" screen, select the Custom: Install Windows only (advanced) option.
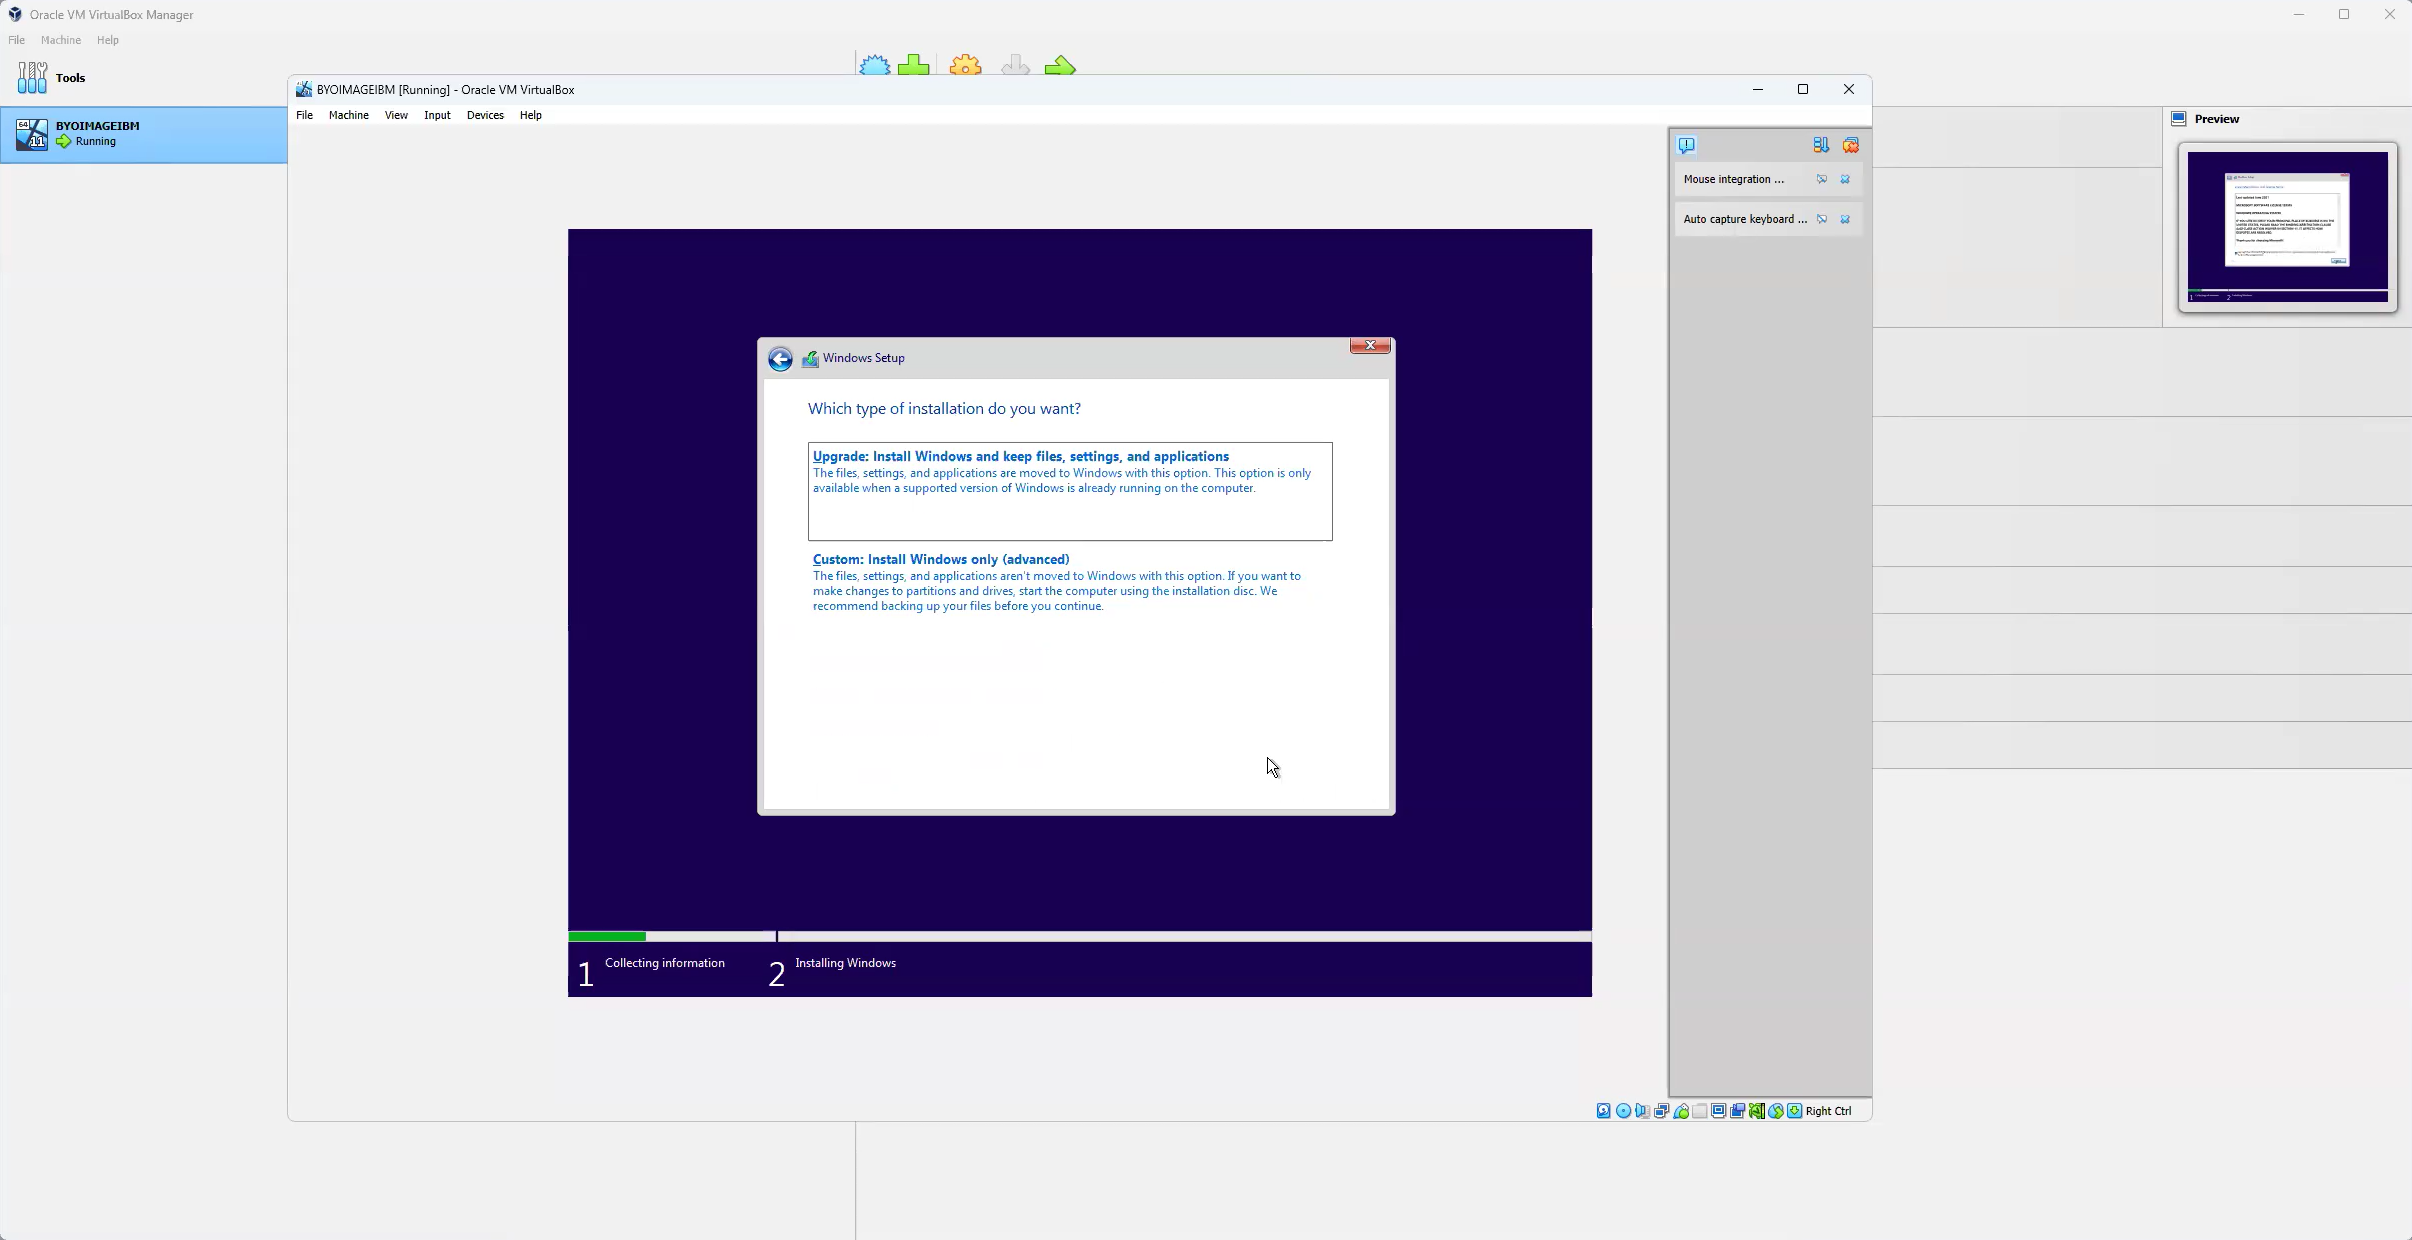
VirtualBox - Installation Type -
Go back to Oracle VirtualBox, select your VM, open Settings, select Storage, and mount a CD-ROM.

VirtualBox - Mount CD-ROM -
Select the Virtio ISO and click Choose.
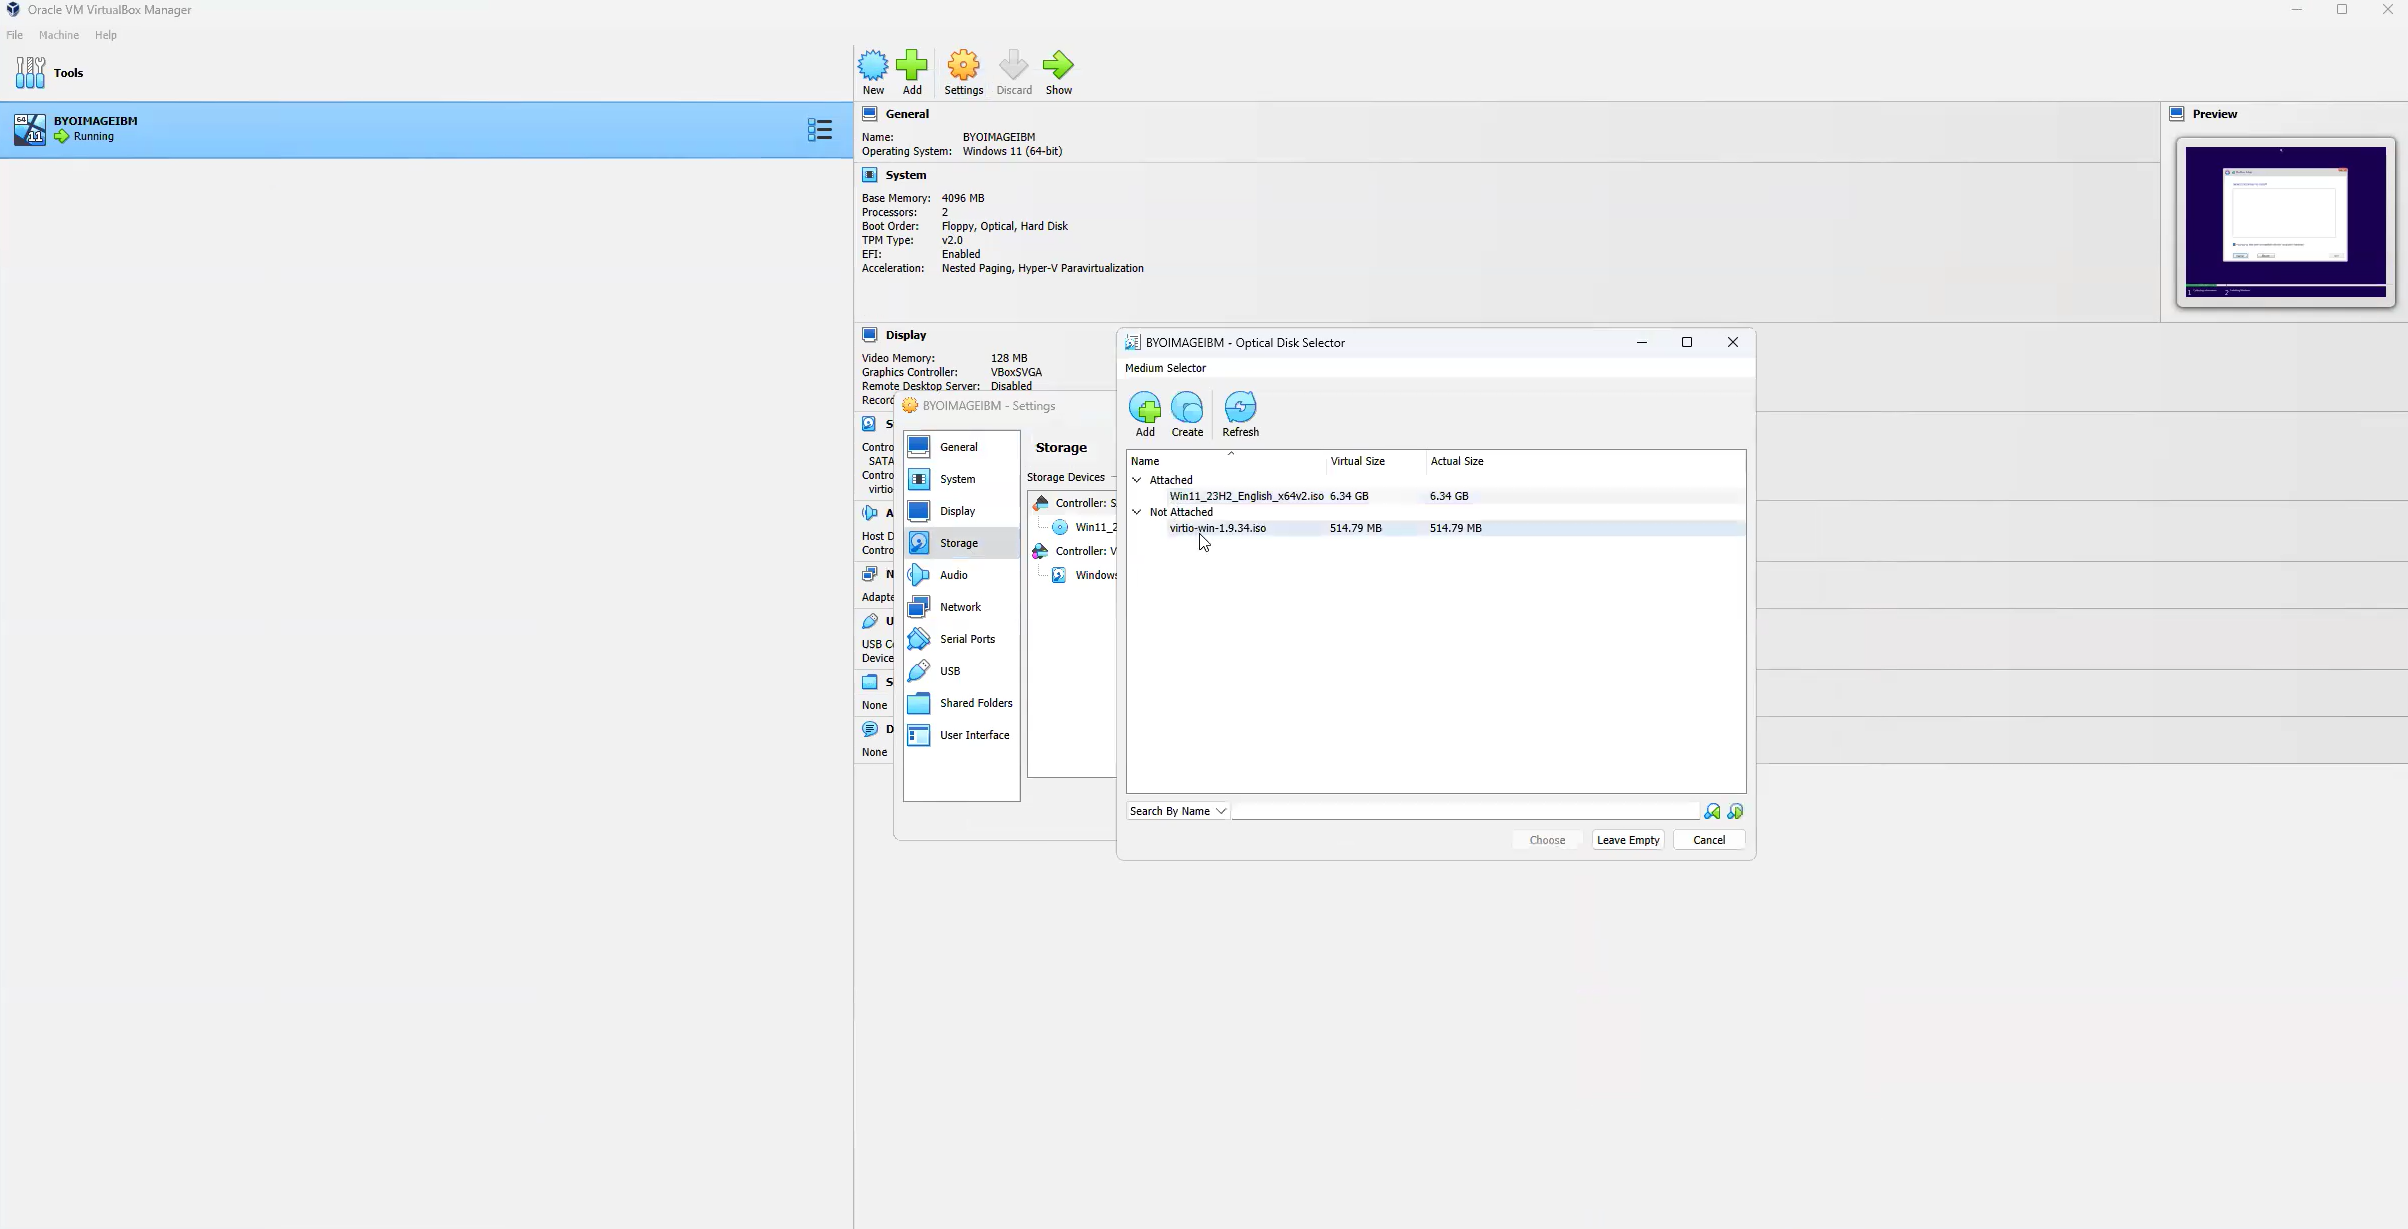
VirtualBox - Select Virtio ISO -
The virtio-win ISO should now be listed under the "Controller: SATA". Click OK to continue.
VirtualBox - Virtio and Windows OS ISOs -
Go back to the Windows installation window and click on Load drivers, browse and select virtio, amd64, and then win 11. If you are installing Windows 10, select the same folder. Click OK to continue.
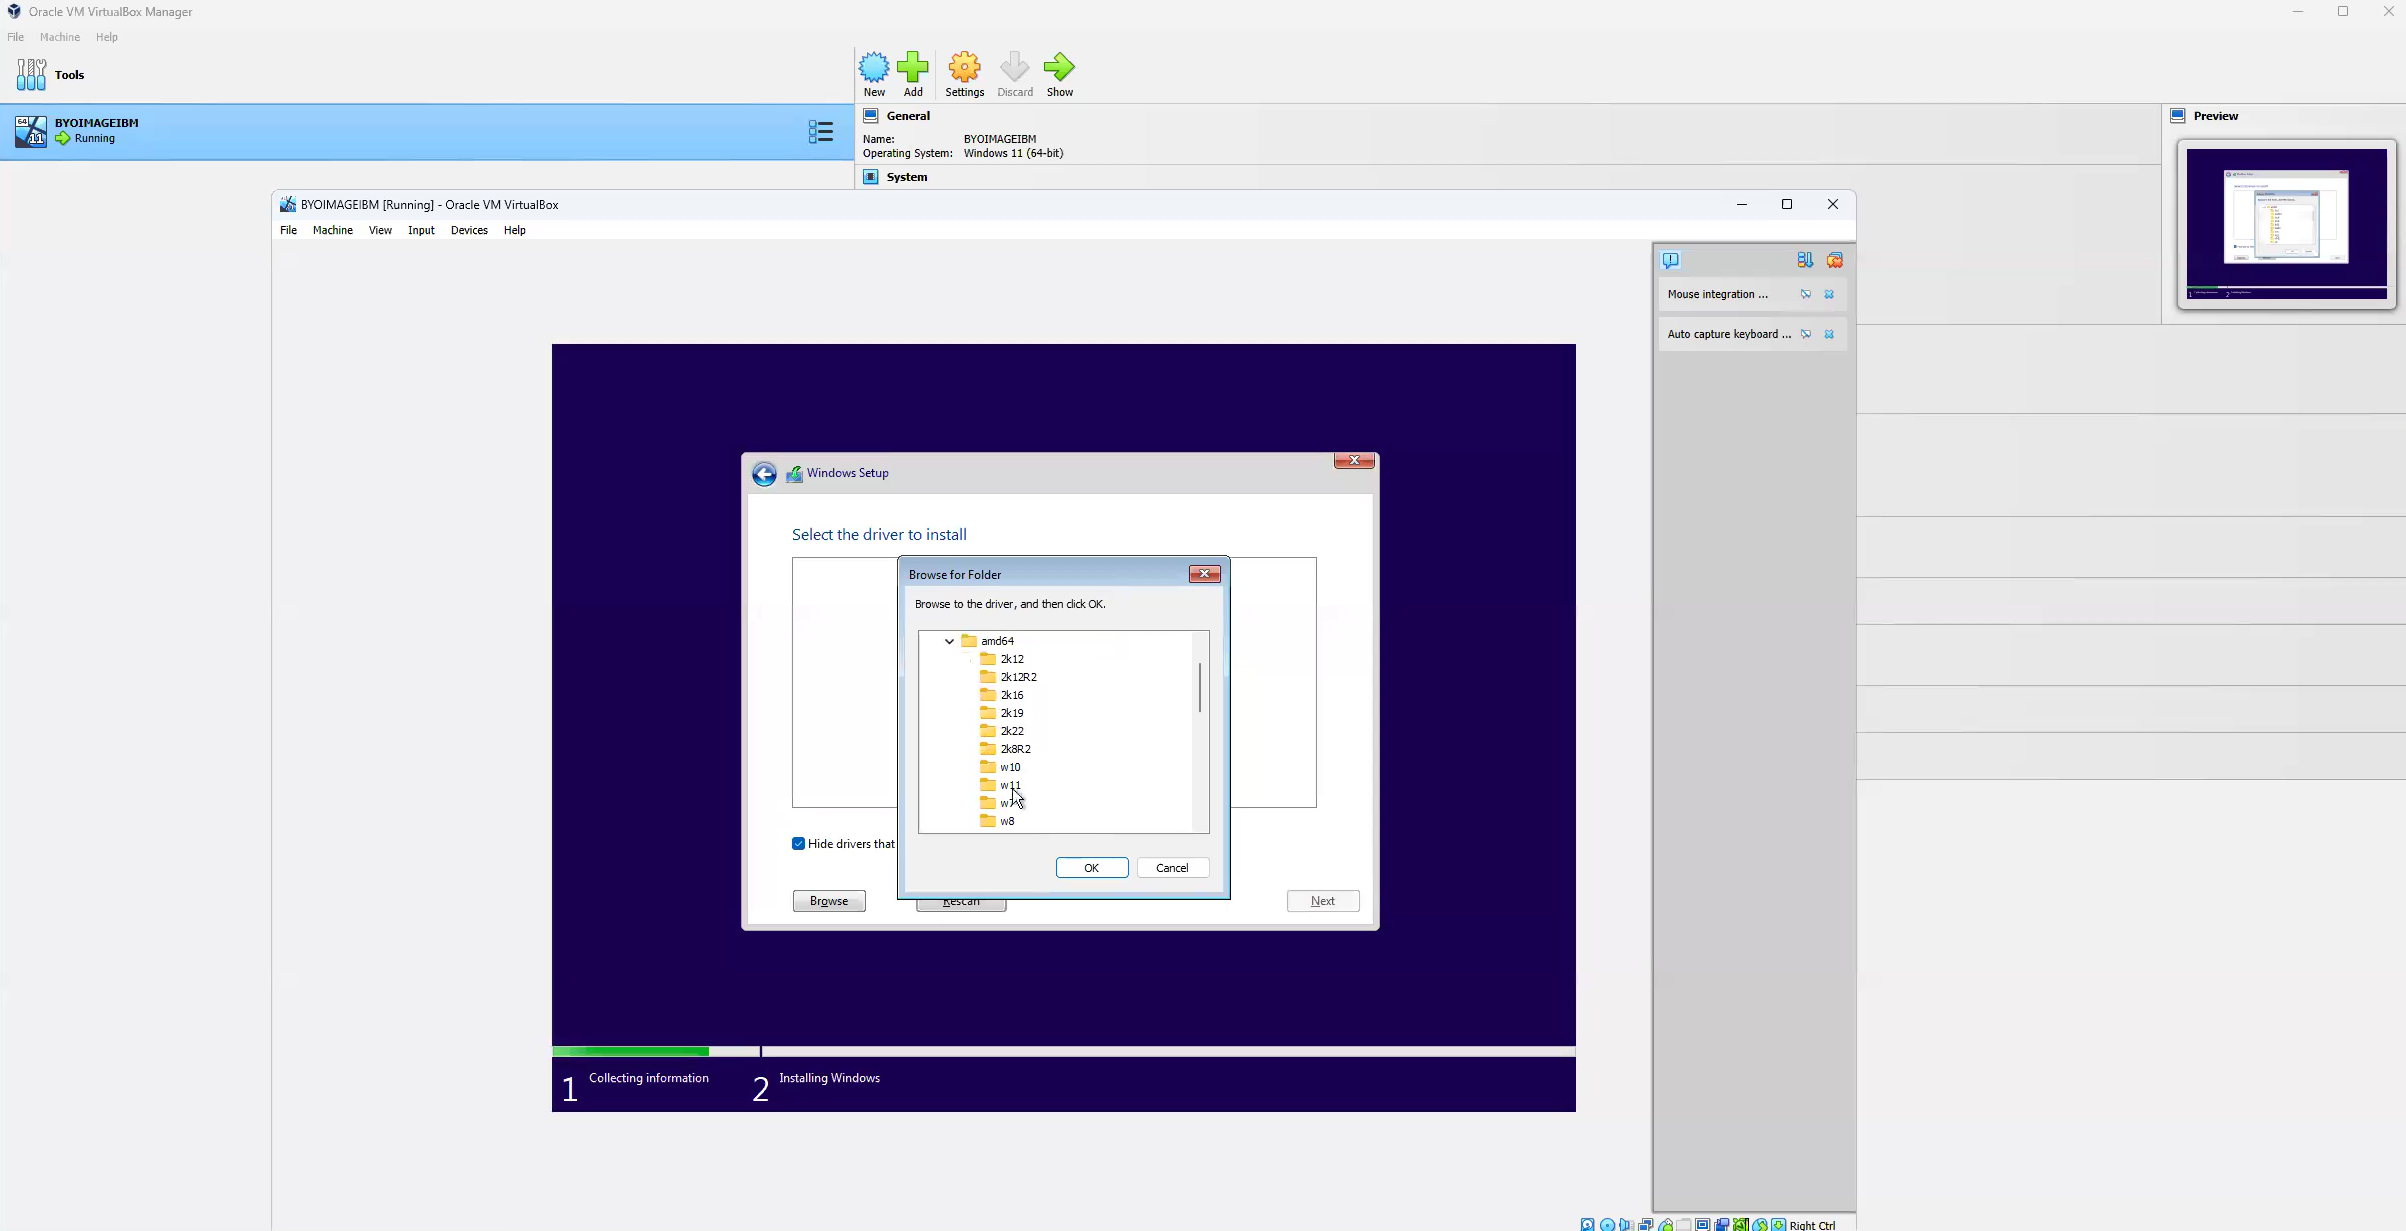
VirtualBox - Select Virtio Driver Location 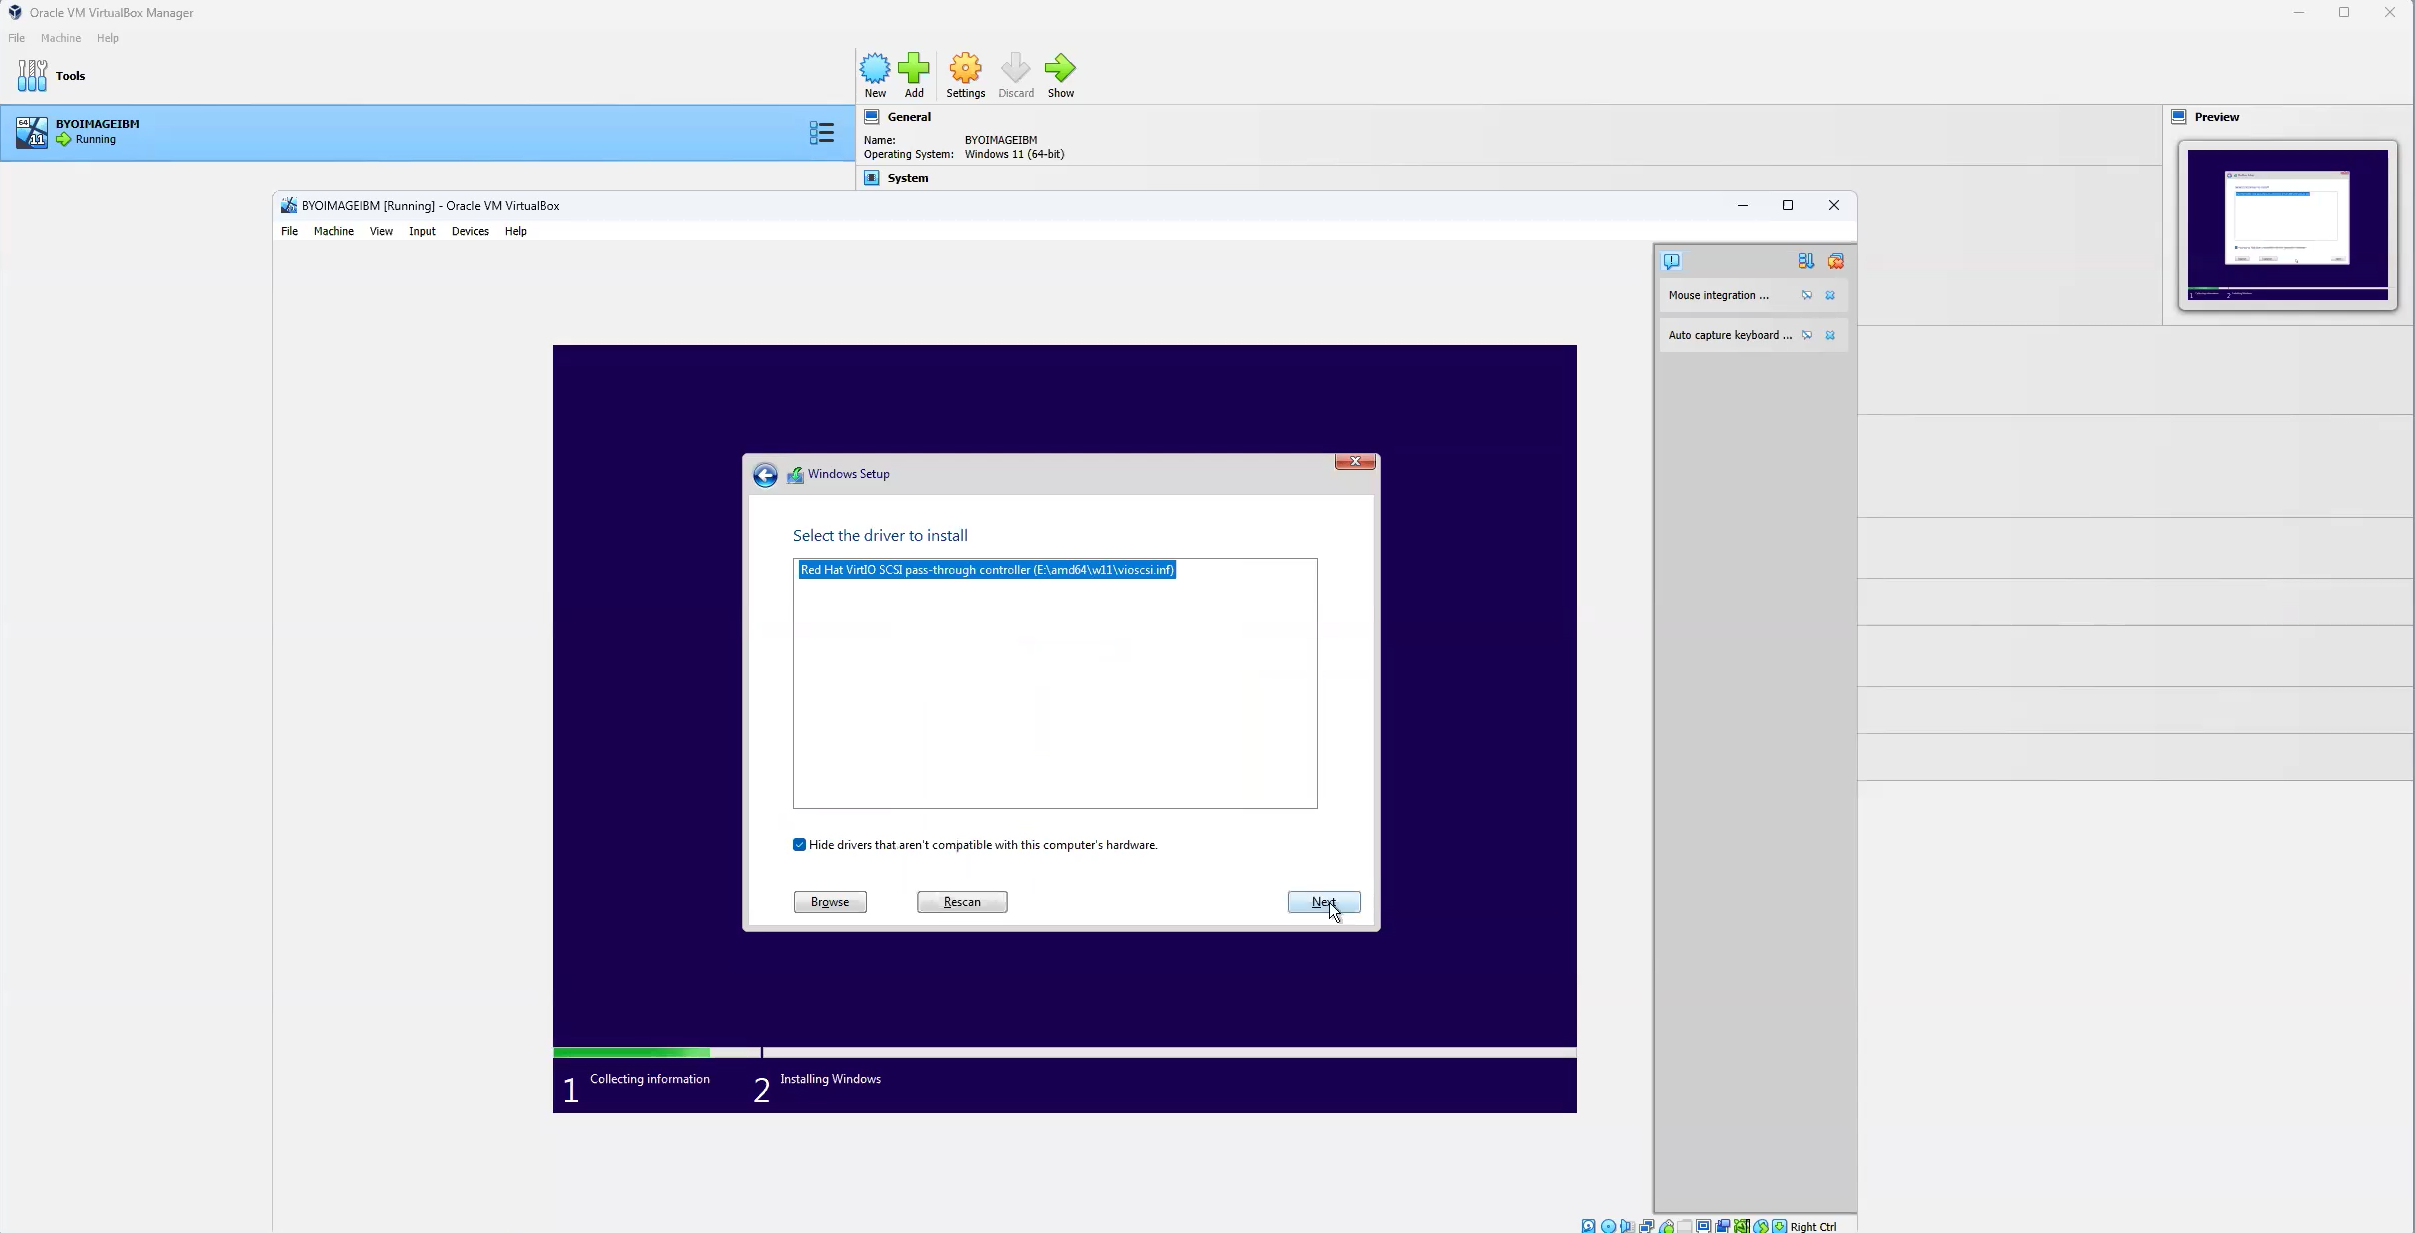
VirtualBox - Select Driver to Install -
Select the newly added disk where you will install your Windows OS and click Next.

VirtualBox - Select Disk to Install OS -
After this step, Windows installation will start. Once the Windows installation is complete, you will have to go through the Windows Out of Box Experience (OOBE) by customizing Region, Language, Keyboard(s), etc. Do not sign in into your online user account. Create a local Windows administrator account and save the username and the password. You will need this local Windows administrator account next.
Configure Windows OS
-
Once the OOBE is done, power on the VM and login using your local Windows administrator account.
-
Install the virtio drivers. The virtio ISO should still be mounted on your VM. Go to File Explorer, open the CD-ROM Drive with virtio ISO.
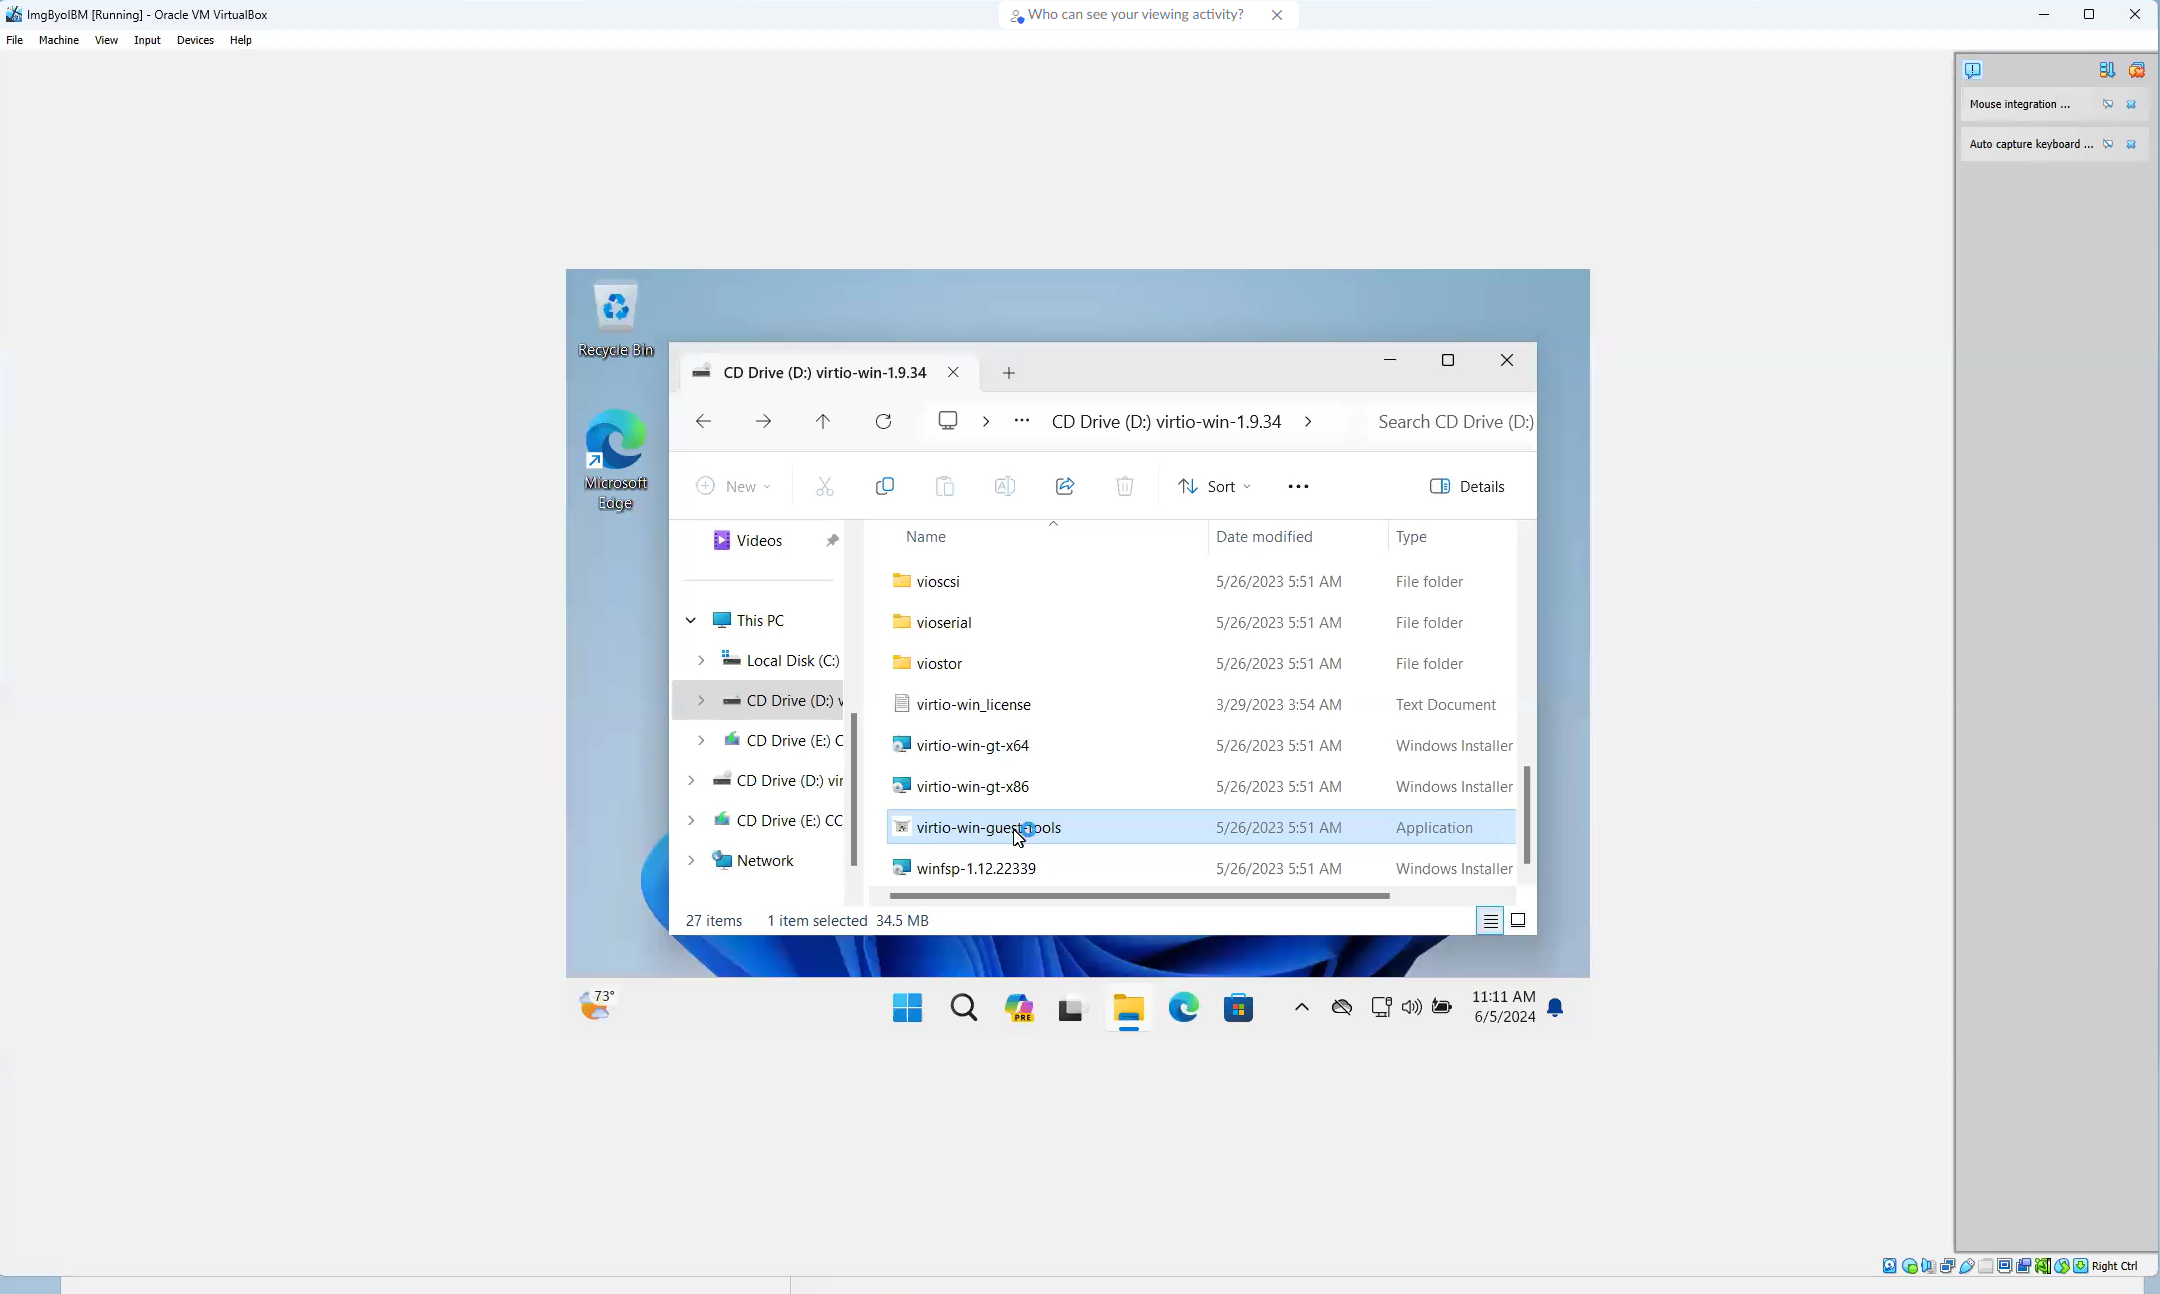
Open CD-ROM -
Start virtio-win-guest-tools.exe application and follow the wizard without any changes.
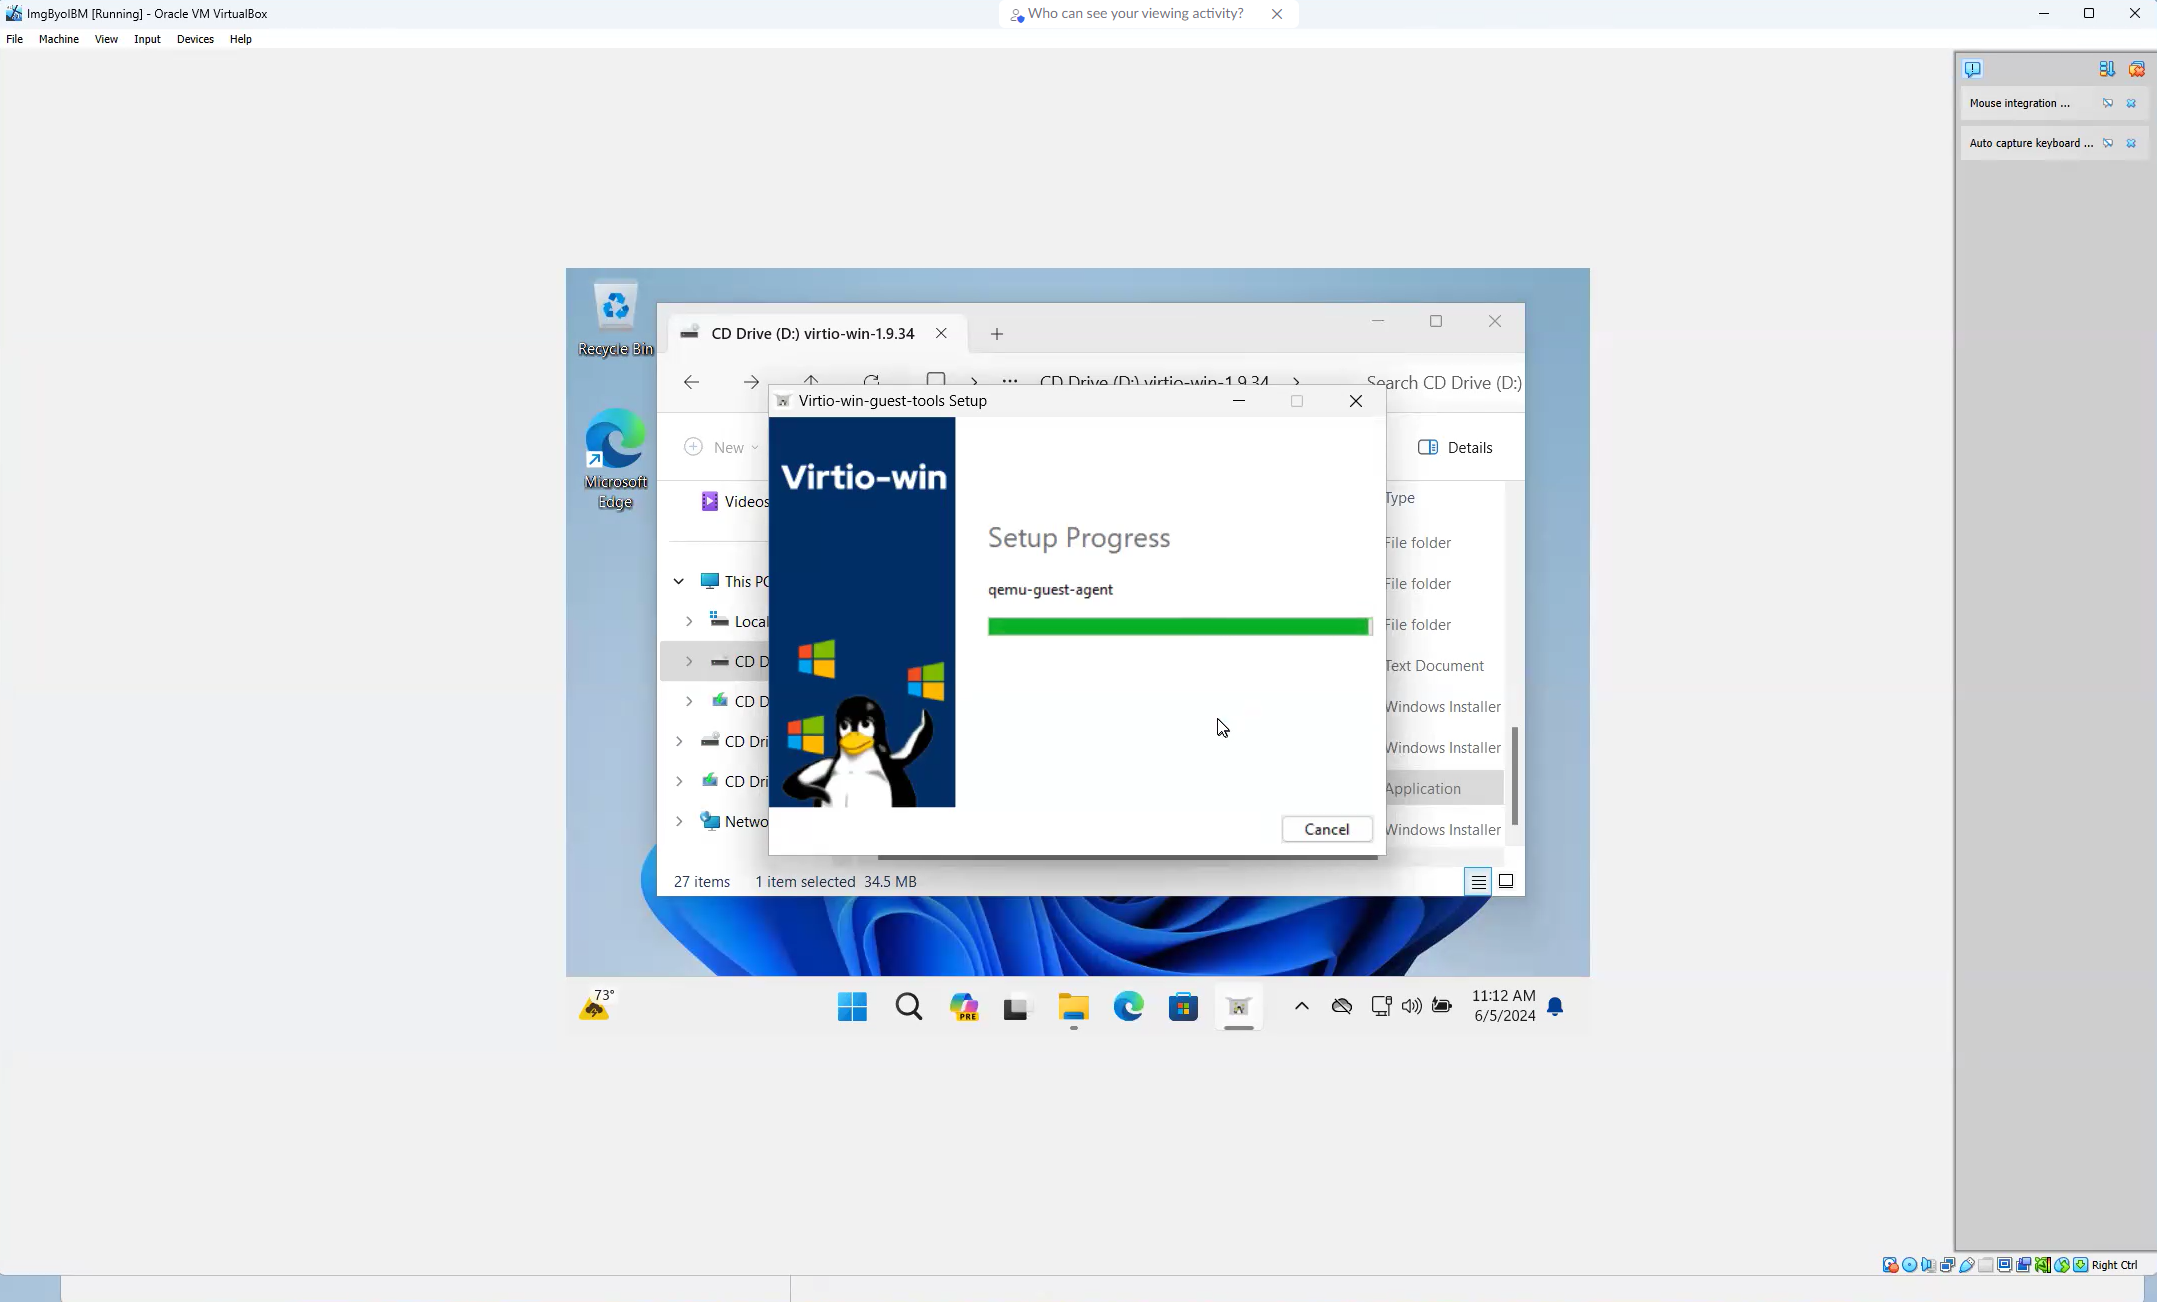
Installing Virtio -
Open the browser and go to Customizing a virtual server and follow steps 1, 2 and 3 only.
a. Download and install Cloudbase-Init.
b. Modify the
cloudbase-init.confandcloudbase-init-unattend.confconfiguration files as explained in the IBM Cloud documentation page. Please be careful as any mistake in modifying the configuration file will result in problems when configuring your image. -
Next, remove the Windows recovery partition on VM as you may need to extend the disk to increase disk capacity in the future. If the recovery partition exists, follow the steps to remove the recovery partition.
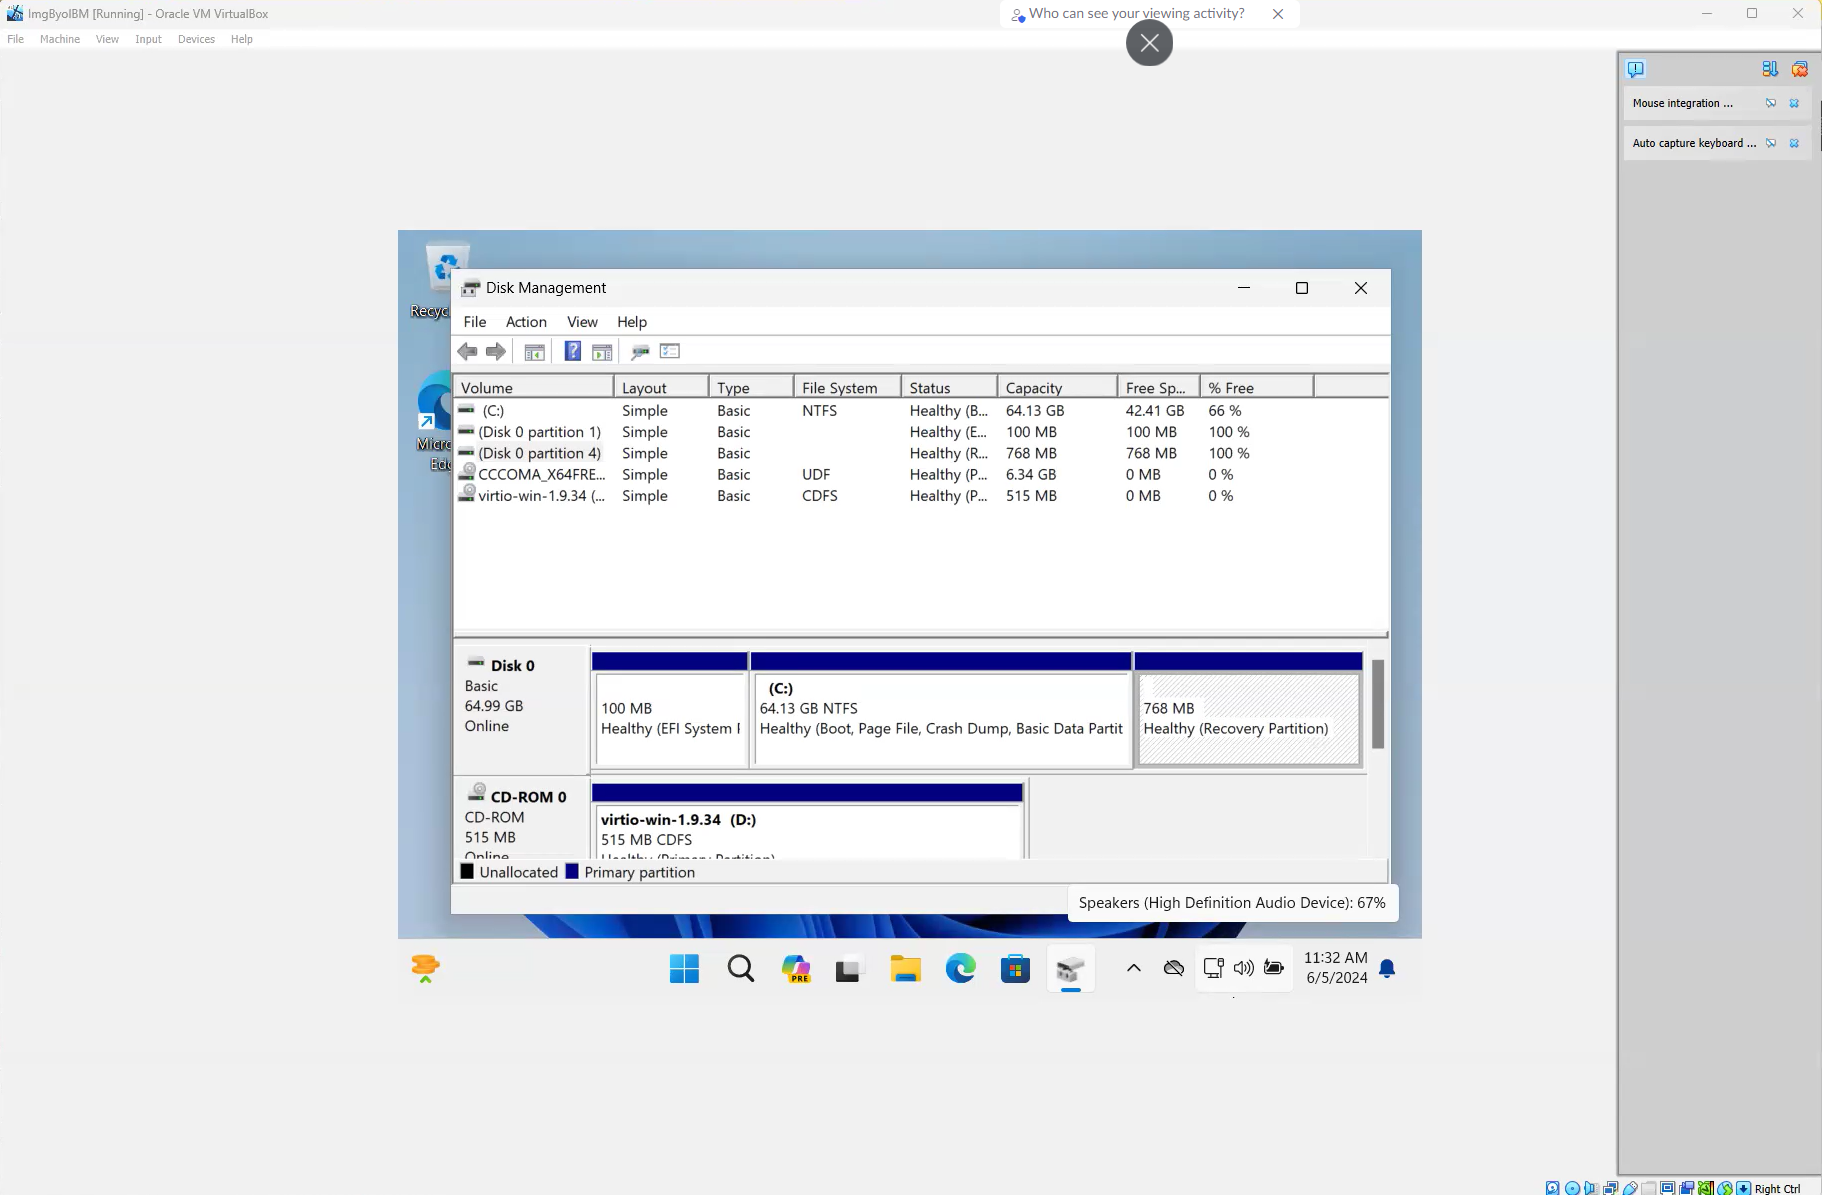
Disk Management - Recovery Partition -
Open Windows cmd.exe as administrator and type
reagentc /info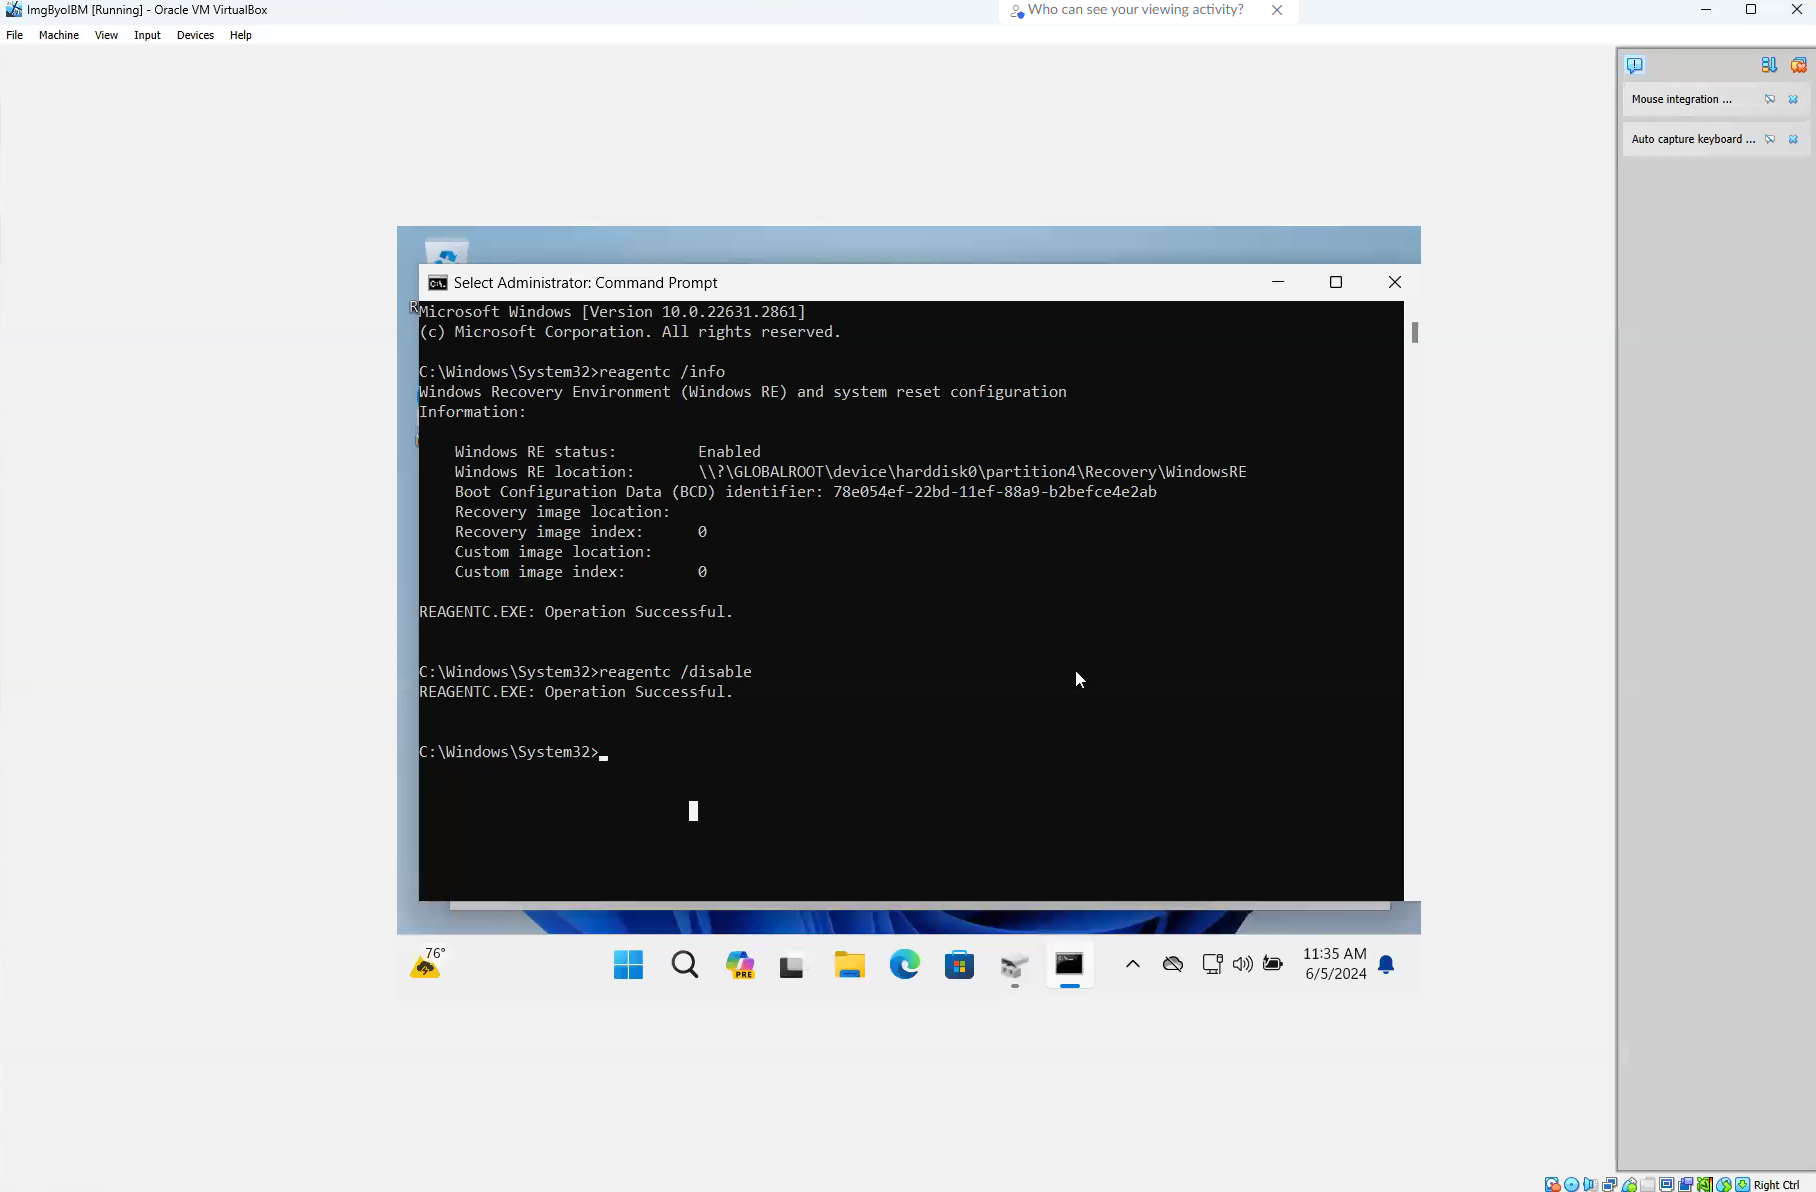
Disk Management - reagentc -
Next, enter
reagentc /disableto lock the agent and allow removal of recovery partition.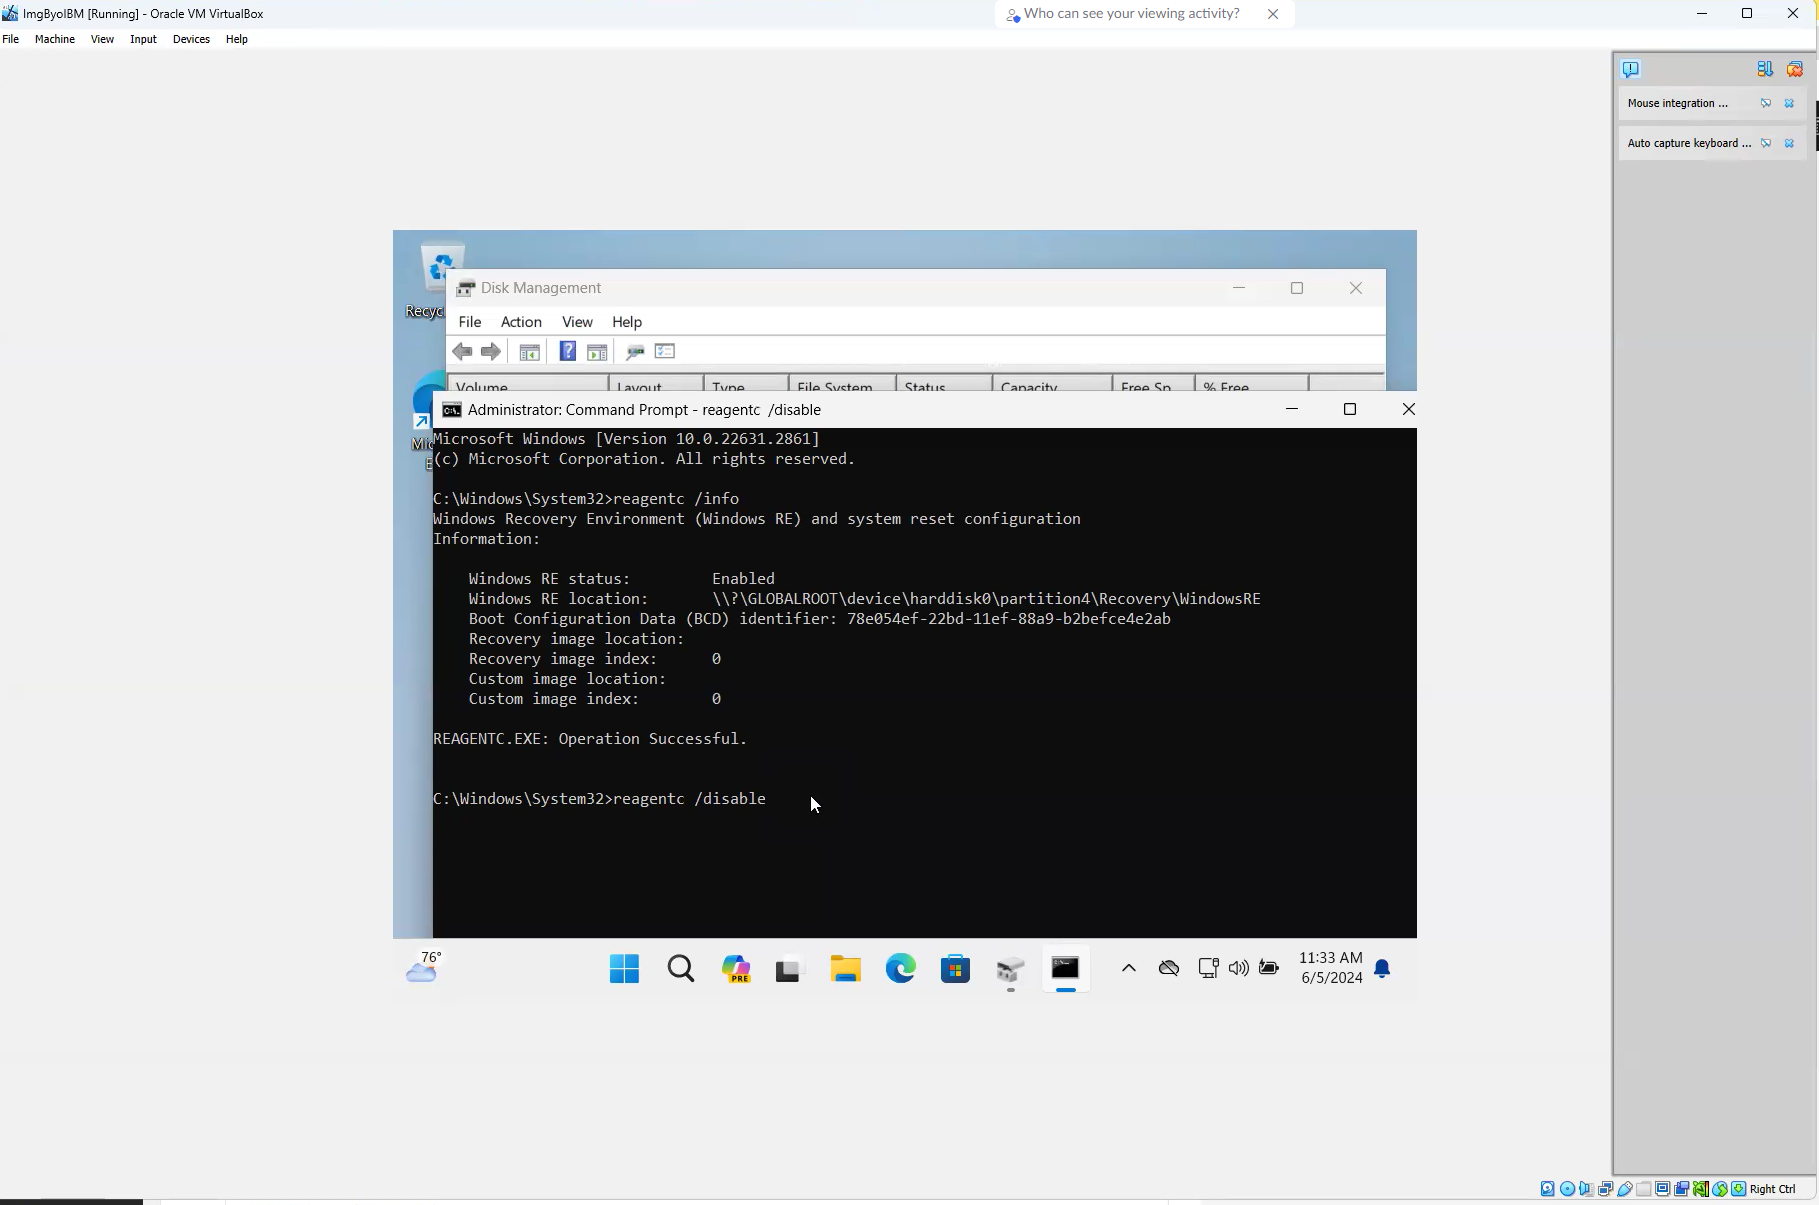
Disk Management - reagentc /disable -
Then execute:
diskpart
list disk
select disk 0
list partition
In the example below, the recovery partition is partition #4.
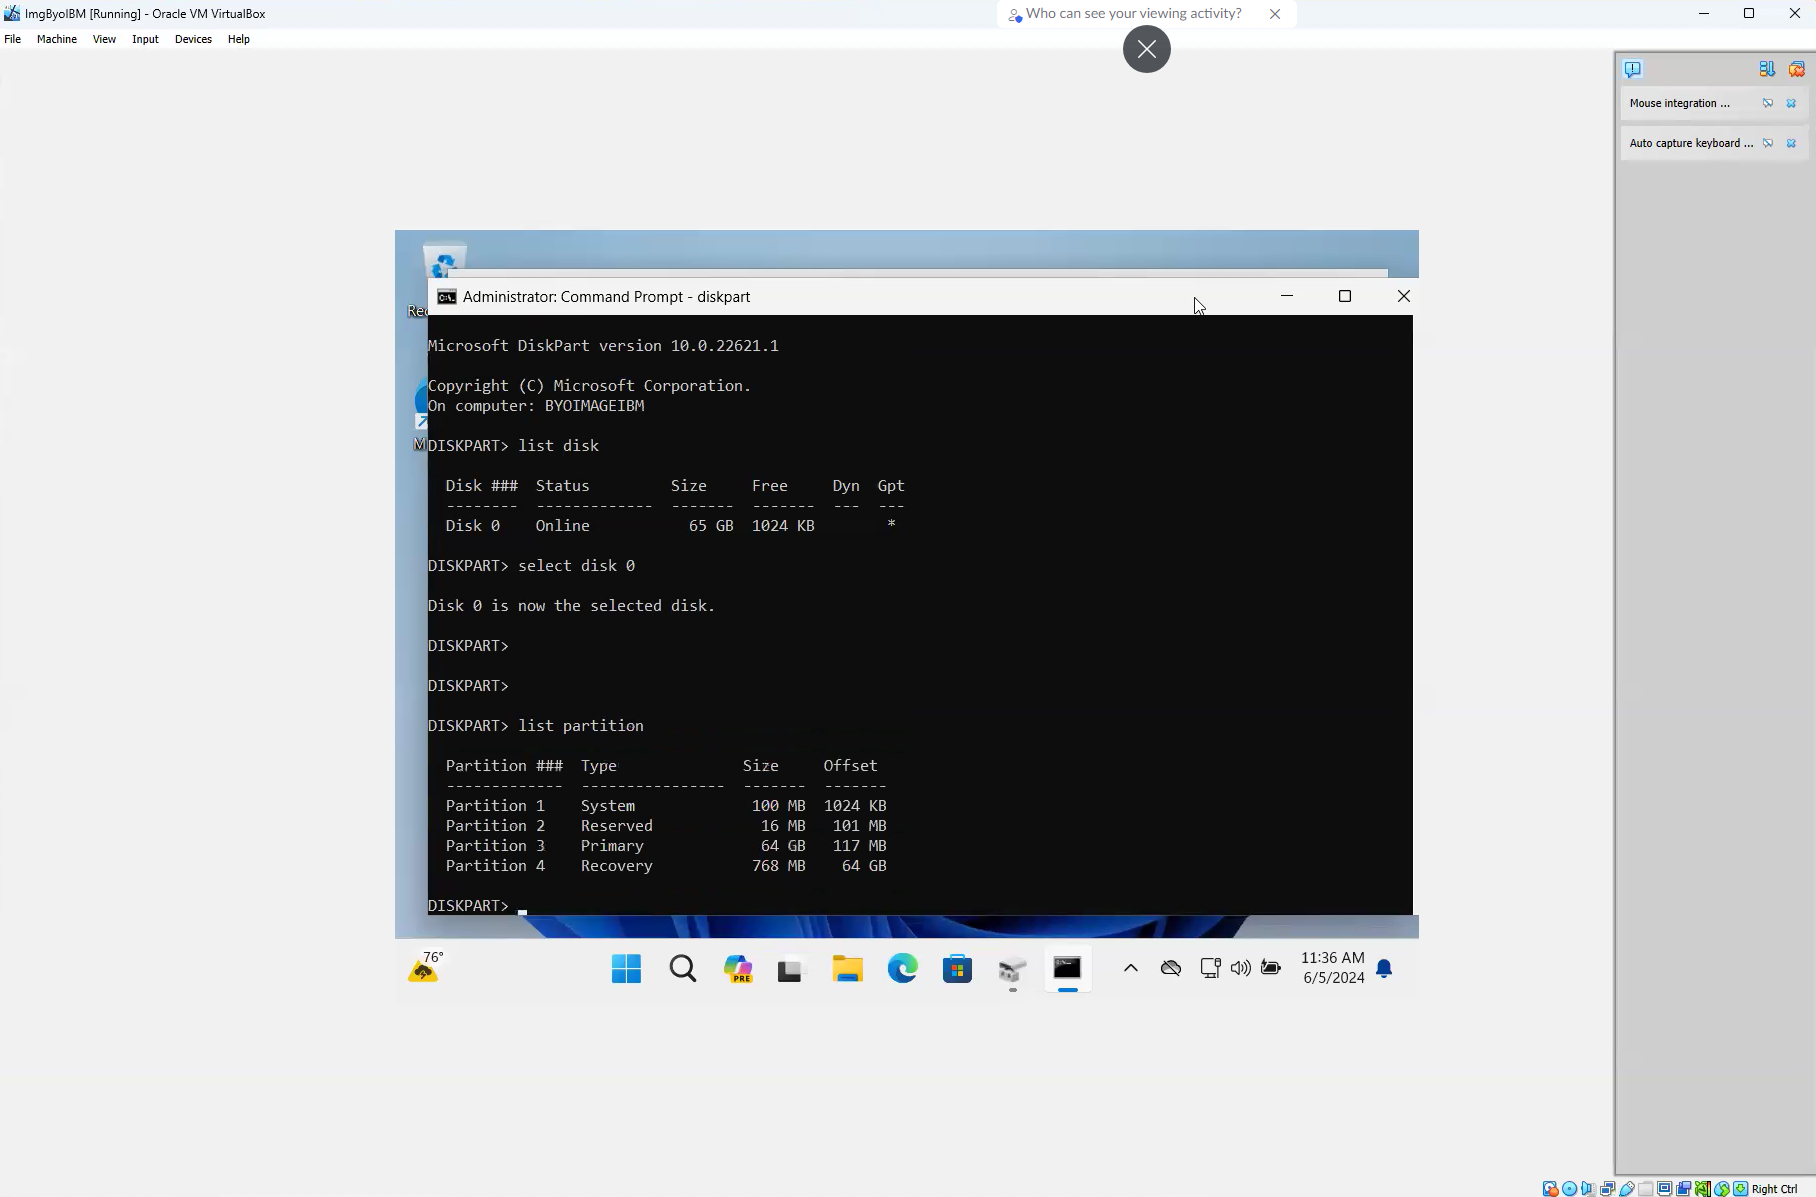
Diskpart - List Partition -
Once you have confirmed the partition number for the recovery partition, execute the following commands. If there is no recovery partition, then exit Diskpart and continue.
select partition <number>
delete partition override
where
<number>is the recovery disk partition. You may chose to executelist partitionto confirm that the recovery partition was successfully removed.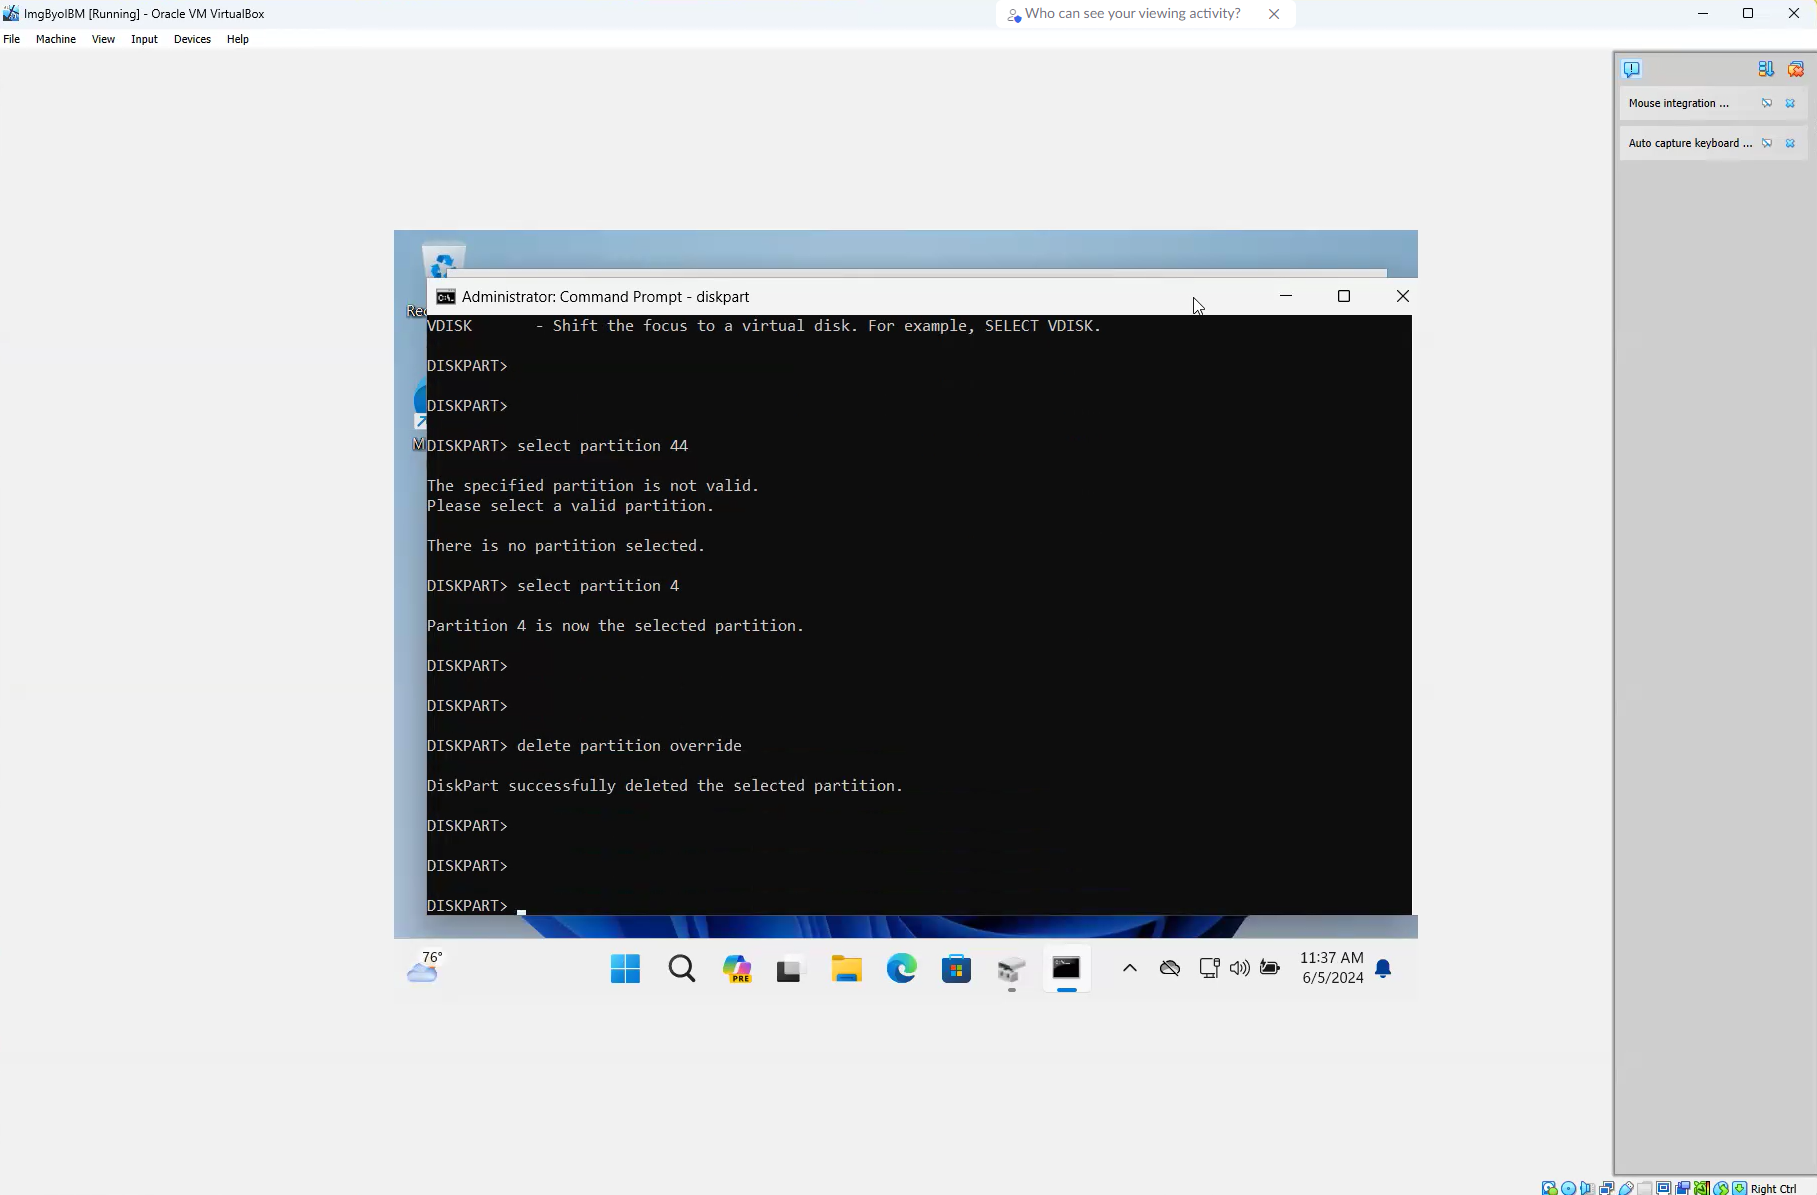
Diskpart - Delete Recovery Partition -
On the Windows command line, enter
reagentc /enable. -
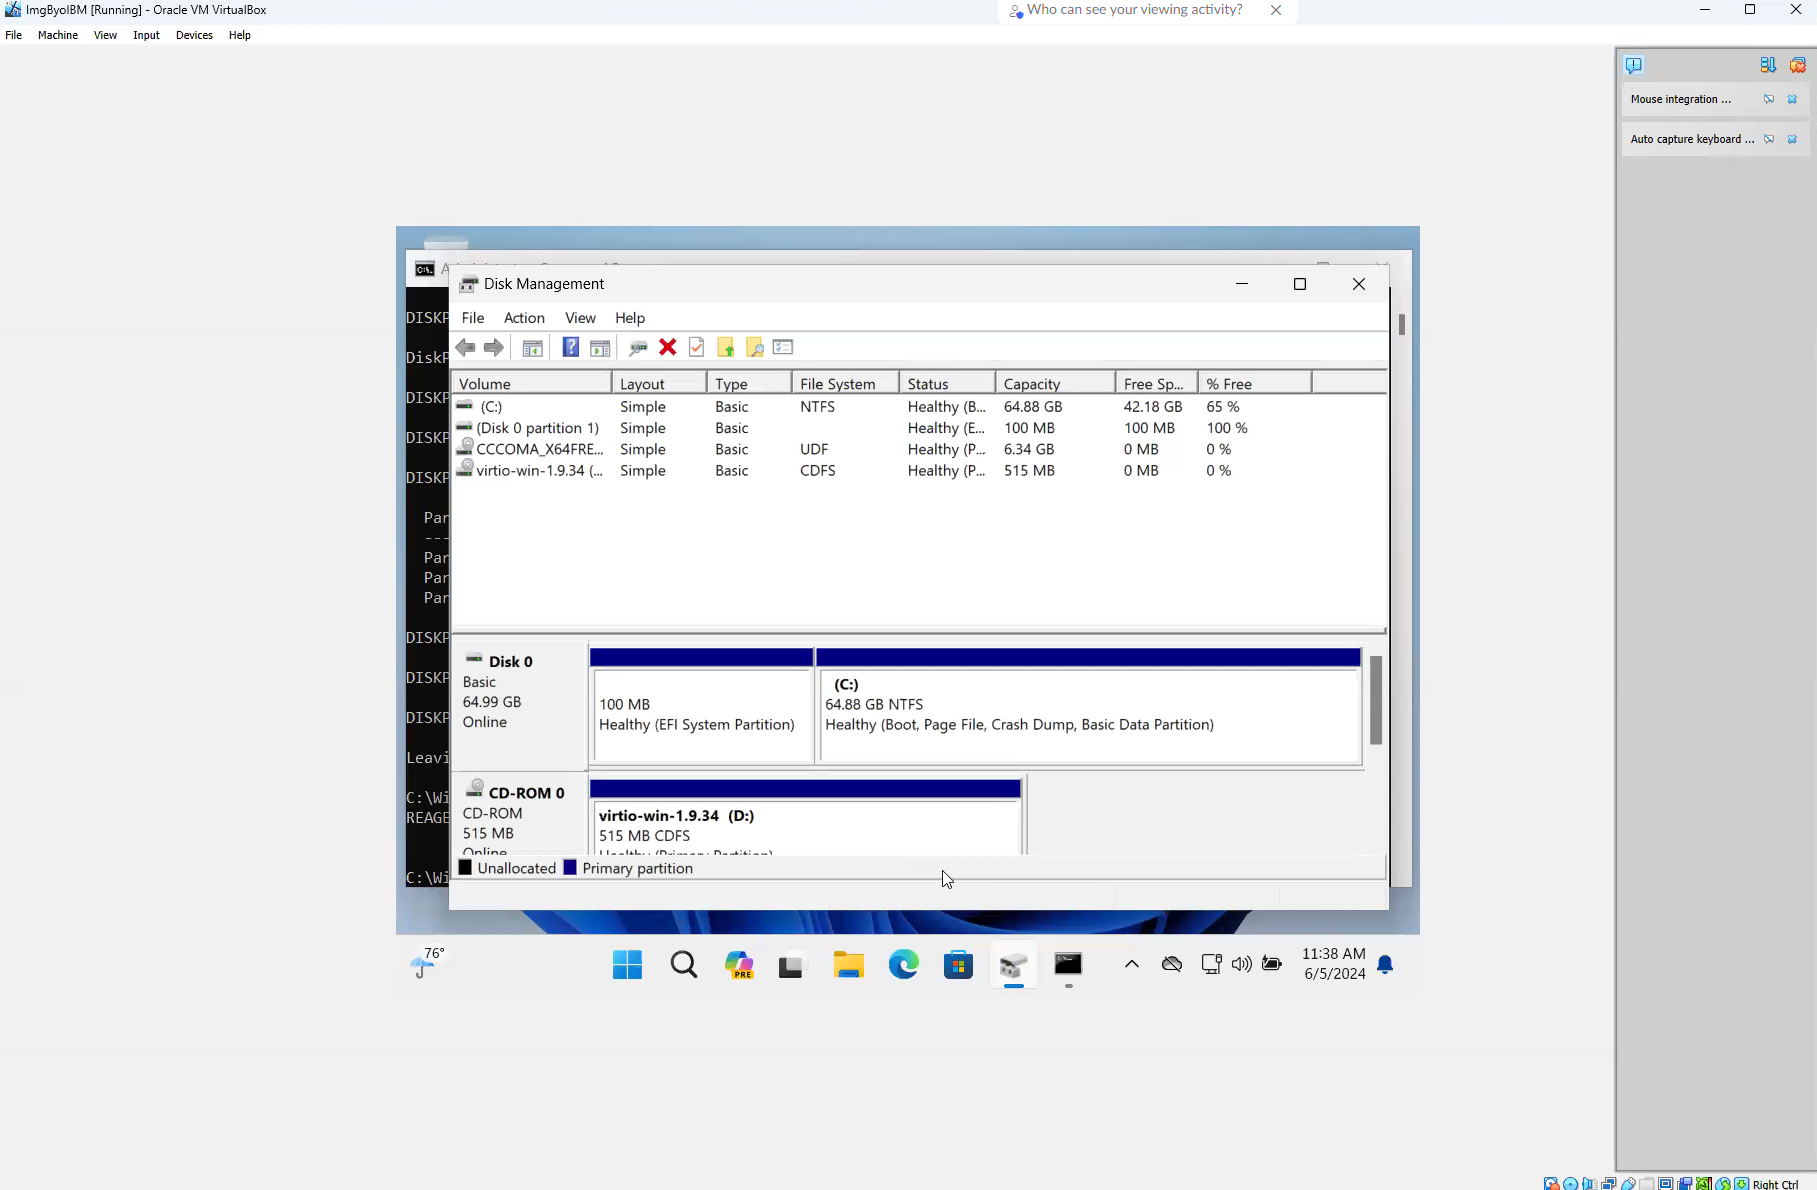
Get back to Disk Management and extend C partition by right clicking on (C:) and Extend Volume...

-
Shutdown the virtual machine.
-
Confirm the location of the .vhd file on your local machine in preparation for uploading the file to IBM Cloud.
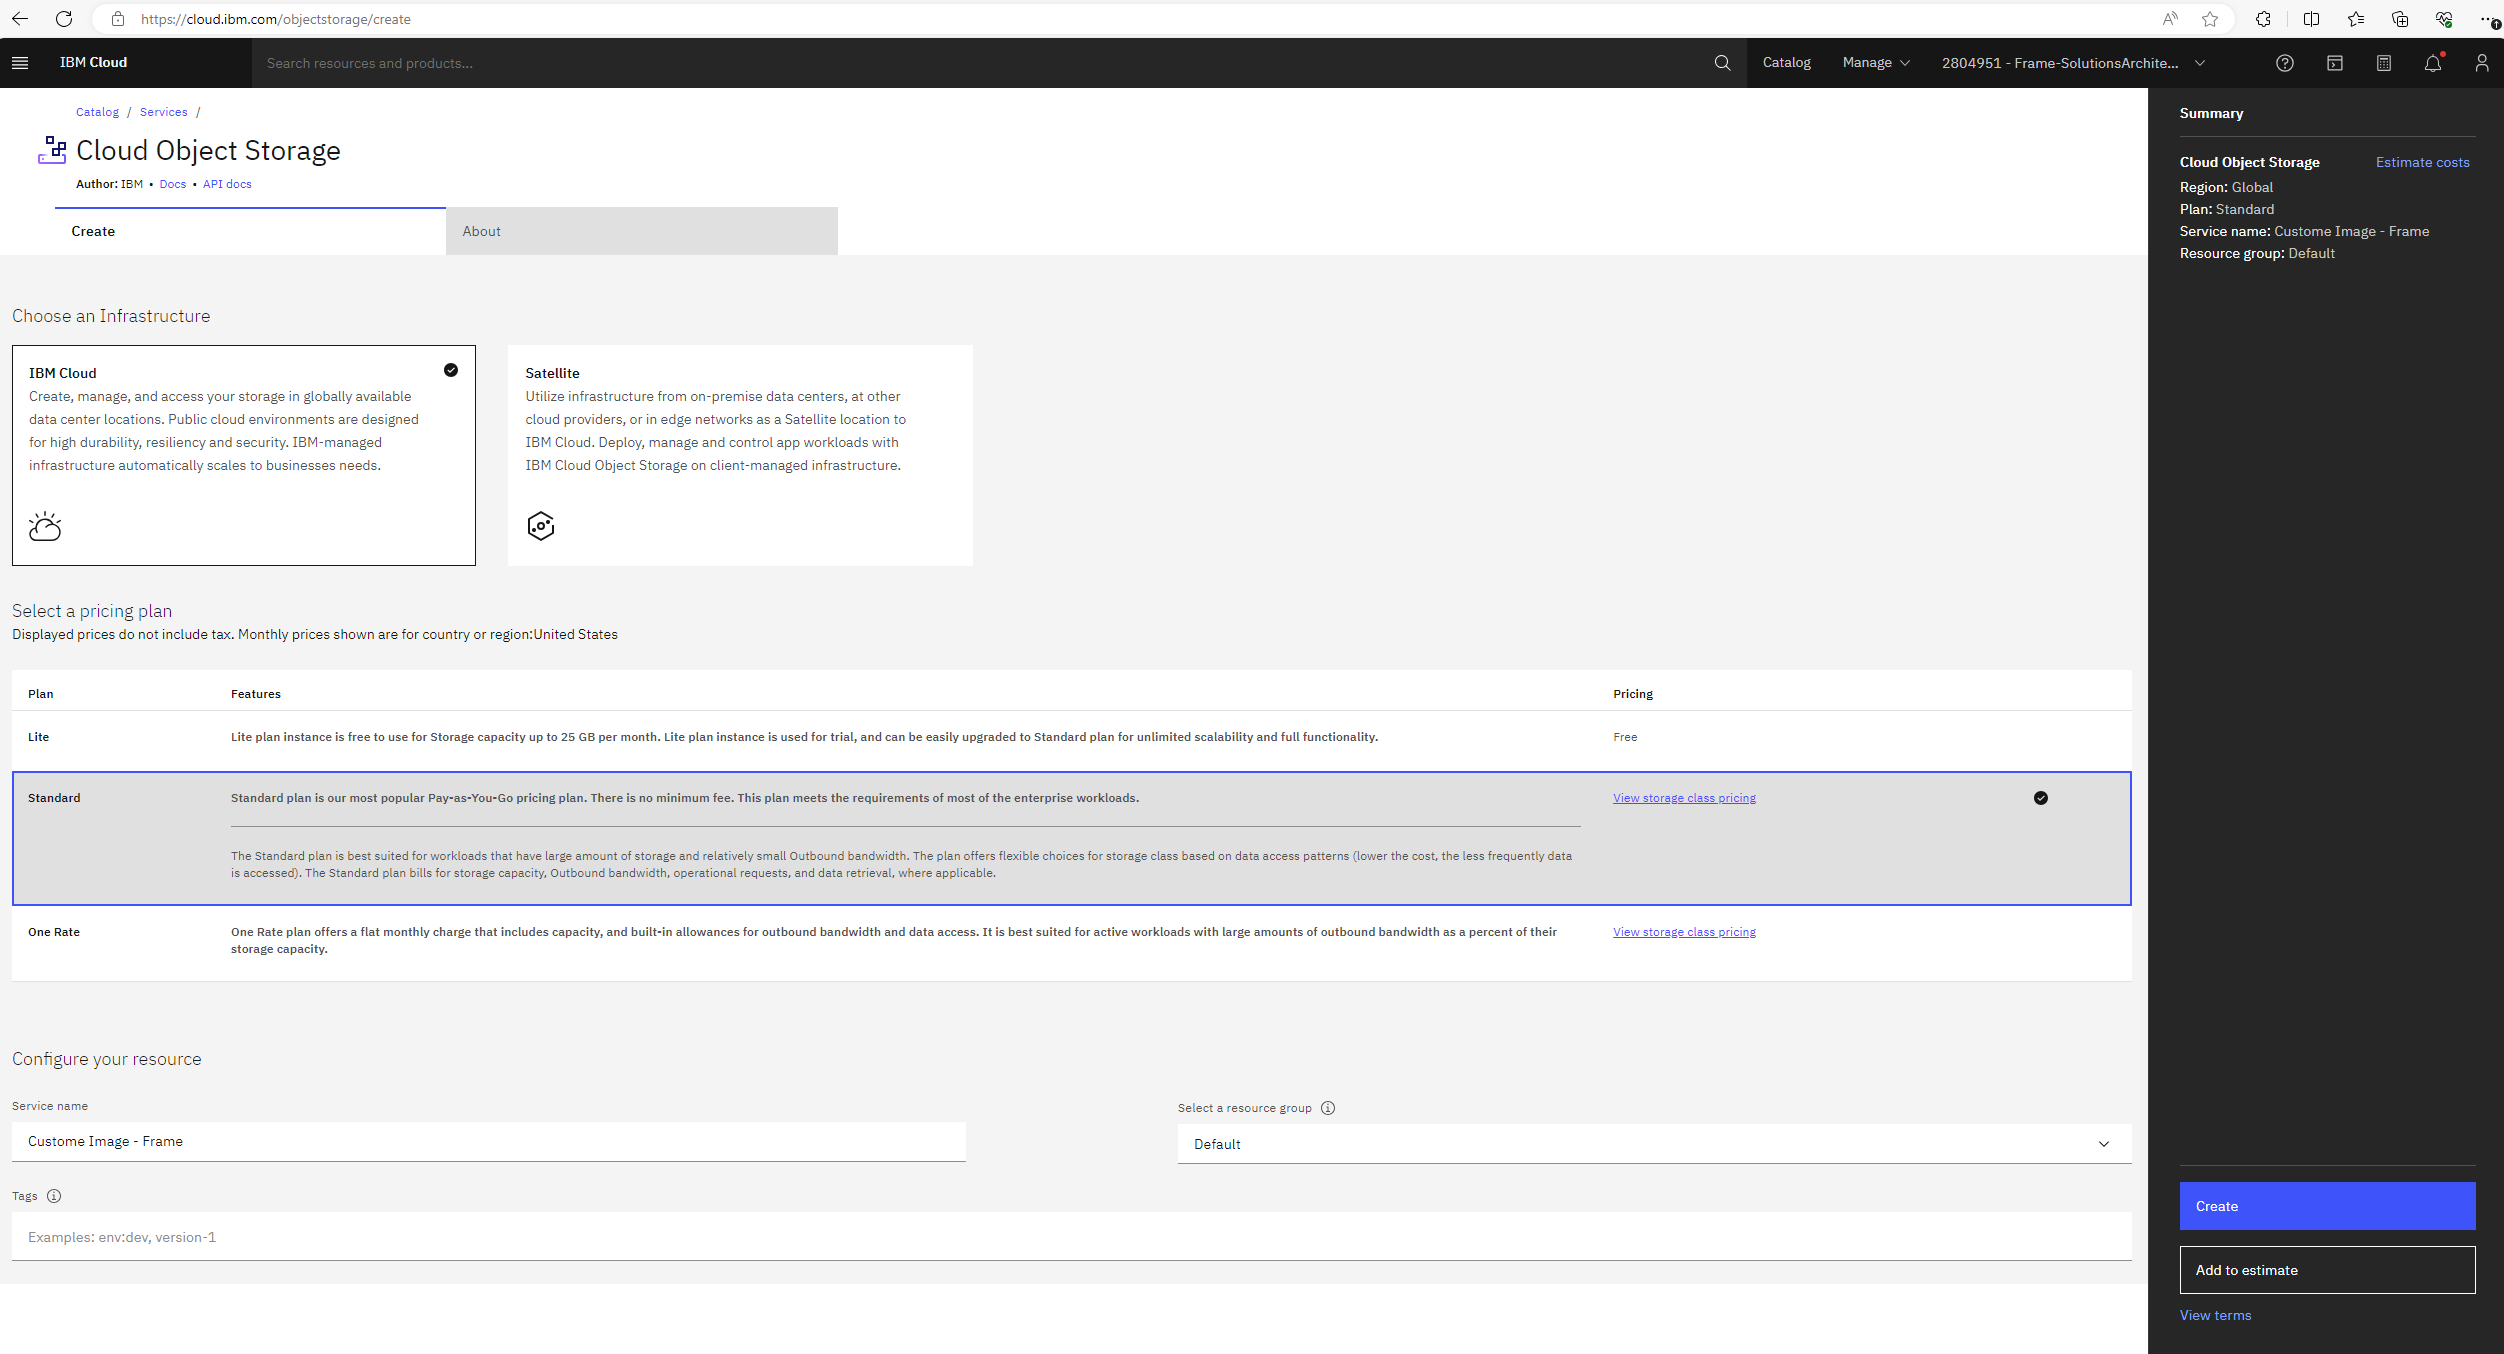
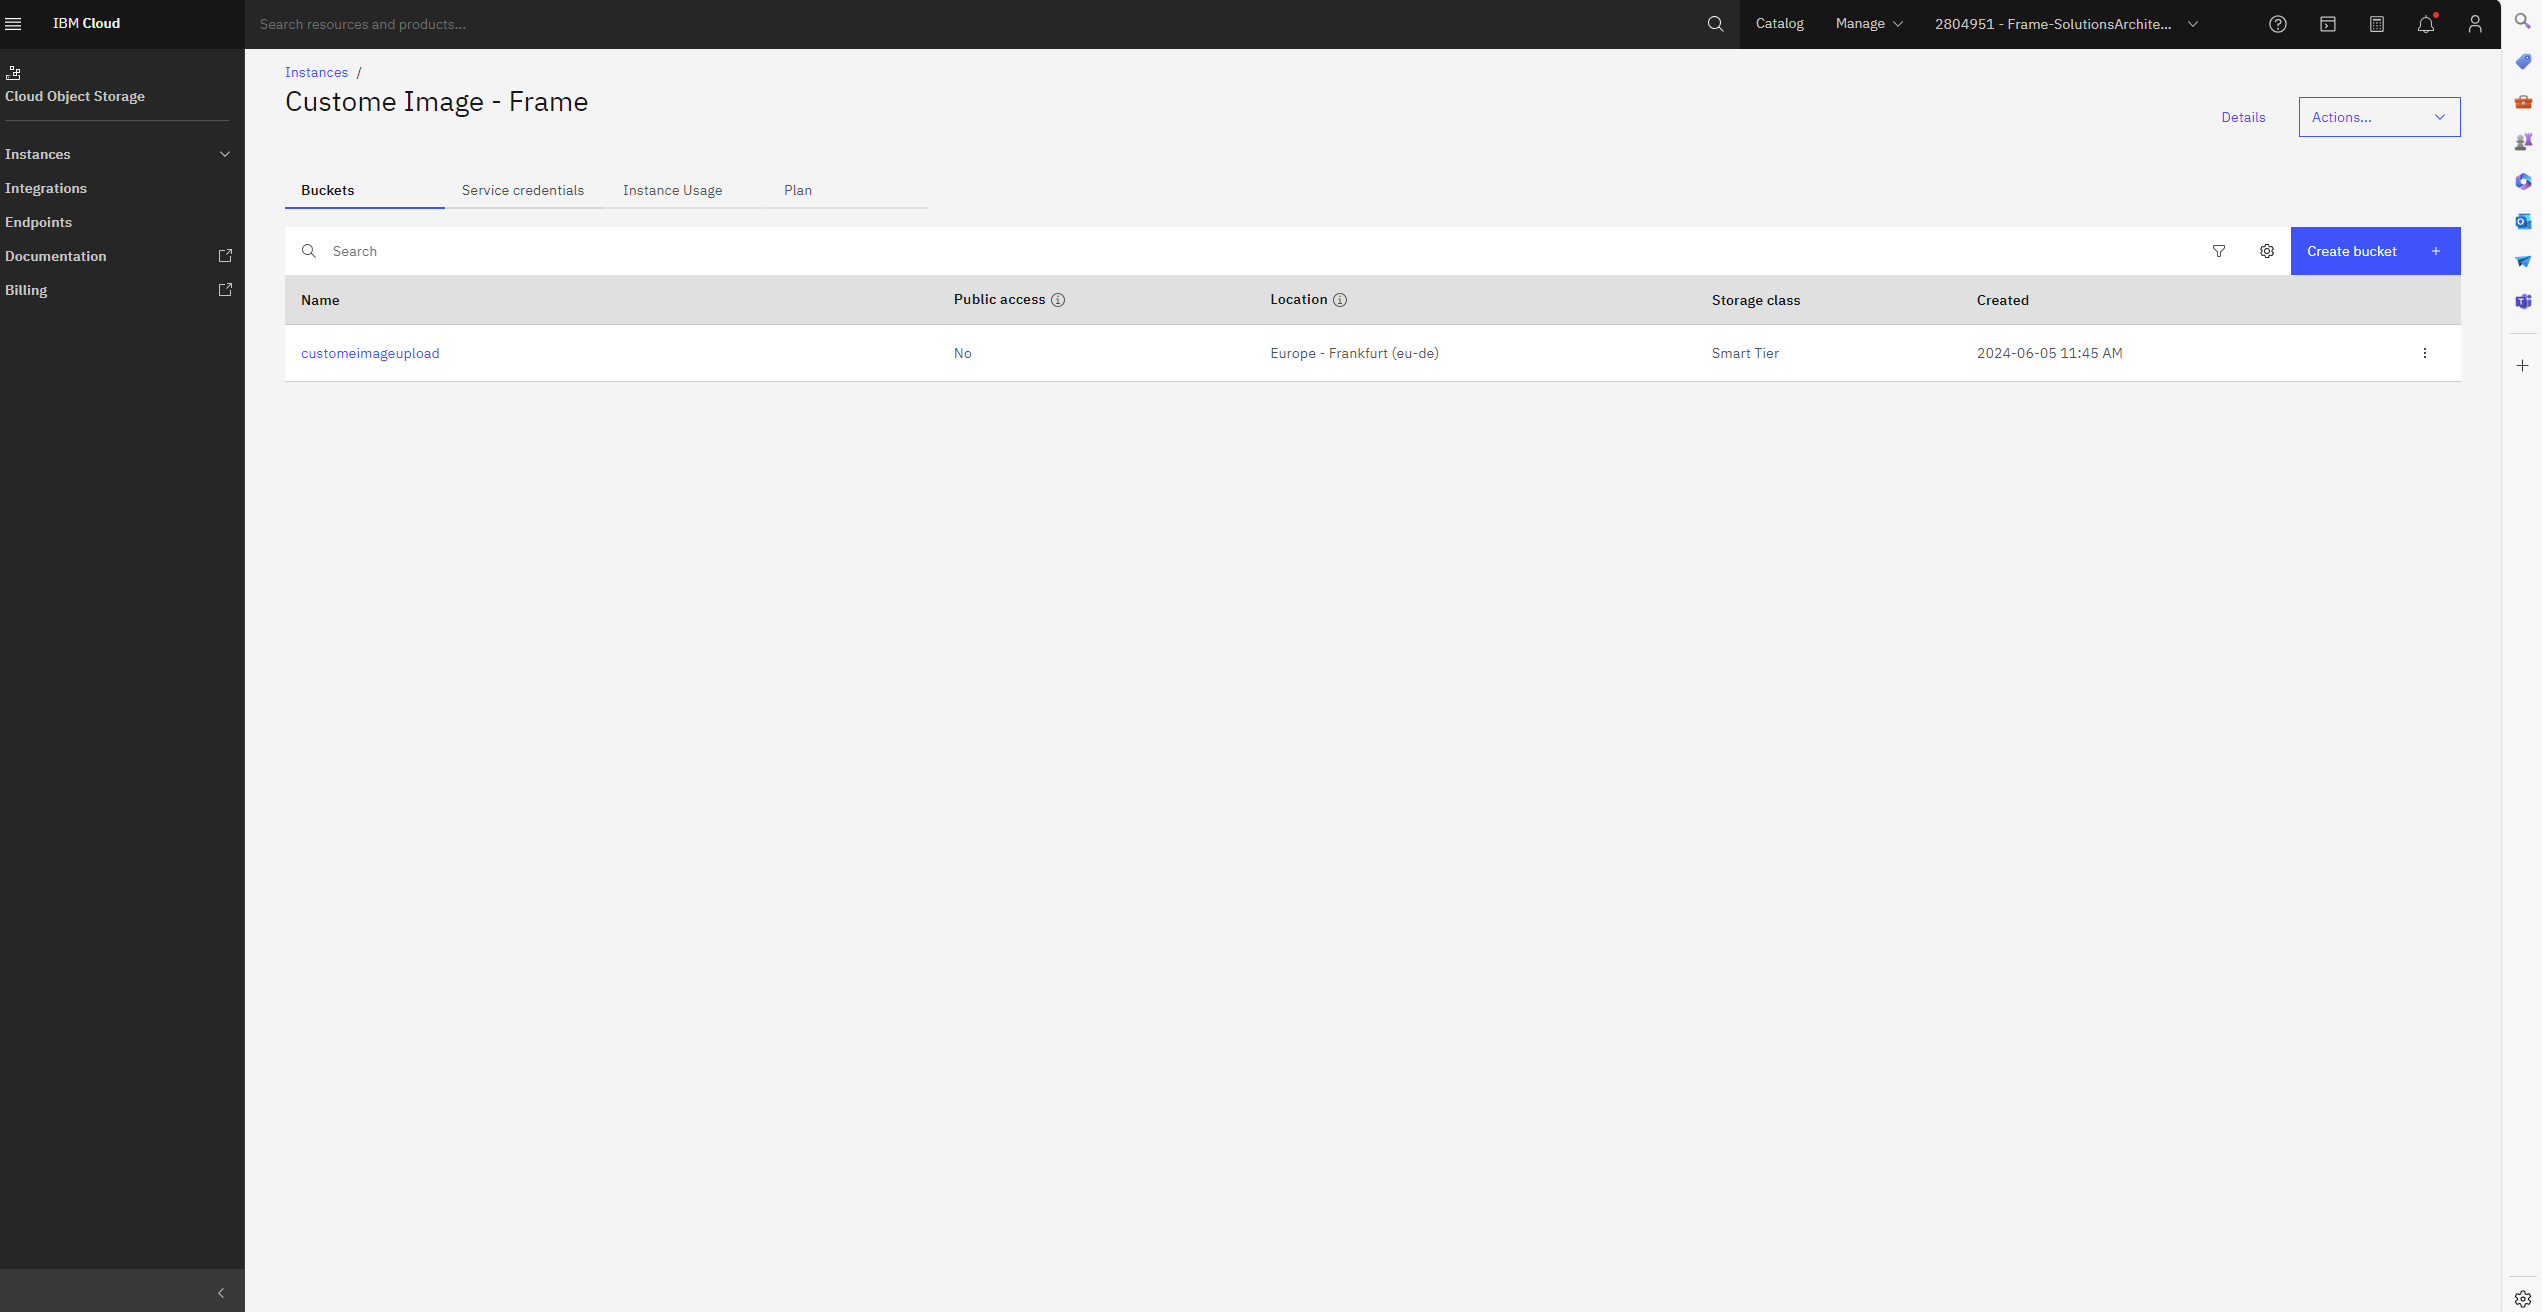
- Upload the virtual hard drive into IBM Cloud. Login to https://cloud.ibm.com/ and create new Object Storage in Standard tier and the bucket.
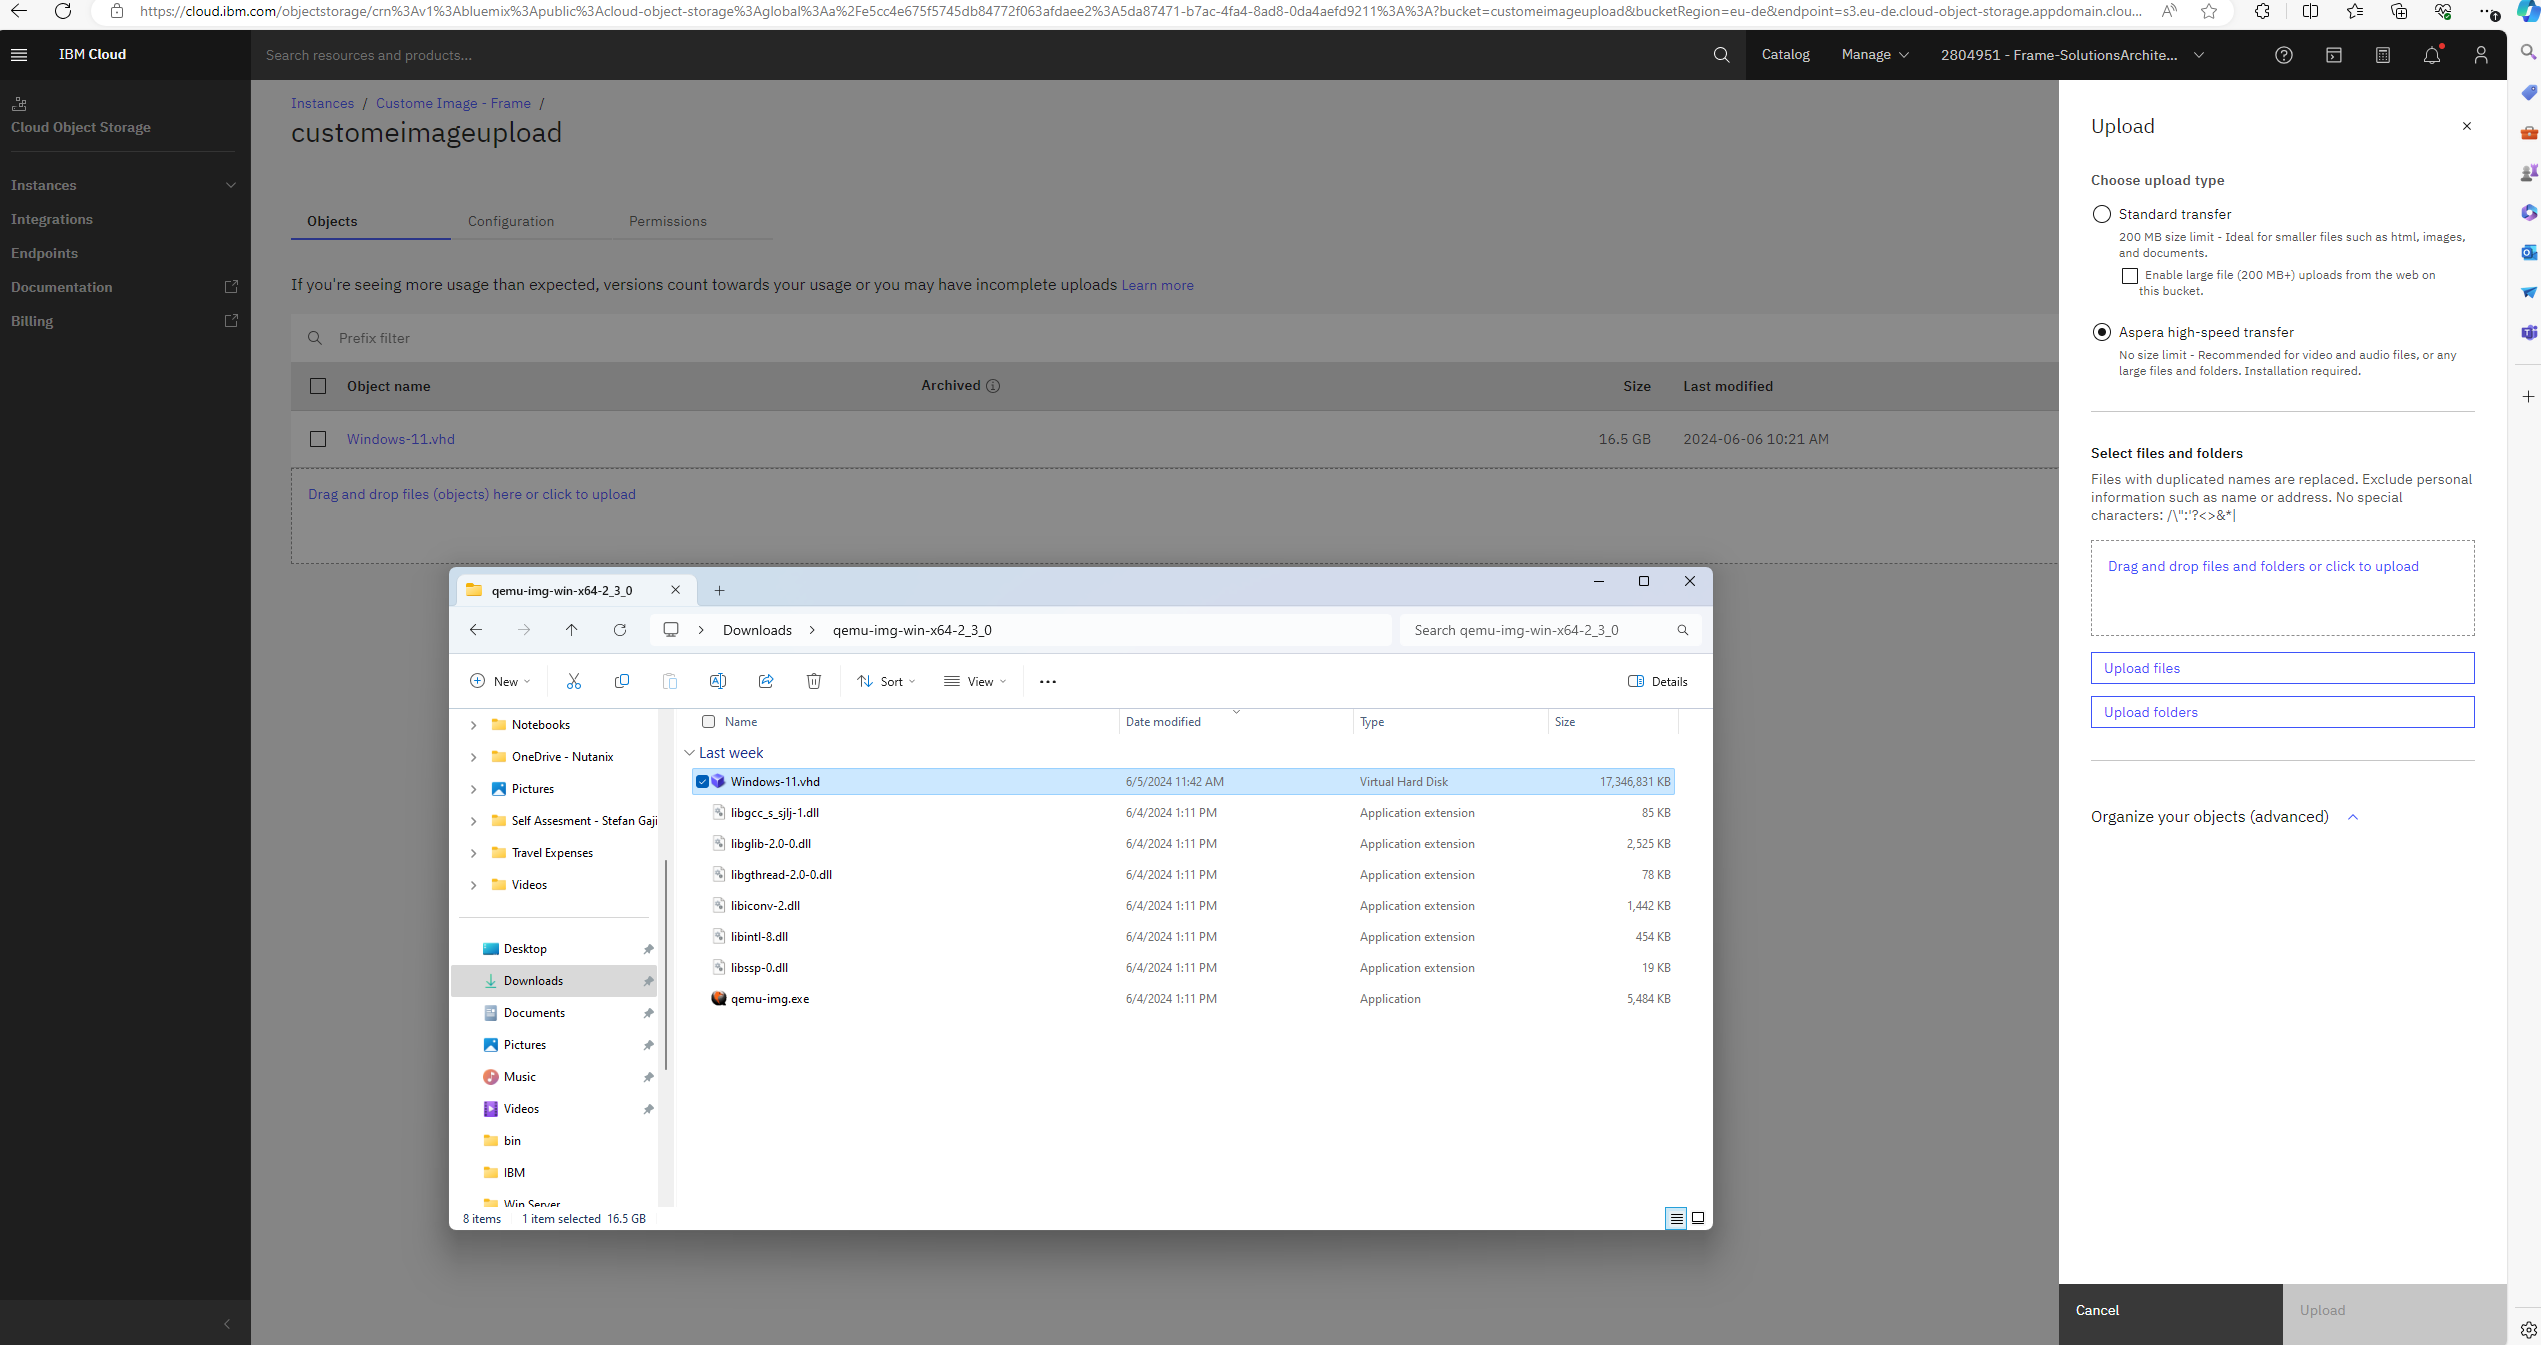
- Using Aspera, upload the .vhd file.
You will need to install extension and client for Aspera as the .vhd file is larger than 200 MB. Follow the instructions from the IBM Cloud Portal.
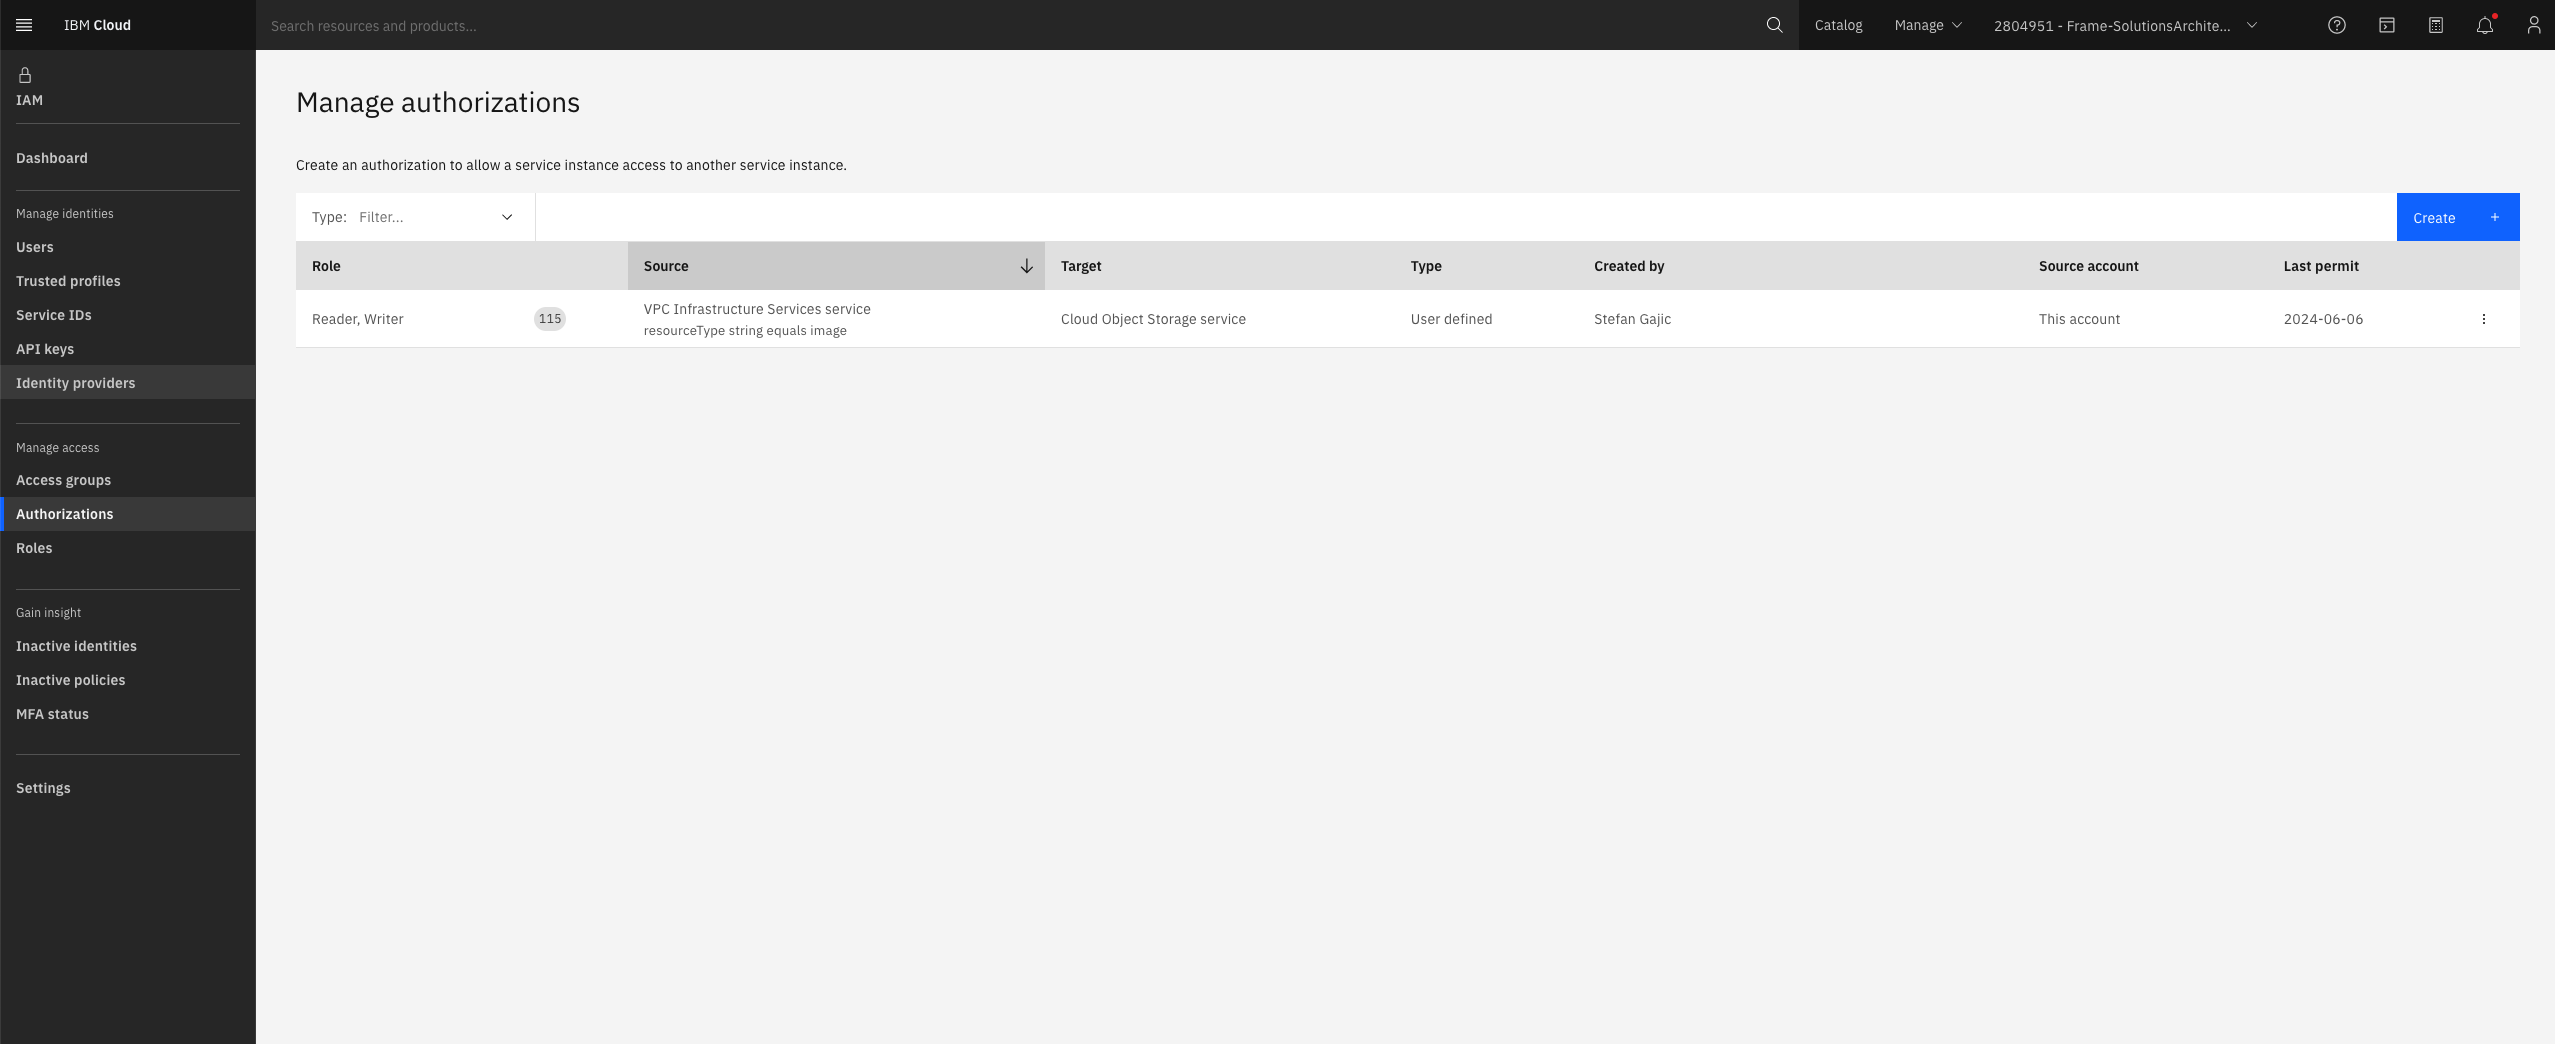
- Next, you need to grant the VPC infrastructure read/write access to the object storage containing the .vhd file. Configure this authorization by going to Manage – Access (IAM) and opening the Authorizations section and creating new authorization.
- Now it is time to create the IBM Image from the .vhd file. Under VPC Infrastructure, locate and click on Images and then Create +.
a. Specify the Geography, Region, Name, and Resource group.
b. For Image source, select Cloud Object Storage and pick the Cloud Object Storage instance, Location, and Bucket where your uploaded image file is located.
c. Select the image file that will be used to create the custom image.
d. Select the Operating system. For Windows 10 or 11, use Windows Server and the Version should be windows-2019-amd64-byol.
e. Click the Create custom image button to create the custom image.
- Once the custom image is created, you will create the virtual server instance using that custom image. Go to VPC Infrastructure and then the Virtual server instances for VPC page. Click on Create +.
a. Choose your desired Location (Geography, Region, and Zone) for your virtual server instance.
b. Give the virtual server instance a name and choose the Resource Group in which you want to deploy this instance in.
c. In the Image section, click on Change image, go to Custom images tab, select your custom image, and click Save.
d. Choose a profile.
e. Configure the SSH key and networking. Please make sure that RDP port 3389 is opened by the security group.
f. Enable Metadata and Secure access – this step is mandatory for FAST installer to work.
g. Click the Create virtual server button.
If you don’t have VPN S2S or P2S connection to your IBM infrastructure, please assign Floating IP Address to your instance so you can access it over public internet.
- Once your Windows virtual server instance has booted, RDP into your virtual instance. Use the local administrator username and password that you set during VM creation on Oracle VirtualBox during OOBE procedure.
Now that you have a template image VM accessible via RDP, you can proceed with the installation of the Frame agent and drivers.
Install Frame Agent and Drivers
-
Use RDP to connect into your VM. Follow the Installation and Usage instructions to download the Frame Agent Setup Tool (FAST) and install the Frame Agent, drivers, and tools in your template image VM.
-
Once FAST has successfully installed the Frame Agent, drivers, and tools, reboot the VM to complete the installation of the Frame Agent. Use RDP to connect back into your VM.
noteFor additional installation scenarios (e.g., proxy server configuration, command line arguments, review our Frame Agent Setup Tool documentation.
-
(Optional): If a proxy server is required for all outbound traffic to the Internet from your private network, you will need to configure Frame Guest Agent to use your proxy server. Refer to our FGA Proxy Helper Tool documentation page for further details.
-
(Optional): If you plan to use AMD or NVIDIA GPU-based instance types in AWS, make sure you install the appropriate AMD or NVIDIA GPU drivers in your template image VM.
Frame-verified GPU DriversThe following driver versions have been validated for use with Frame workload VMs. Frame cannot offer support for any other driver version or combinations. For IBM, use:
- NVIDIA driver version:
513.46
- NVIDIA driver version:
-
(Optional): Install your applications and finish image customization.
-
Once you have configured the image as desired, launch Powershell as an administrator.
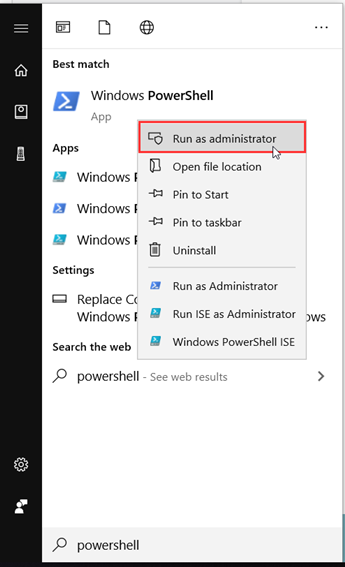
Windows - PowerShell -
Run the following PowerShell command to generalize your image using Microsoft Sysprep:
Start-Process -FilePath "$env:windir\System32\Sysprep\Sysprep.exe" -ArgumentList "/oobe /shutdown /generalize /unattend:$env:programdata\Nutanix\Frame\Sysprep\Unattend.xml" -Wait -NoNewWindow -
If the VM does not shutdown, then there was a problem with sysprep. Review the sysprep logs in
%WINDIR%\System32\Sysprep\Pantherto determine the source of the error.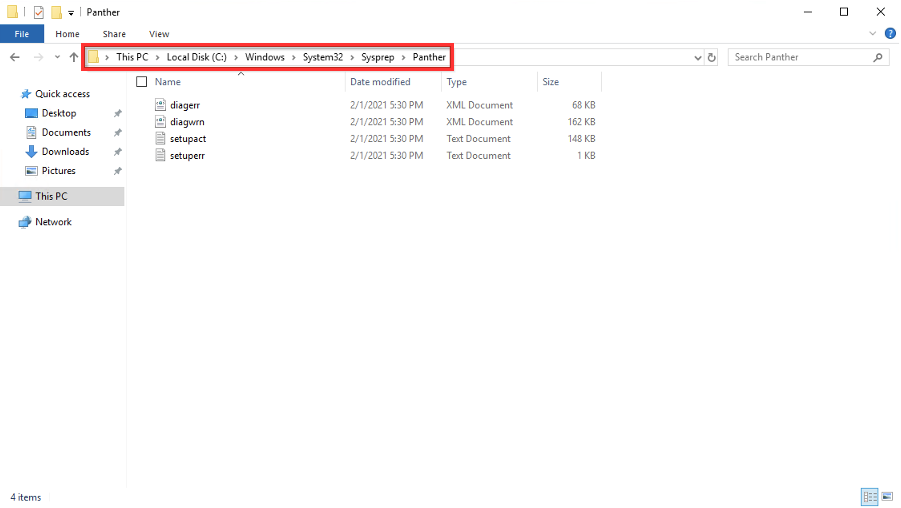
Windows - Sysprep Log Path -
When sysprep is successful, the VM will automatically power off. Verify that the VM has stopped in AWS Console.
Tag the IBM Cloud Machine Image
-
Create an image from your IBM Cloud instance.
-
Once the image is created, navigate to the list of images in the IBM Cloud console. Click on the image you created in the previous step and assign a tag with the Key name
frameroleand valuemasterimageto the image.
Voilà! You have successfully created a template image to be registered in Frame for use to create your Frame workloads. You may prepare additional template images (e.g., different Windows OS versions, template images with different sets of applications) by simply repeating the procedure with a new image.
Registration
Now it's time to register your template image in Frame. See how to do this in our Cloud Accounts > Template Images guide.