Session Settings
You can customize many aspects of how your users' sessions will behave when accessing their Frame session. The session settings page in your Account Dashboard was created to give you fine granularity over these features.
Account Session Settings
For Frame Account Session Settings, navigate to the “Settings” page listed on the left side of your Dashboard. Click on the "Session" tab. Any changes you make on this page will apply to all production/test instances, Utility servers, and your Sandbox.
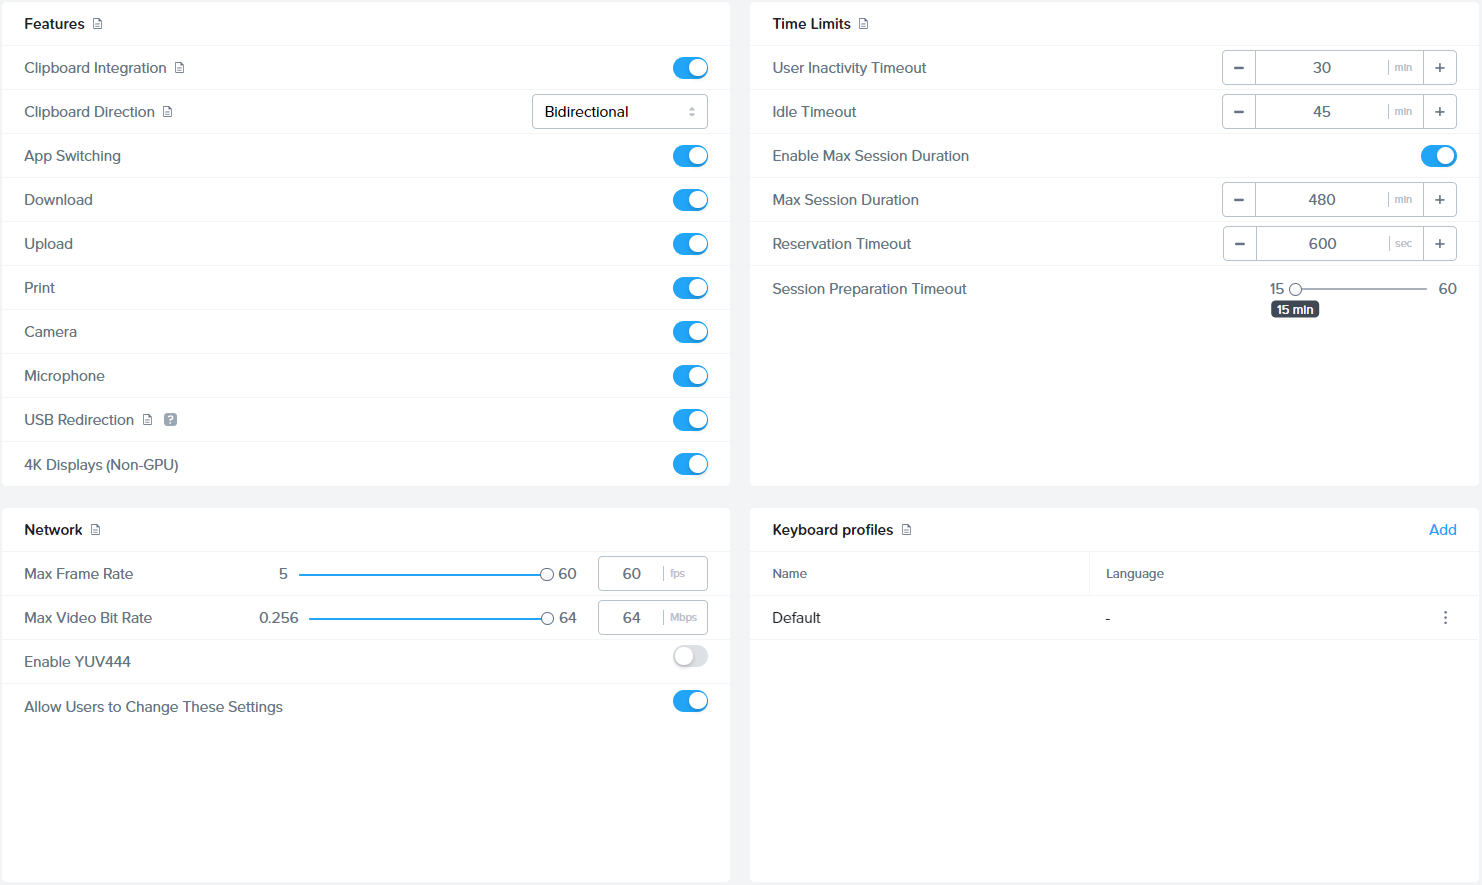
You may specify a separate set of session settings for your Sandbox/Utility server or test/production instances by clicking on the ellipsis next to your Sandbox (Dashboard>Sandbox), Utility Server (Dashboard>Utility Servers) or Launchpad (Dashboard>Launchpads), clicking on "Session settings," and disabling the "Use account settings" toggle. Edit this page as desired and click "Save" to apply your changes.
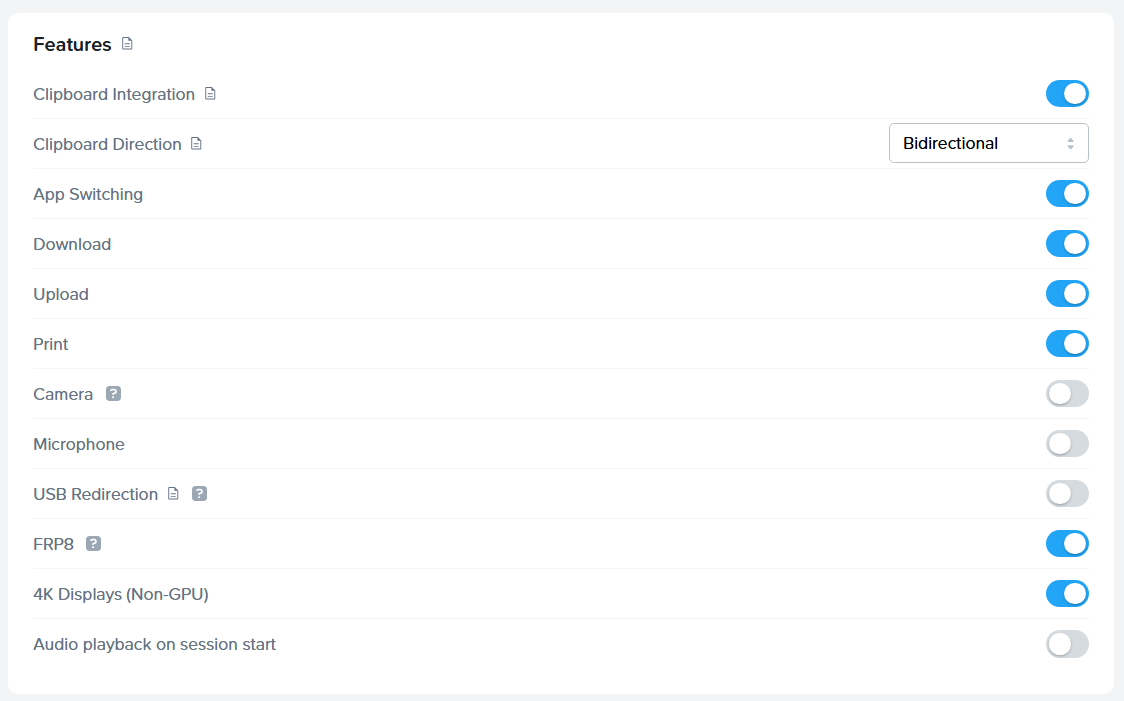
Features
| Feature | Description |
|---|---|
| Clipboard Integration | Enables clipboard functionality. Users can cut and paste text between their local device and their Frame session. |
| Clipboard Direction | When the clipboard integration is enabled, use this drop-down menu to choose the clipboard direction policy for your users. |
| App switching | When App switching is enabled, end users can switch between two or more application windows by typing Alt + ~ (Alt + ~ is sent to the remote Windows VM as Alt + Tab). |
| Download | Enables downloading files from the remote session to the user's local device. |
| Upload | Enables uploading files from the user's local device to their Frame session. |
| Enables printing files from the remote session to the Frame Virtual Printer. | |
| Camera | Enables webcam support for sessions.* |
| Microphone | Enables audio input when using applications within the session. This feature is enhanced for sessions using FRP8. |
| USB Redirection | Enables locally-connected USB devices to be visible to the remote workload VM. USB-connected storage devices are automatically detected and populated as additional drives which are accessible from the file explorer.** |
| FRP8 | Enables Frame Remoting Protocol 8 |
| 4K Displays | Enables resolutions up to 4K (4096x2160) for CPU-only instances (GPU instances support up to 4K displays by default). Note: CPU-based encoding of 4K displays will require increased vCPU capacity (e.g., 4 vCPUs instead of 2 vCPUs). Note: This feature should be enabled in scenarios where users will be accessing a CPU-only workload VM from ultra-wide or non-4k high resolution monitors. |
| Audio playback on session start | This setting ensures audio playback is enabled on session start but can still be disabled within the session by the user if desired. Enabled by default. |
* = Requires Frame Remoting Protocol 8 to be enabled.
** = Requires Frame Remoting Protocol 8 and Frame App 6.3 or above for Windows only.
Additional details for these features can be found in our Session Features End User Guide and other sections of our official Frame documentation.
Time Limits
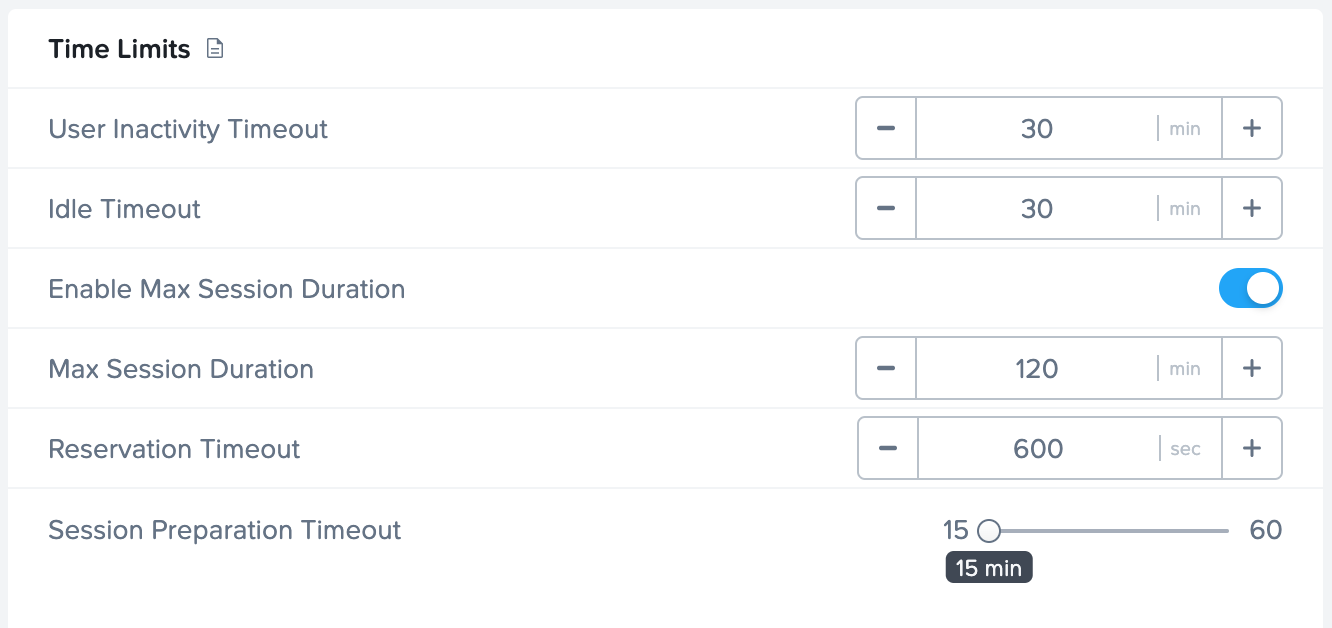
The "Time Limits" section displays parameters which control how long sessions can run. See the corresponding sections below to learn more about each parameter.
User Inactivity Timeout
This is the maximum amount of time (in minutes) that Frame will keep a session connected when there is no user activity (no mouse/keyboard events). Frame will display a warning at the “1 minute left” mark (configurable) and then disconnect the session.
- Default value: 10 minutes
- Minimum value: 1 minute
Idle Timeout
For any sessions that are launched from the Launchpad, authenticated users can disconnect from a session and reconnect later to the same running session. The Idle Timeout setting refers to the amount of time (in minutes) that a session will be kept active after an authenticated user disconnects from the session by closing Frame App or their browser window (while in session), disconnecting from the Frame gear menu, or by getting disconnected due to a network issue. Once the Idle Timeout is reached and the user has not resumed their session, the session will be closed.
If the Idle Timeout value is set to 0, then when a Frame session is disconnected, the session will be closed immediately.
- Default value: 10 minutes
- Minimum value: 0 minutes
Idle Timeout and User Inactivity Timeout session setting values cannot exceed the maxmium value of the Max Session Duration as described below.
Max Session Duration
This is the maximum length (in minutes) of time that a session can run. The duration is shown on the status bar countdown timer in the session itself.
- Default value: 1 hour
- Minimum value: 1 minute
- Maximum value: 10,799 minutes
Max Session Duration timeout is now an optional setting and can now be enabled or disabled with the Enable Max Session Duration switch. By default, this feature is disabled for all new Accounts. When enabled, administrators can set a maximum duration for all sessions, after which the sessions will automatically close.
Reservation Timeout
The Reservation Timeout parameter refers to the amount of time (in seconds) that the client's browser will wait for a server to become available before displaying a timeout error. This value would typically be adjusted to accommodate slow-starting virtual machines. This timeout is less likely to be reached if a min or buffer is configured.
- Default value: 600 seconds
- Minimum value: 120 seconds
- Max value: 900 seconds
Session Preparation Timeout
This value specifies how long Frame will wait for session initialization to complete before automatically closing the session. This includes the time waiting for a user to log into their Windows domain in domain-joined Frame accounts. Admins can configure this value between 15 and 60 minutes (in 15 minute increments).
- Default value: 15 minutes
- Minimum value: 15 minutes
- Max value: 60 minutes
Network
The "Network" section of the Session Settings page is where you can set network and QoS settings for your users. Some organizations manage groups of users in remote areas which have limited bandwidth, high latency, and often encounter varying network conditions. The Frame Remoting Protocol responds to such circumstances by rapidly adjusting the visual properties, frame rate, image quality, and other key aspects to maintain a consistent user experience. Each of the variables listed below applies to a different aspect of the session's QoS settings:
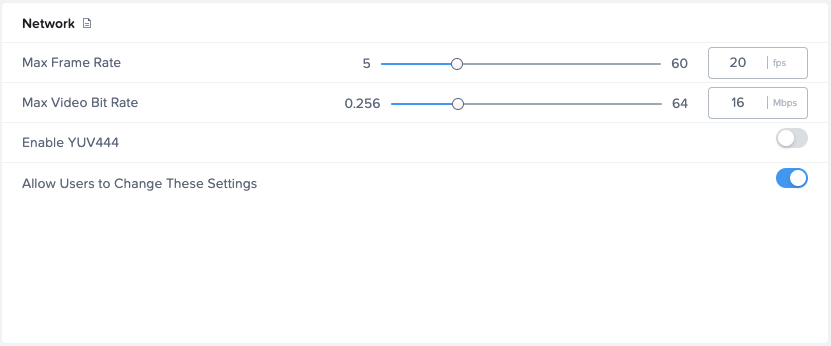
- Max Frame Rate: Sets the maximum frame rate for a session. The frame rate is defined as the number of frames displayed per second.
- Max Video Bit Rate: Adjusts the maximum bandwidth (in Mbps) to be used for the session display.
- Enable YUV444: Use YUV444 encoding instead of YUV420 encoding.
- Allow Users to Change These Settings: Allows your users to define their own QoS settings from within their session by accessing the Frame gear menu.
Network QoS Settings Defined
- Max Frame Rate
- Max Bandwidth
- YUV444
Frame automatically adjusts the video frame rate in response to application activity and available bandwidth. Under normal circumstances, the default frame rate is 20 frames per second (fps). Limiting the maximum frame rate can reduce bandwidth requirements, but may cause choppiness and can make interactive editing tasks difficult. Administrators can set the maximum frame rate for production sessions from the Dashboard. If enabled by the admin, end users can adjust the frame rate of their session as they see fit.
Supported Ranges
- GPU-enabled Instances: 5 - 60 fps
- CPU-only Instances: 5 - 30 fps
Frame limits the maximum bandwidth to 32 Mbps. Lowering the bandwidth limits the overall bandwidth available to Frame, reducing both frame rate and image quality.
Supported Ranges
- Video Bandwidth: 256 kbps - 32 Mbps
By default, Frame's H.264 implementation uses YUV420 chroma subsampling to encode images. This takes advantage of the human eye's inability to recognize color differences to the same degree that it can recognize variations in brightness. By sending less information about color than it does about brightness, it is possible to reduce the amount of bandwidth required substantially without significantly compromising image quality. This does an excellent job of reducing the amount of bandwidth required, but in some situations, especially in apps where regions of strongly contrasting colors are displayed next to each other, chroma subsampling can result in colors “bleeding” into each other with undesirable results.
To support our customers who need absolute color fidelity, Frame also provides support for YUV444 encoding. This turns off chroma subsampling, sending the full depth of color information for every pixel. Since more color information must be sent, use of YUV444 will increase the required bandwidth between the remote VM and the end user.
YUV444 is not supported on mobile web browsers.
End users accessing a YUV444-enabled session will notice that the magnifying glass in the Frame Status Bar is solid green:

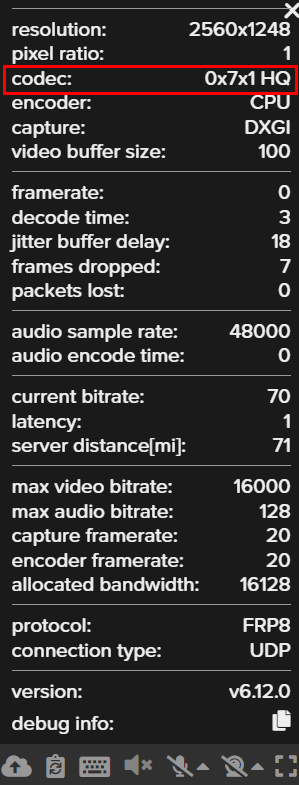
If session stats are enabled for the account, you can see if your session is using YUV444 by looking for HQ in the codec name.
Keyboard Profiles
Keyboard profiles consist of custom keyboard shortcuts and language settings that allow you to map endpoint keyboard combinations to keyboard combinations within the remote VM. Refer to the Keyboard Profile section of our documentation for details on how to manage your end users' keyboard profiles.
Advanced Options
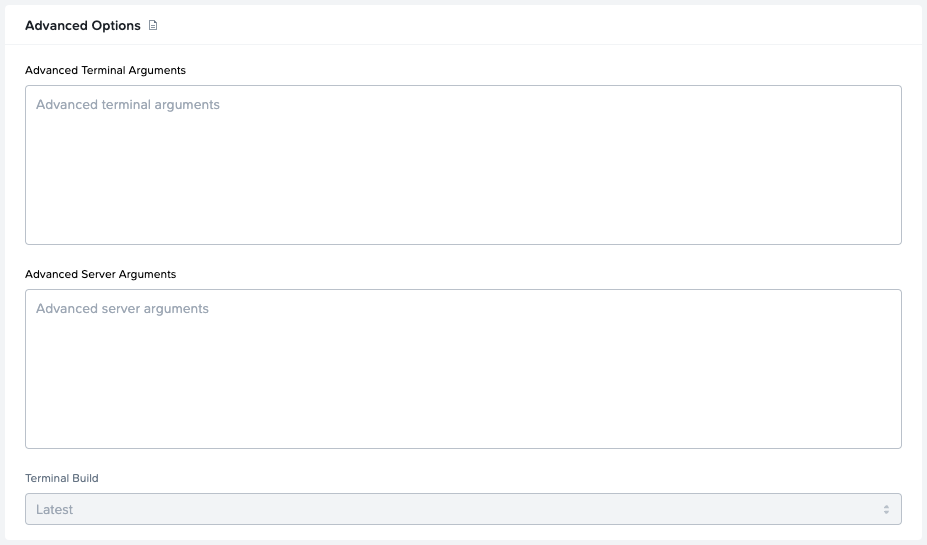
The Advanced Options section of Session Settings displays two editable fields, Advanced Terminal Arguments and Advanced Server Arguments. Here, you can enter configuration flags that will either affect the behavior of Frame Terminal or Frame Agent during a session. Advanced configuration flags should be separated using a space. Be sure to click Save to save your configurations.
Terminal Build Version
At the bottom of the Advanced Options section, you will notice a dropdown menu listed under a section titled Terminal Build. This feature allows administrators to dictate which Terminal build version they would like any new sessions to utilize for the account they are accessing.
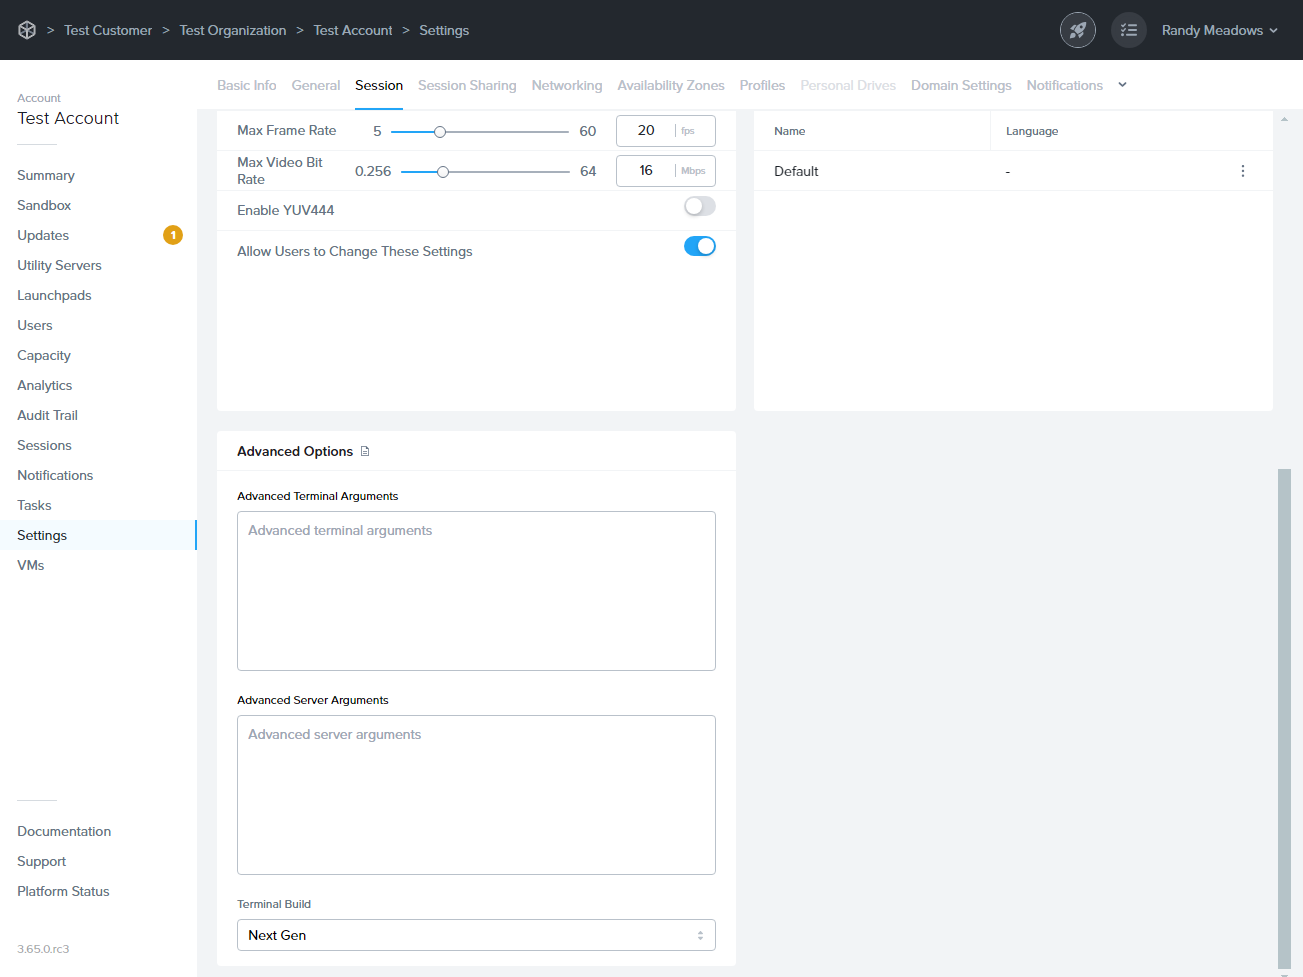
This setting can be adjusted on a per-Launchpad basis as well by navigating to the desired Launchpad from the Account Dashboard, clicking the kebab menu, and selecting Session Settings. The options are as follows:
- Current: The current GA (Generally Available) version of Frame Terminal.
- Previous: The previous GA version.
- Next Gen: Our next-generation session experience which features a sleek, modern interface with enhanced menus and controls. Now available in Early Access.
Advanced Arguments
The following flags can be used in either the Advanced Terminal Arguments (T) or Advanced Server Arguments (S) fields to modify the behavior of Frame Terminal or session behavior, associated with the Frame Account or Launchpad. These arguments are supported in both Frame Remoting Protocol (FRP) 7 and 8 unless otherwise noted.
| Argument | Type | Syntax | Details |
|---|---|---|---|
| Enable Sound on First Interaction | T | enableSoundOnFirstInteraction | Automatically enables sound in the session upon first user interaction (mouse click or move) for embedded scenarios. |
| Disable Onboarding Dialog | T | disableOnboardDialog | Disables the initial welcome message for new users. |
| Enable Mouse Modes | T | *features*mouseModes*isEnabled*=true | Enables Frame Terminal to display to the user the Mouse Mode selection icon for standard, relative, and touchpad mouse modes. |
| Frame App Update Indicator | T | appAutoUpdateNotification | Use this argument to show or not show the update indicator in Frame App. Value of 'always' will display indicator whenever user is using a version that is not the newest. Value of 'old' will display the indicator if user's Frame App is a version more than 1 year old. |
| Adjust Upload Chunk Size | T | channelFileChunkSizeBytes | Use this argument to adjust the FRP8 upload chunk size when uploading files from Frame Terminal to the workload VM. Default value is 4096 bytes. |
| Disable Bandwidth Indicator | T | disableBandwidth | Use this argument to disable the Network Bandwidth Indicator on the Frame Terminal Status Bar. |
| Disable Local Timezone | T | disableClockSync | Use this argument to prevent the timezone in the user's endpoint from being used within the workload VM at the startup of a Frame session. |
| Disable Network Latency Indicator | T | disableLatency | Use this argument to hide the Network Latency Indicator on the Frame Terminal Status Bar. |
| Enable Autofocus | T | enableAutoFocus | Use this argument to automatically set keyboard focus to the Frame session without requiring initial mouse input within the Frame session window. |
| Force Lossless Video Quality | T | forceLosslessVideoQuality | Use this argument to enable Lossless encoding (requires YUV444 to be enabled). |
| Force Display Resolution | T | forceResolution=<width>x<height> | Use this argument to require Frame Terminal to display in a preset resolution (width: 1024/1280/1920, height: 768/1024/1080). |
| Hide Status Bar on Full Screen | T | hideStatusBarOnFullscreen | Use this argument to hide the Frame Terminal Status Bar when Frame Terminal is in full-screen mode. |
| Set Max Session Timeout Warning | T | lastMinutesWarningTimeout=<minutes> | Use this argument to specify the number of minutes left in a session before the max session timeout warning is displayed. |
| Use TCP by Default for FRP8 | T | preferredIceCandidateProtocol=tcp | Force FRP8 to always use TCP instead of the default UDP protocol. |
| Refresh Stream on Packet Loss | T | refreshStreamOnPacketsLoss=<n>/<t>/<b> | Automatically refresh video stream when packet loss threshold is exceeded. n=packets lost, t=timeframe(ms), b=backoff factor. |
| Enable Automatic Audio Playback | T | unmuteAudio | Enable automatic audio playback in supported browsers without requiring users to unmute audio in the Frame Terminal Bar. |
| Scan Input Media Device Once | T | scanInputMediaDeviceOnce | Limits camera and microphone scanning to once per session, improving compatibility with features like Apple's Continuity Camera. |
| Set Disk Attach Timeout | S | -diskattachtimeoutms <timeout in ms> | Sets profile disk/personal drive attach timeout value. Default is 90000 ms (90 sec). |
| Force CPU Encoding | S | -encode <encoder> | Force CPU encoding if GPU driver isn't working correctly. Use '-encode ffcpu' or '-encode dxgigpu'. |
| Set Frame Session Label | S | -frame-session-label=<string> | Set custom value accessible from FRAME_SESSION_LABEL environment or registry. |
| Set Key Frame Frequency | S | -gopsize <N> | Set key frame frequency for video refresh. Default: 240 for FRP7, infinite for FRP8. |
| Set Link Handler | S | -linkhandler <browser> | Designates which browser is used to launch URLs within the Frame environment. |
| Set Logoff Timeout | S | -logofftimeoutms <timeout in ms> | Set Windows user logoff operation timeout. Default is 10000 ms. |
| Refresh Stream on Packet Loss | S | -refreshStreamOnPacketLossPercent <loss %> | Send periodic key frames when packet loss exceeds specified percentage. |
| Set Trailing Display Frames | S | -trailingFramesNumber <#> | Override default trailing display frames (2 for CPU, 8 for GPU encoding). |
| Set Upload Folder Path | S | -uploadto <upload_path> | Designate custom upload folder path. Default: C:\Users\<username>\Uploads. |
Users may have to close their existing session and start a new session in order to see any newly applied session settings.
Frequently Asked Questions
How does YUV444 improve the end user experience? What are the limitations?
If the user is working with 2D or 3D design, YUV444 may provide sharper text and shapes. If the text or shapes appear blurry when using the standard YUV420, enable YUV444 and see if there are any visual improvements. This feature requires up to 50% more bandwidth for video streaming. More detailed information, as well as some test images that illustrate the differences, can be found online in articles like this one.
My end user's bandwidth is limited. How can I have the best possible end user experience with limited bandwidth?
Frame dynamically adjusts bandwidth based on streamed content and network conditions to consume the lowest bandwidth while maintaining the best possible user experience. If you need to set a bandwidth limit for a user connection, administrators can adjust the "Max Bandwidth" slider in session settings.
What settings should be adjusted to best support conferencing applications like Zoom, Microsoft Teams, and Skype?
Administrators wishing to support video conferencing applications in Frame must first have FRP8 enabled for their Frame account. Once FRP8 has been configured, admins can simply enable the “Camera” and “Microphone” options in Session Settings. Accounts using FRP7 can still enable the microphone feature for voice calls. These applications perform best with low-latency network connections. The end user will need to allow certain permissions in the browser, which is discussed in further detail in our Session Features End User Guide.
Under what circumstances can I enable lossless video?
Lossless quality encoding requires up to 40x more bandwidth than “normal” video streaming, as well as the Chrome browser (version 100+) or Frame App on the endpoint device. Administrators will need to add the ``forceLosslessVideoQuality` Advanced Terminal Argument in session settings in order to use this feature.