Non-Persistent
Suspend/Resume Administration
This Early Access feature introduces a new deployment model that combines the user experience benefits of persistent accounts with the centralized image management advantages of non-persistent accounts. Admins can now enable Suspend/Resume on a per-Instance Pool basis by navigating to: Capacity > Select Pool > Suspend Preferences.
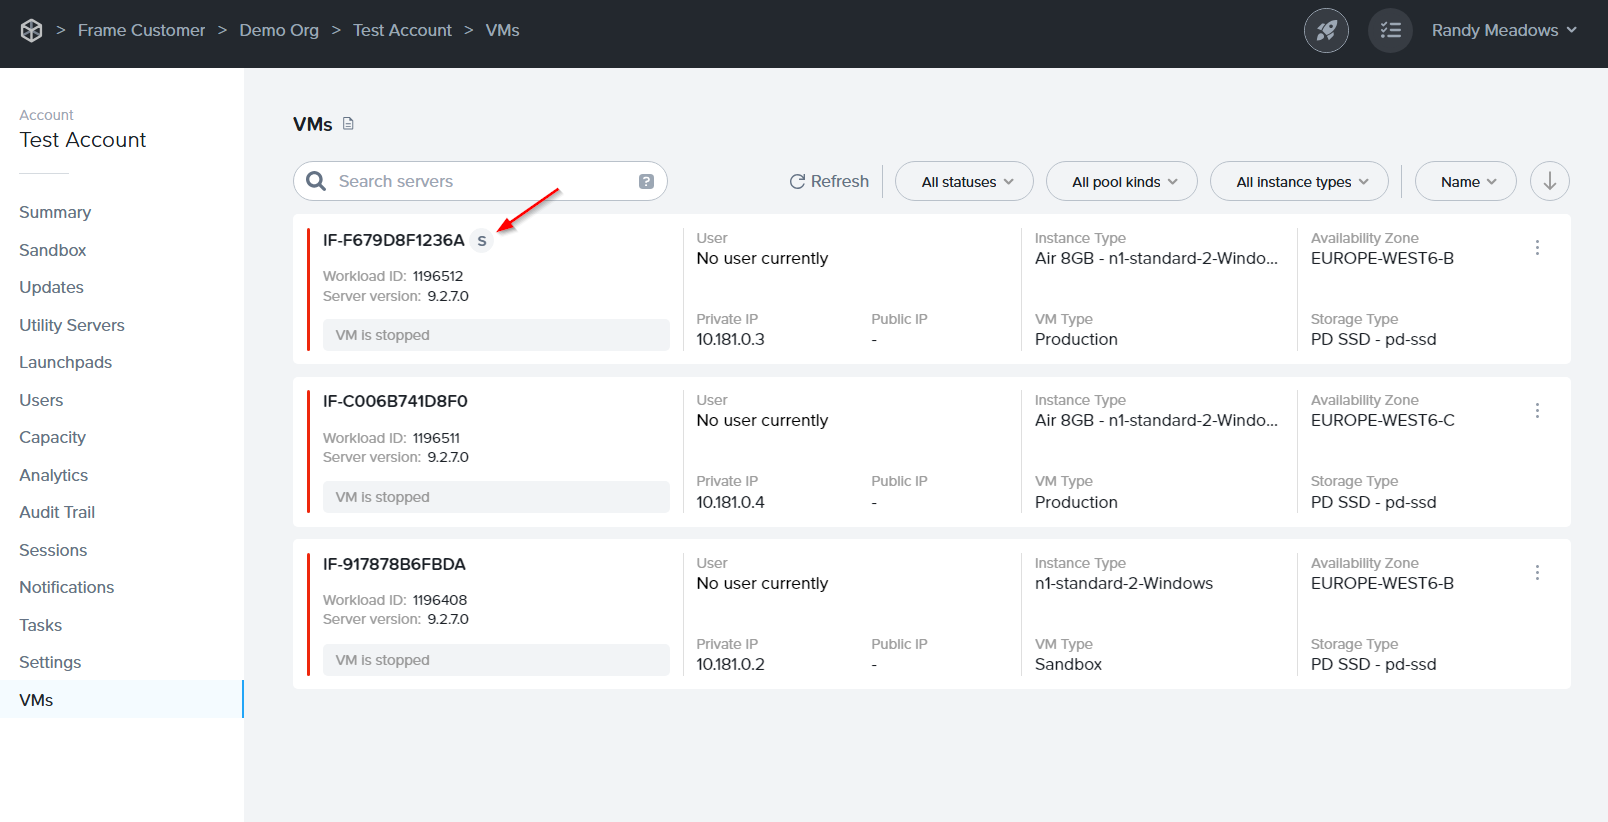
Additionally, admins can configure a custom reboot schedule to automatically restart idle VMs and those with suspended sessions at regular intervals. To enhance visibility, the VMs page now displays an "S" icon to indicate which VMs have Suspend enabled.
Enabling Suspend/Resume requires specific configurations. Please review the Requirements and Considerations before proceeding to avoid unexpected issues.
Additional Considerations
Before proceeding, review the additional considerations listed below that are specific to non-persistent Frame deployments:
- Capacity: Max Capacity for Instance Pools with this feature enabled will likely need to be adjusted. Max Capacity should be equal to the number of unique users that use the pool on a monthly basis. Customers with Per VM subscription entitlements enabling this feature may require an increase in entitlements and/or result in overage.
- Idle Timeout: When this feature is enabled, the default behavior when Idle Timeout is reached is to suspend the session instead of closing the session.
- Automatic Reboot: For security purposes, we require customers to schedule an automatic reboot of suspended, non-persistent VMs at least once every 4 weeks if a Publish was run since the last reboot. Any idle VMs and VMs with a suspended session will be rebooted at the time of scheduled reboot. VMs with an active session will not be rebooted.
Enable Suspend/Resume
Existing Pools
To enable the Suspend/Resume feature for an existing pool, navigate to the Capacity page of your Account Dashboard. From there, select the desired pool. Lastly, click the kebab menu and choose Suspend Preferences as shown below:
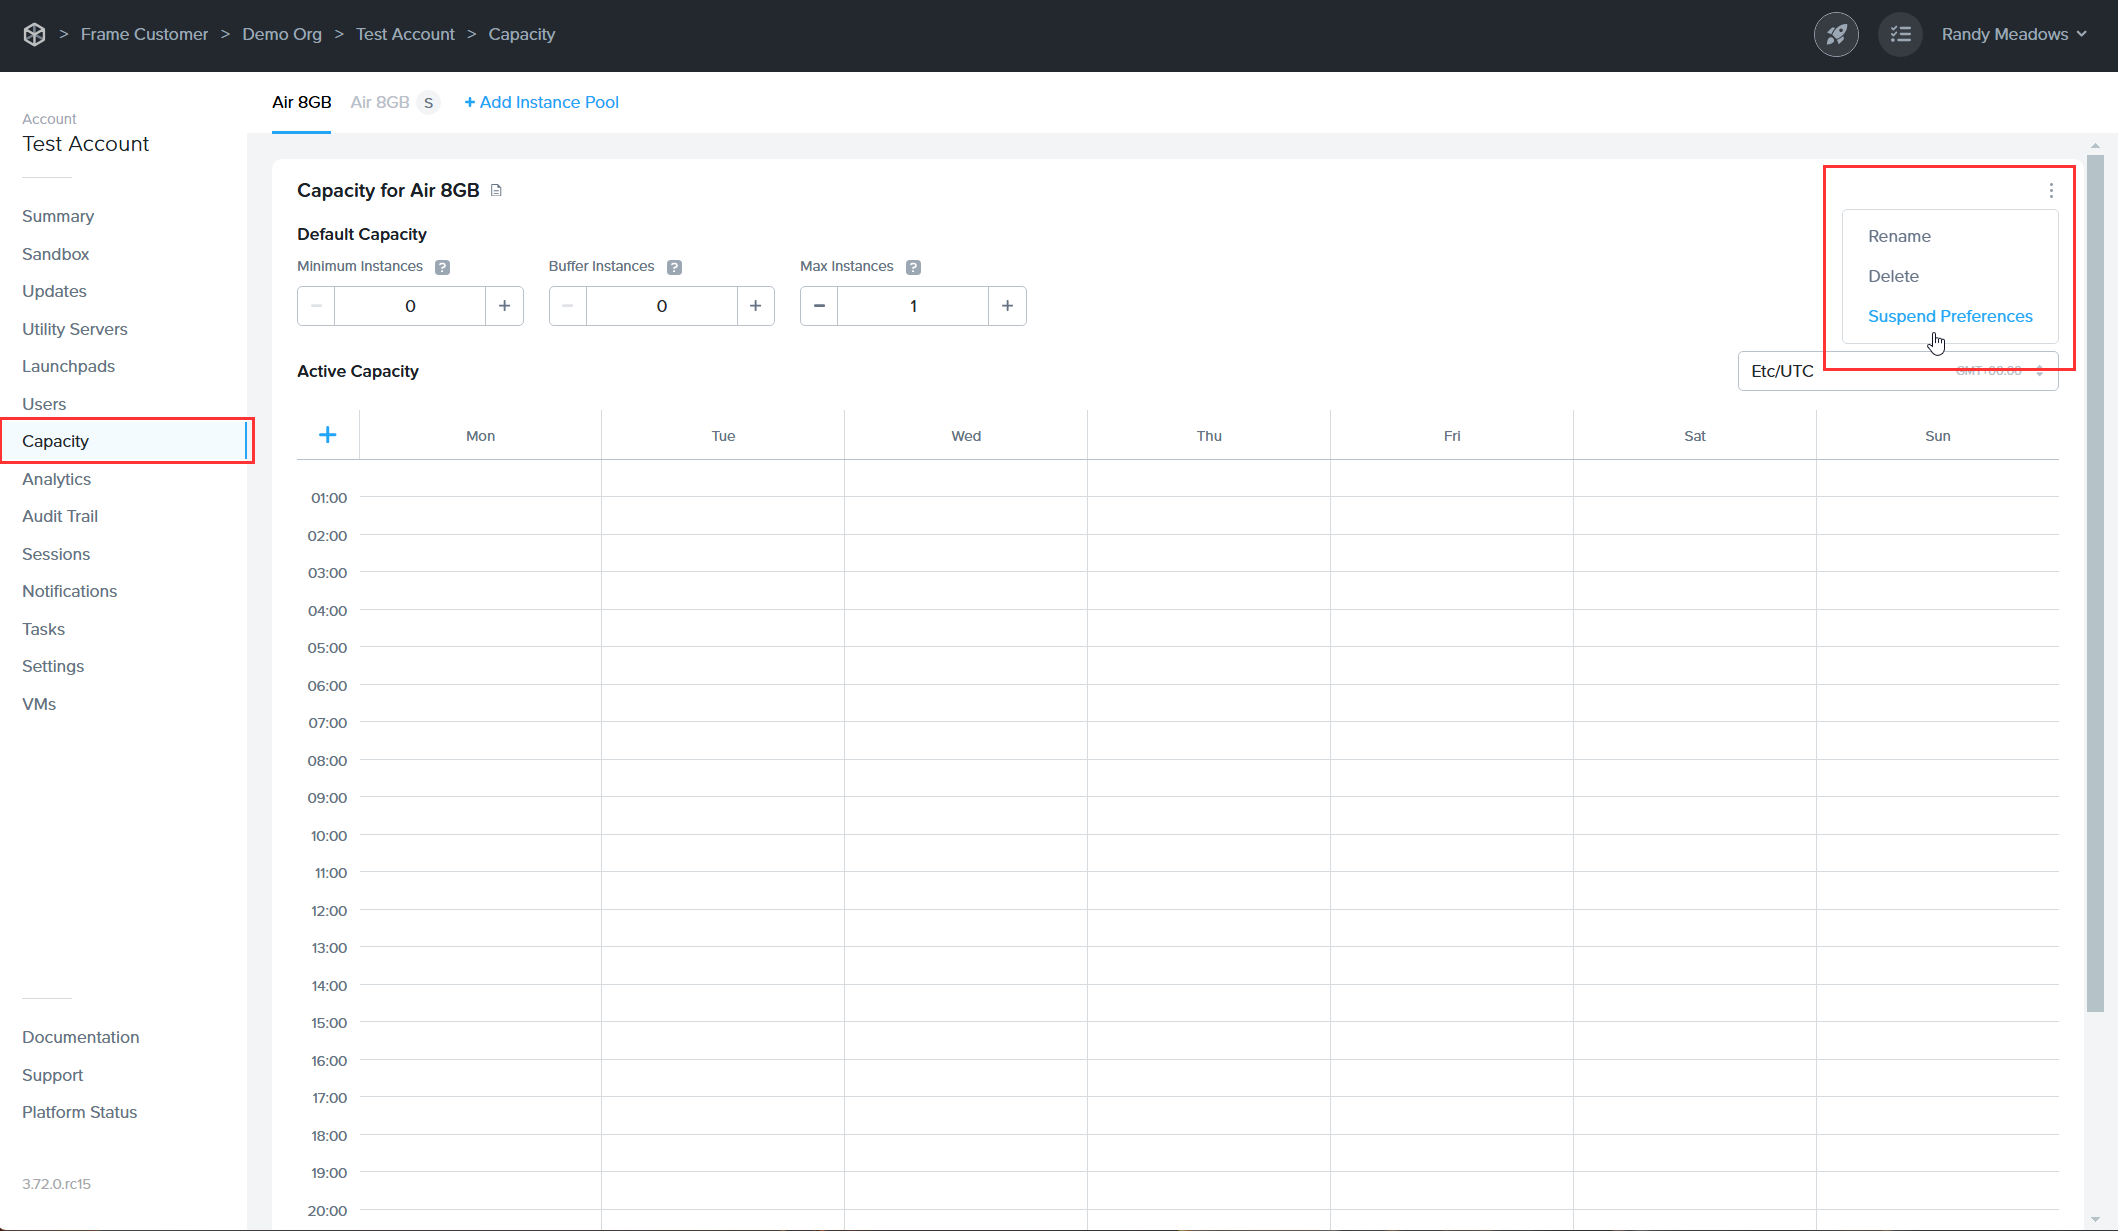
From there, simply enable the toggle and click Confirm. A new window will appear where Suspend Preferences can be configured. If you're ready to proceed, skip ahead to the next section.
New Pools
To enable the Suspend/Resume feature for a New Pool, navigate to the Capacity page of your Account Dashboard. Click + Add Instance Pool at the top of the page.
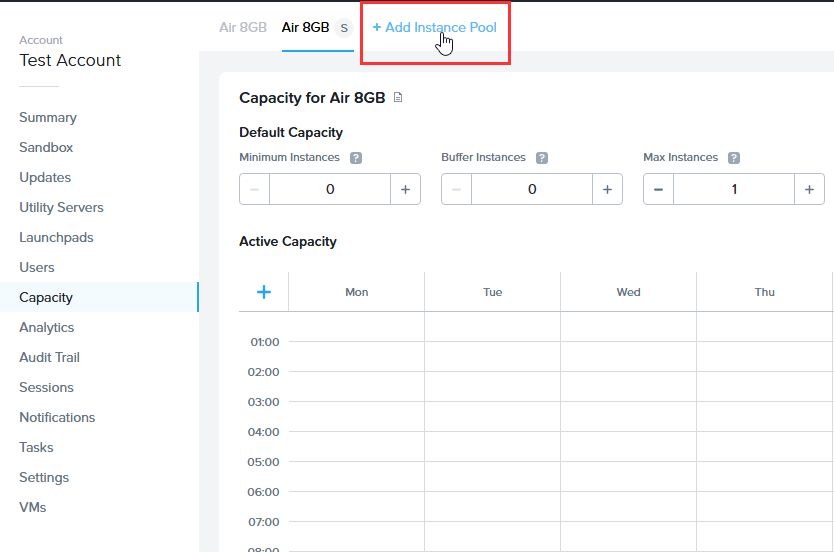
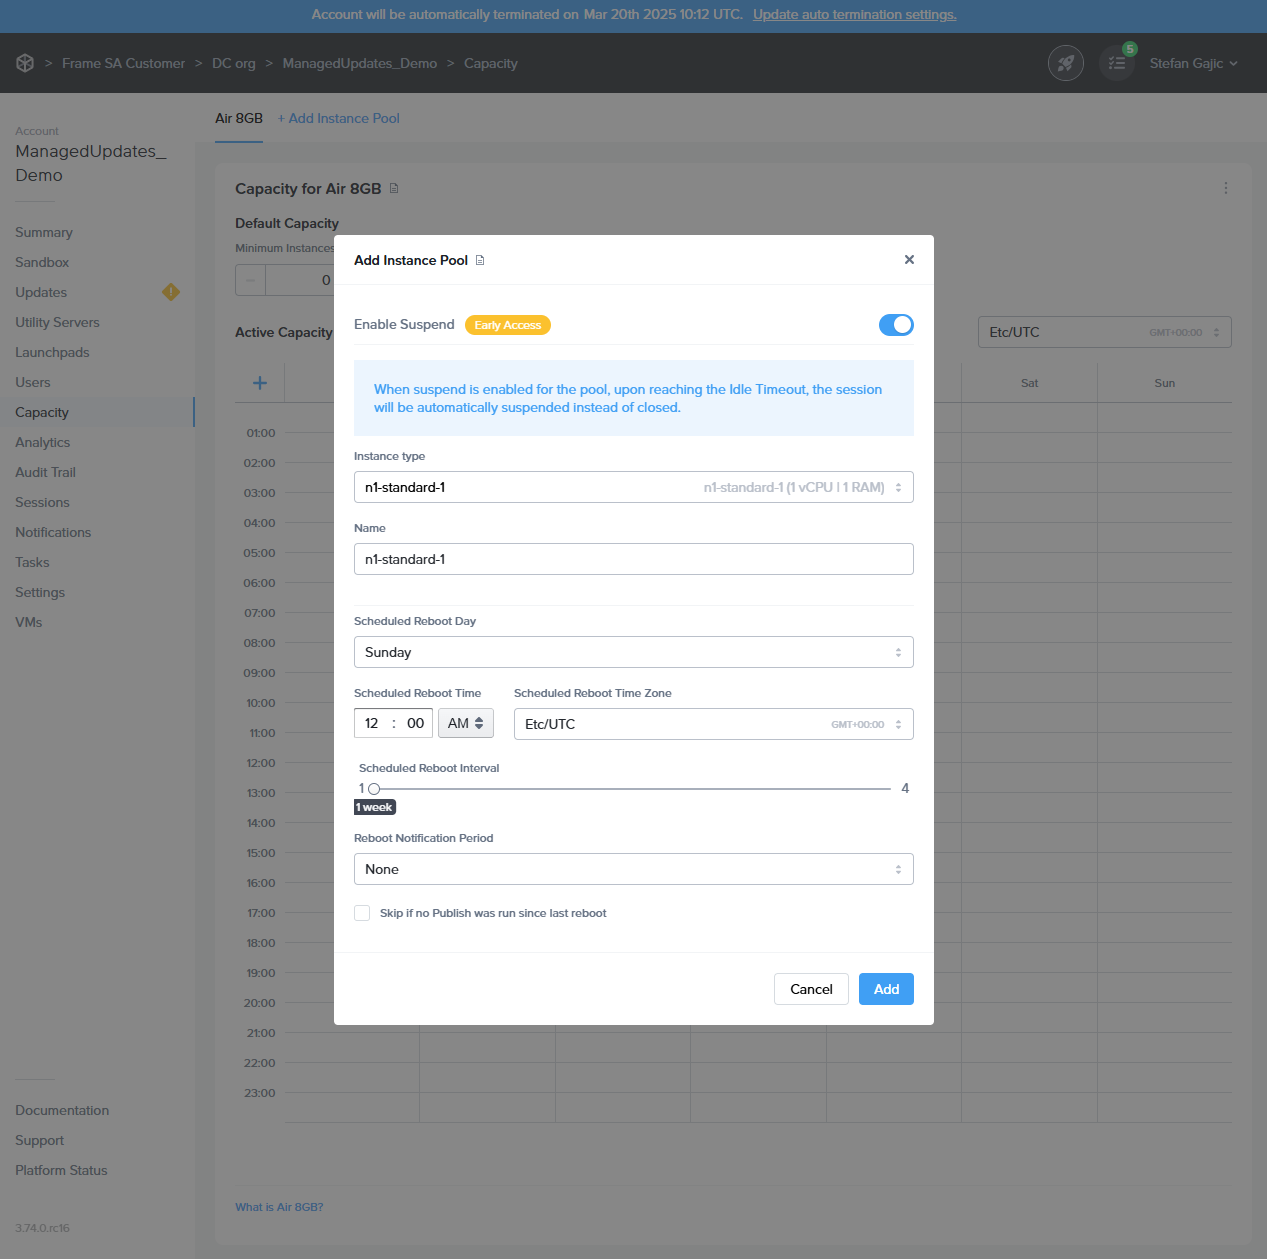
From there, a configuration window will appear. Enable the Suspend toggle.
As mentioned in the "Additional Considerations" section above:
- The Max Capacity for Instance Pools with this feature enable will likely need to be adjusted. Max Capacity should be equal to the number of unique users that use the pool on a monthly basis.
- Customers with Per VM subscription entitlements enabling this feature may require an increase in entitlements and/or result in overage.
Move on to the section below to learn how to configure your Suspend Preferences.
Configure Suspend Preferences
For security purposes, customers must schedule an automatic reboot for suspended non-persistent VMs at least once every four weeks. To prevent data loss, we recommend notifying end users in advance of scheduled reboots.
Next, we'll configure scheduled reboots for suspended VMs. Below are the available settings:
- Scheduled Reboot Day: Select the day of the week when VMs will automatically reboot.
- Scheduled Reboot Time: Specify the exact time for the reboot to occur.
- Scheduled Reboot Time Zone: Choose the time zone for the scheduled reboot.
- Scheduled Reboot Interval: Set how often the reboot should occur:
- Weekly (every 1 week)
- Bi-weekly (every 2 weeks)
- Every 3 weeks
- Every 4 weeks
- Reboot Notification Period: The time period when Dizzion DaaS should start notifying end users about the imminent VM reboot.
- Skip if No Publish Was Run Since Last Reboot:
- Unchecked: The reboot will occur at the scheduled time, regardless of whether a publish has been performed.
- Checked: The reboot will only occur if a publish was completed within the selected interval. If no publish occurs, the reboot will be skipped but rescheduled for the next cycle.
Once the desired settings are configured, click Confirm to save your changes.
And that's it! You have successfully configured Suspend/Resume for your non-persistent Frame account.