Sandbox
Each Frame Account has a Sandbox - a virtual machine provisioned specifically to allow you to manage the operating system and applications for the Frame account. The Sandbox image acts as a template for the rest of your workload VMs. For non-persistent Frame accounts, any changes made to the Sandbox image (e.g., updating Windows OS or Linux OS, installing or updating applications) will be served to your users as soon as you Publish.
For persistent desktop Frame accounts, any changes made to the Sandbox image (e.g., updating Windows OS or Linux OS, installing or updating applications) will be made available to new users after you Publish and the new users are assigned to their persistent desktop. Already assigned persistent desktops will not receive those Sandbox changes. Refer to Persistent Desktop Lifecycle for more details.
Access your Sandbox
The Sandbox is accessed from the Frame Dashboard menu (Dashboard > Sandbox). From this page you can power it on, start the Sandbox session, and make desired changes to your operating system and applications.
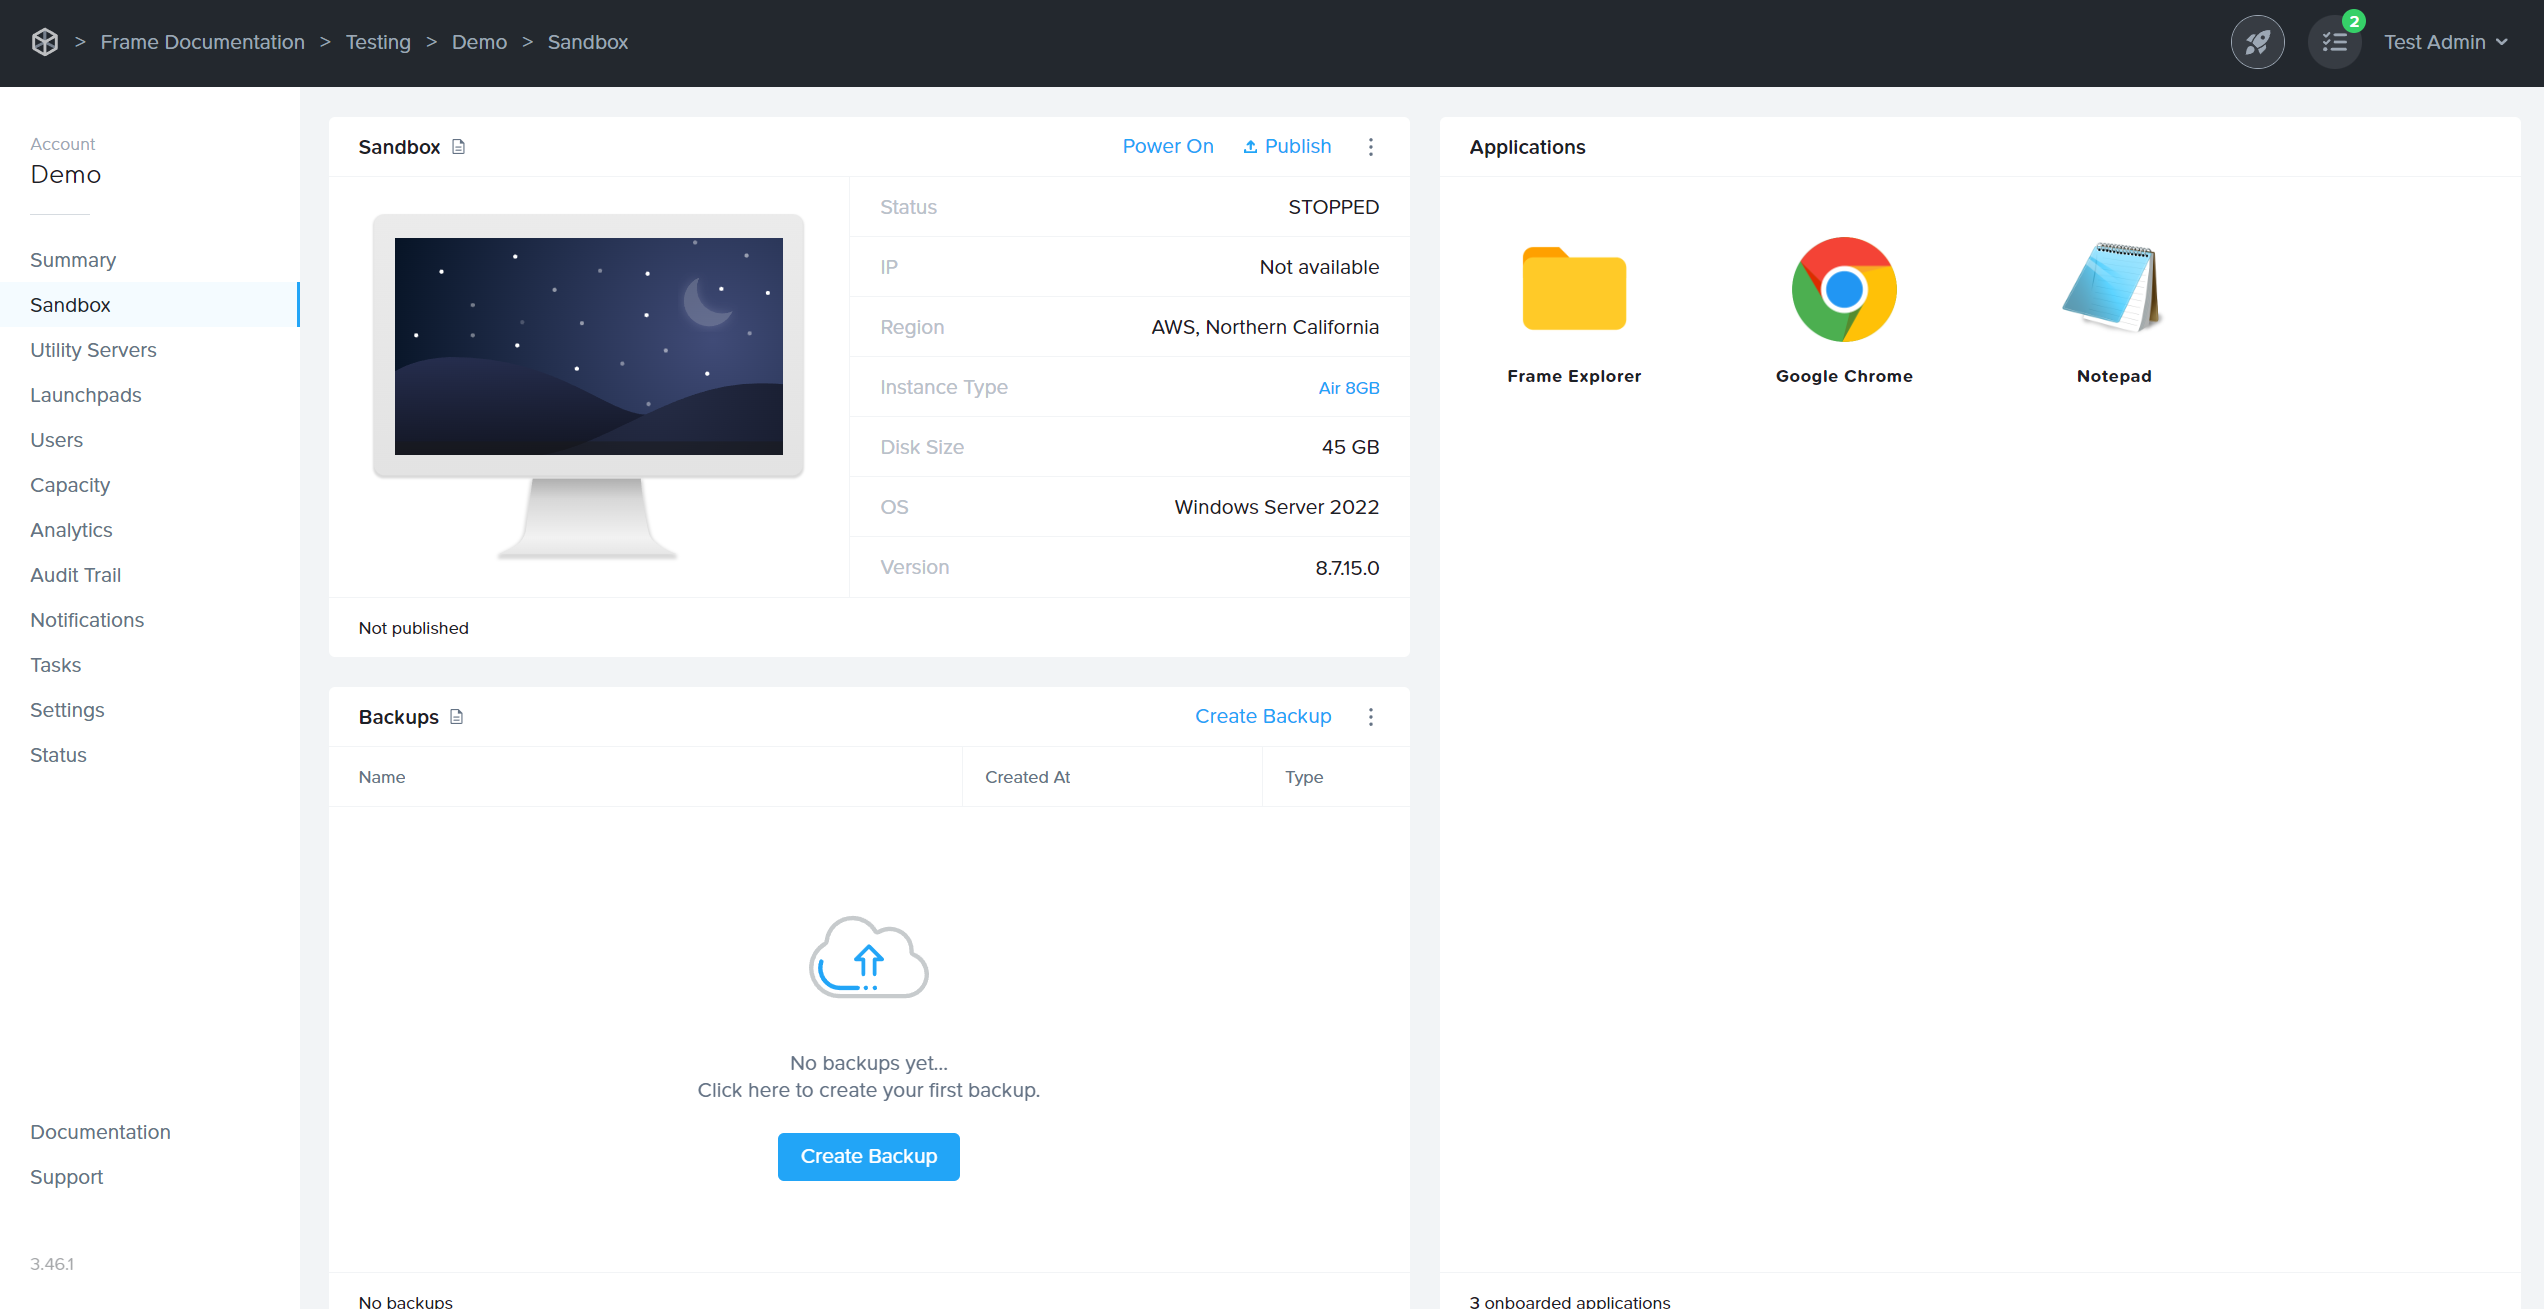
Once the Sandbox is powered on, you can start a session by clicking on the Start Session option. If the Sandbox is currently being used by an admin, the system will first prompt you to confirm that you wish to close the existing session.
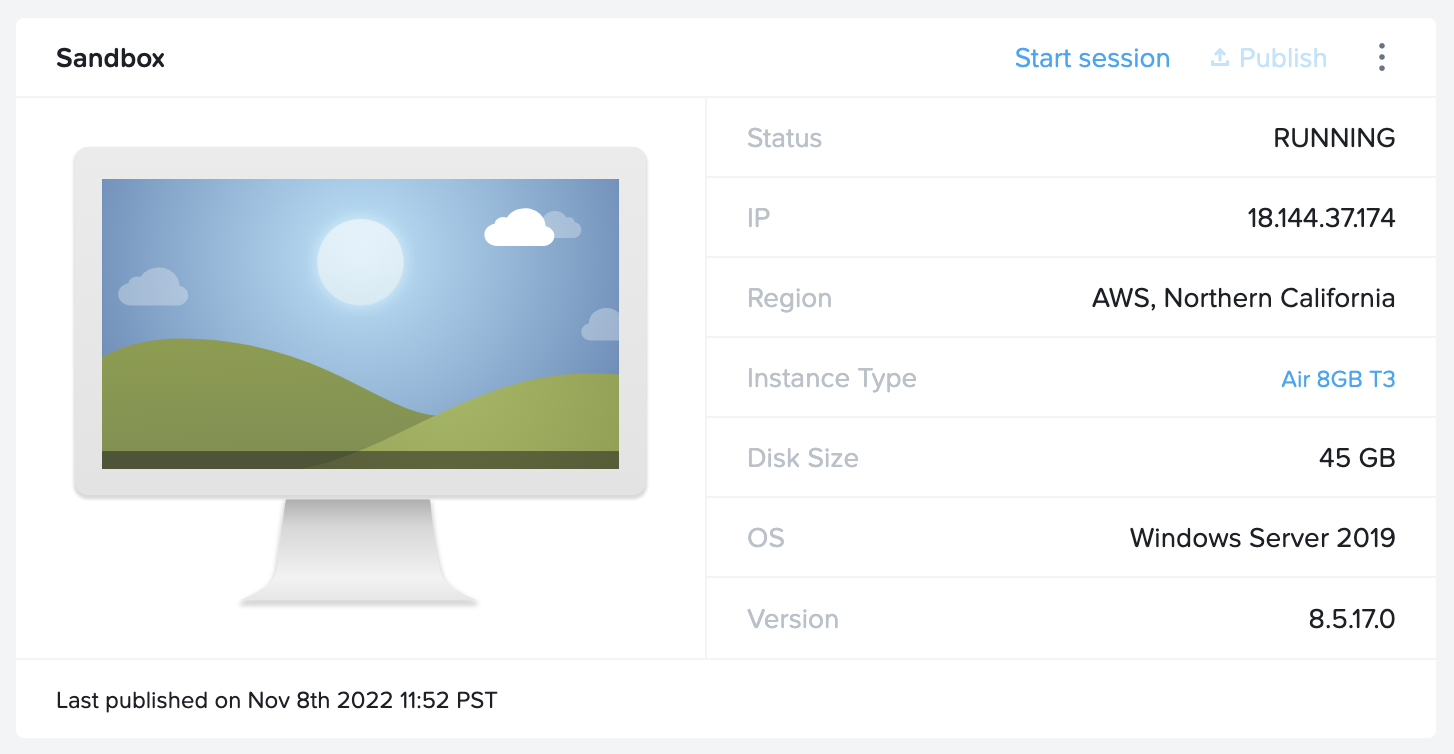
Installing and Publishing
With your Sandbox in place, you can install apps and customize your experience. Then, once it's all configured, it's time to deploy or Publish the Sandbox as a disk image to your instances.
Sandbox Options
Power Off or Reboot
When the Sandbox is powered on, the admin can power off or reboot the Sandbox by clicking on the kebab menu.
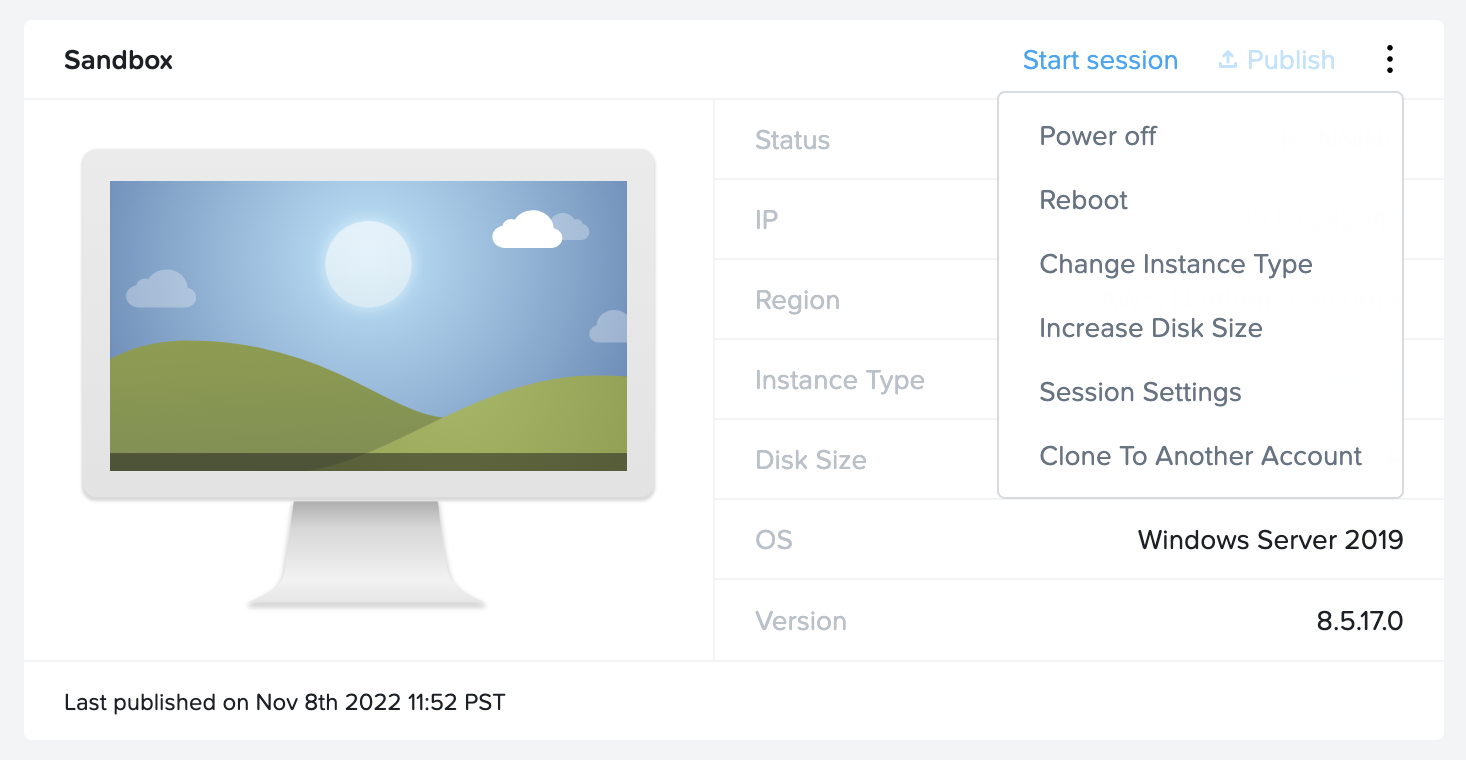
If an administrator chooses to reboot the Sandbox while another admin is accessing it, the system will prompt the admin to choose whether to reboot or force reboot the Sandbox. Choosing reboot will ensure the Sandbox is rebooted once the active Sandbox session is closed. The force reboot option will immediately close the active session and reboot the Sandbox.

Change Instance Type
The Sandbox instance type is defined by the administrator during account creation, however, this can be changed (provided the Sandbox VM is powered off) at any time. Changing the Sandbox instance type can be helpful if you wish to:
- Test your applications and configuration on Sandbox VMs with a different instance type
- Install or update applications that require a specific instance type. For example, an admin may wish to install a CAD application that requires a GPU. It can be helpful to switch to a GPU-based instance type and then back to a CPU-only instance type for installation/update tasks that don't require a GPU.
For public cloud infrastructure, changing the instance type requires the new VM to power on after the existing Sandbox disk is attached to the new VM and the old VM is terminated.
Click on the kebab menu and then select Change Instance Type. A dialog will appear prompting you to select a new instance type for your Sandbox.

Increase Disk Size
If your users need a larger C:\ drive, you can increase the size of the Sandbox disk in increments of 1 GB. If you are using Azure, you will only be allowed to increase the disk size in discrete disk sizes.
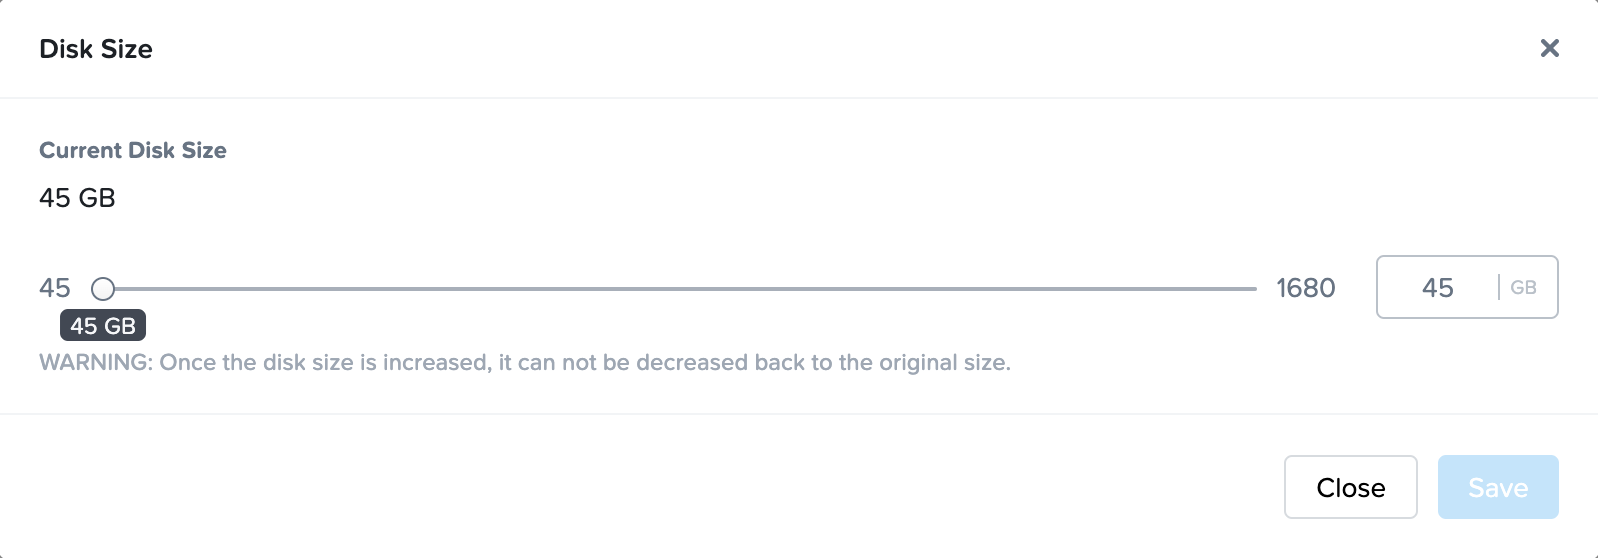
Increasing the size of the disk should be used with caution as this operation is irreversible.
Sandbox Session Settings
Frame admins can change the behavior of the session by overriding the default account-level session settings. To override the account settings, simply disable the Use account settings slider. You will then be allowed to edit the settings.
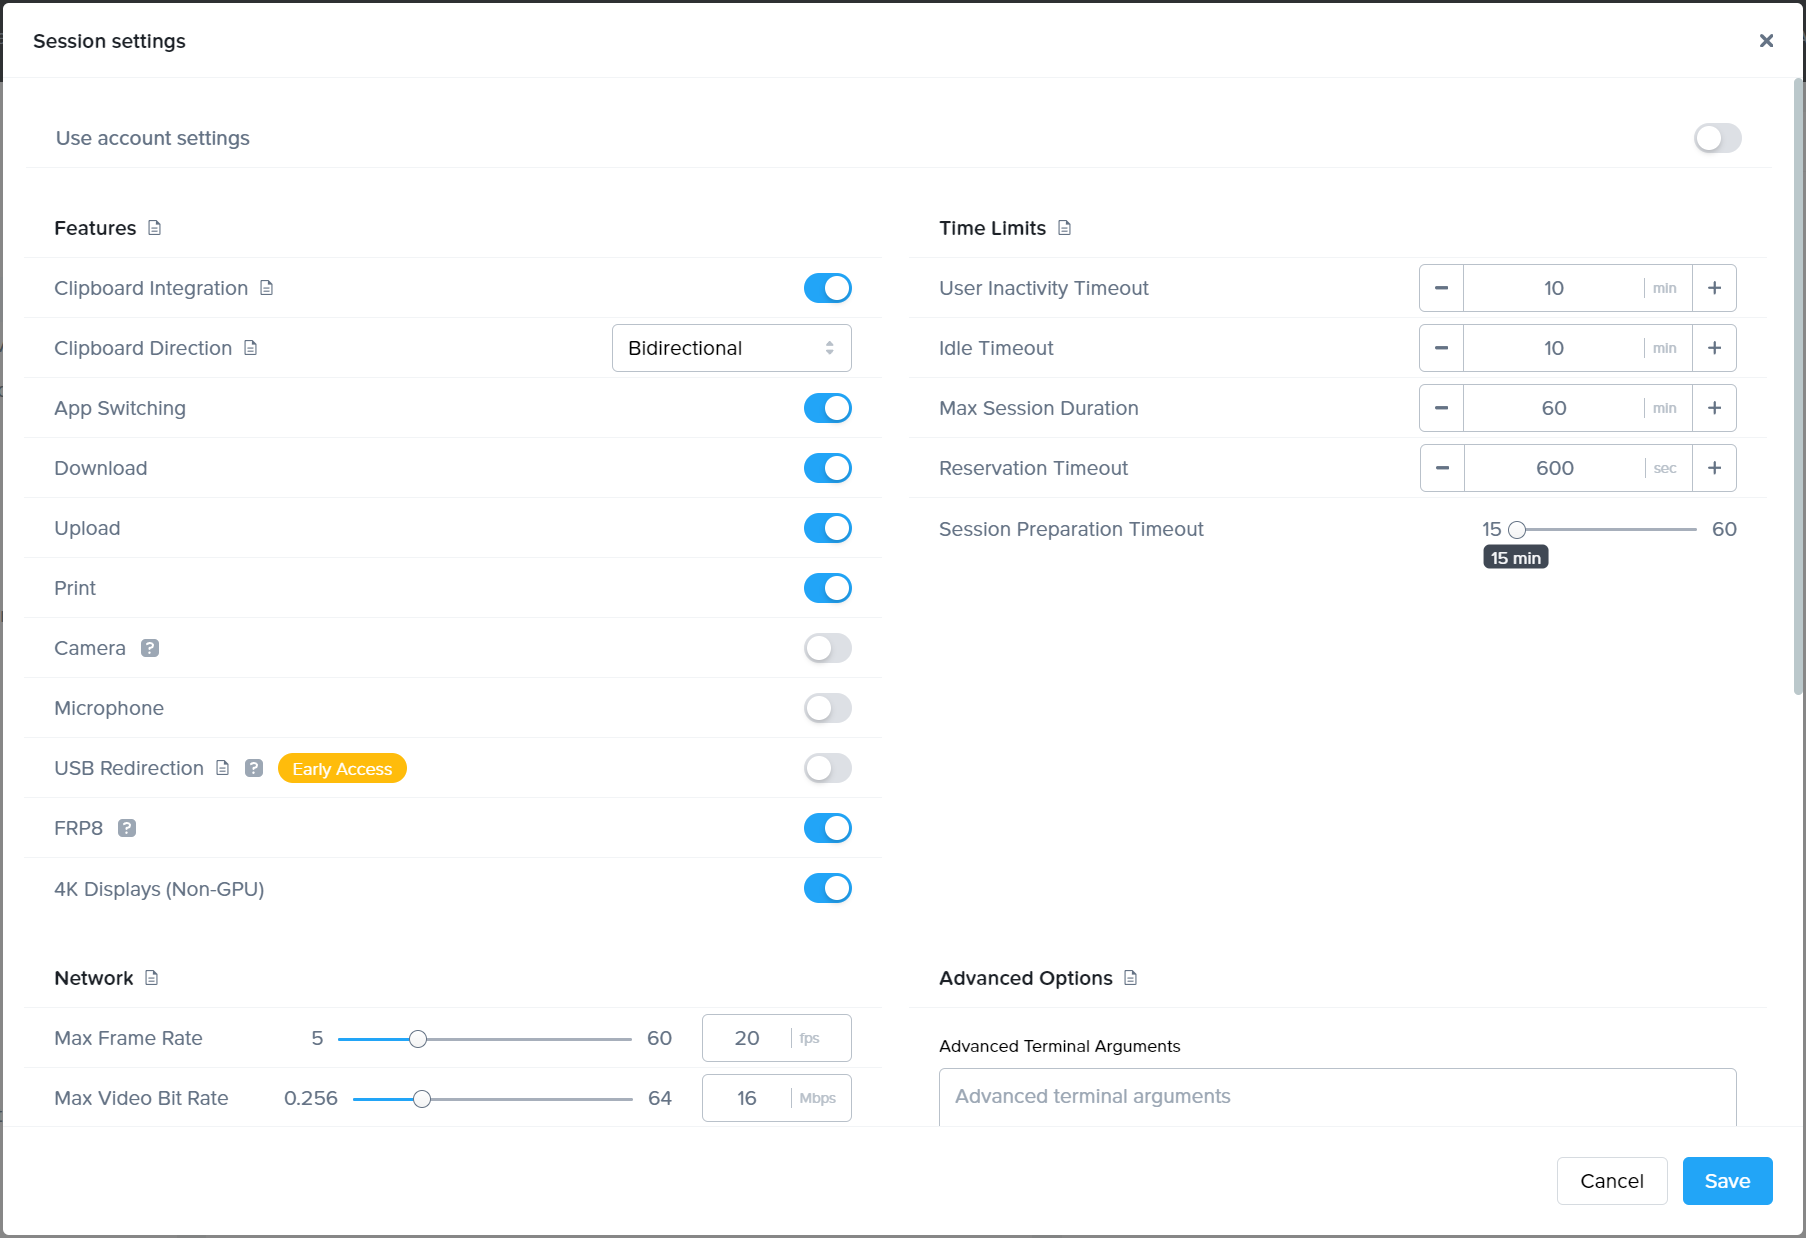
This is particularly important when Frame admins need ample time to install/configure applications, update their operating system/applications, or to test specific features. We recommend increasing the Sandbox Time Limits for this work to prevent your Sandbox session from ending prematurely.
As a best practice, specific timeout settings to consider increasing are:
- User Inactivity Timeout
- Idle Timeout
- Max Session duration
You may also want to review and enable features that allow you to do your work more efficiently, whether or not your users are allowed to use the same features in their Frame sessions:
- Clipboard Integration
- Download, Upload, and Print
- USB Redirection
Refer to Session Settings for details of each session setting parameter.
Cloning
The Sandbox disk image can be cloned (copied) to other Frame accounts, provided the source and destination Frame accounts share the same cloud account (public or AHV).
Refer to Cloning for details on how to clone a Sandbox (or a Sandbox backup) to one or more destination Sandboxes.
Backup and Restore
There are 3 different ways to perform a backup of your Sandbox image:
- Publish: when you start a publish, your Sandbox disk will automatically be backed up.
- Manual backup: you can manually backup your Sandbox disk at any time.
- Automated backup: you can schedule a task to backup your Sandbox with a daily or hourly periodicity.
Refer to Backups for additional information on these three backup approaches and how to restore the Sandbox disk from a backup.
Reset Master Image
If you have used your own image (BYO Image) to create your Frame account, you will have the option to reset your Sandbox image back to a template image of your choice, as specified in your Cloud Account, under the Template Images tab. Reset Master Image will terminate your existing Sandbox VM and provision a new Sandbox VM with a same instance type using a copy of the default template image.
If you are using Application Launchpads, you must ensure that the onboarded applications are in the new Sandbox VM and/or manually remove the onboarded application entries from the Sandbox page to match what is in the Sandbox before publishing the Sandbox.

Once you have selected the template image that will be used, click Reset to proceed with the replacement of your Sandbox image.

Updates
The Updates page of your Account Dashboard will display any needed OS or Frame-related updates for your Sandbox. More details can be found in the Updates section of our documentation.
Local Group Policies
In order for users to be able to use Frame, administrators must ensure that the following Windows Local Group Policy requirements are met.
| Policy | Location | Required Value | Explanation |
|---|---|---|---|
| Interactive logon: Don't display last signed-in | Computer Configuration\Windows Settings\Security Settings\Local Policies\Security Options | Enabled | Auto-login is required for the Frame session to be able to start. |
| Interactive logon: Message title for users attempting to log on | Computer Configuration\Windows Settings\Security Settings\Local Policies\Security Options | Not defined | Frame session will not start if the title is defined. |
| Interactive logon: Message text for users attempting to log on | Computer Configuration\Windows Settings\Security Settings\Local Policies\Security Options | Not defined | Frame session will not start if the message is defined. |
| Password protect the screen saver | User Configuration\Administrative Templates\Control Panel\Display | Disable | Frame session will not start or resume if the screen saver requires a password. |
Frame-specific Local Windows Users
Frame adds two local Windows users to each Windows workload VM:
Frame- a local Windows user that is included in the local Administrators group.FrameUser- a local Windows user used in non-domain-joined workload VMs when the Enterprise Profiles feature is enabled. This local Windows user does not have local Windows administrative privileges.
Do not:
- Remove the
Frameuser from the local Windows Administrators group. - Modify the
Frameuser permissions inComputer Configuration\Preferences\Control Panel Settings\Local Users and Groups. - Change the
Frameuser password. - Remove the
FrameUseruser (if the Enterprise Profile feature is to be used in a non-domain-joined pool of workload VMs). - Change the
FrameUseruser password (if the Enterprise Profile feature is to be used in a non-domain-joined pool of workload VMs). - Modify the local user password policy or implement a stronger password policy.
Otherwise, you will not be able to access the workload VMs using Frame Remoting Protocol.
Changing these passwords on a workload VM can cause the Frame session to fail to start. If a password management solution such as Microsoft Local Administrator Password Solution (LAPS) is used, the two Frame-specific users must be excluded.
Frame-specific Local Linux User
Frame adds one local Linux users to each Linux workload VM:
frame- a local Linux user.
The same warnings from the local Windows user Frame listed above apply for the local Linux user frame.
Local Frame User Password Policy
The Frame (Linux and Windows) and FrameUser (Windows only) password is rotated automatically by Frame for each Frame session. These passwords have the following characteristics:
- Randomly generated
- 25 characters long
- Contains 4 uppercase characters
- Contains 4 lowercase characters
- Contains 4 numeric digits
- Contains 8 special characters (
!,@,#,$,%,^,&,*,(,),,,.,?,:,{,},|,<,>,_)